|
|
#121
 07-05-2016, 09:40 AM
|
|||
|
|||
|
Quote:
Quote:
Quote:
I'm glad you're enjoying this thread and that my passion for building is coming through. Thanks for your interest.
__________________
Chris Ensor 
|
|
#122
07-12-2016, 06:51 AM
|
|||
|
|||
|
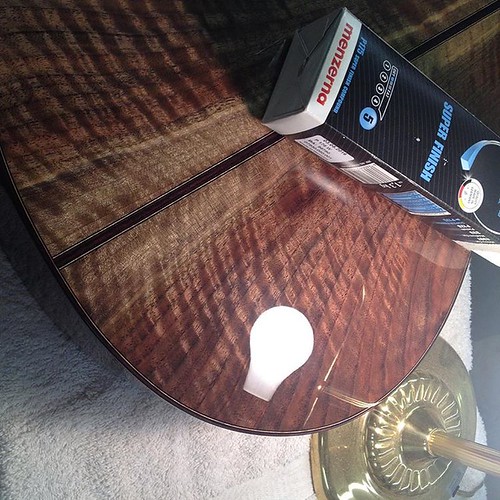
While it seems like the SBAIC clock is perpetually ticking in my ear, I still have a little bit of time before the show. I've been wanting to try out a new buffing compound that's supposed to be "the bee's knees". So I'm putting this one on hold for a moment while I wait for the new supplies to come it. It shouldn't be too long.
__________________
Chris Ensor
|
|
#123
07-13-2016, 08:00 AM
|
|||
|
|||
|
In the mean time, I worked on the frets. First I cut the frets to length- leaving them just a bit longer than the slot it will be housed in.
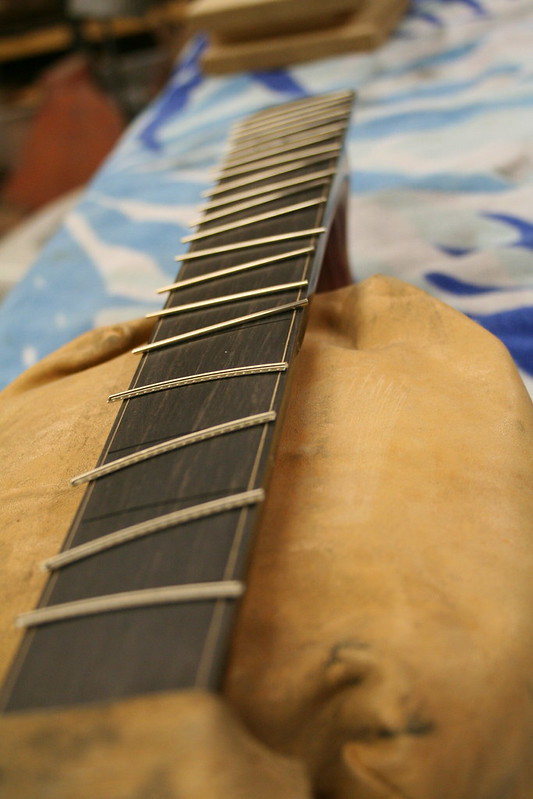 Because I use bound fretboard, each fret has to have a small bit of the tang removed where it overlaps the binding. This is a slow, but important process. Once the frets have been prepped, they are hammered into place, trimmed to length, and the end get bevelled, eased and polished. 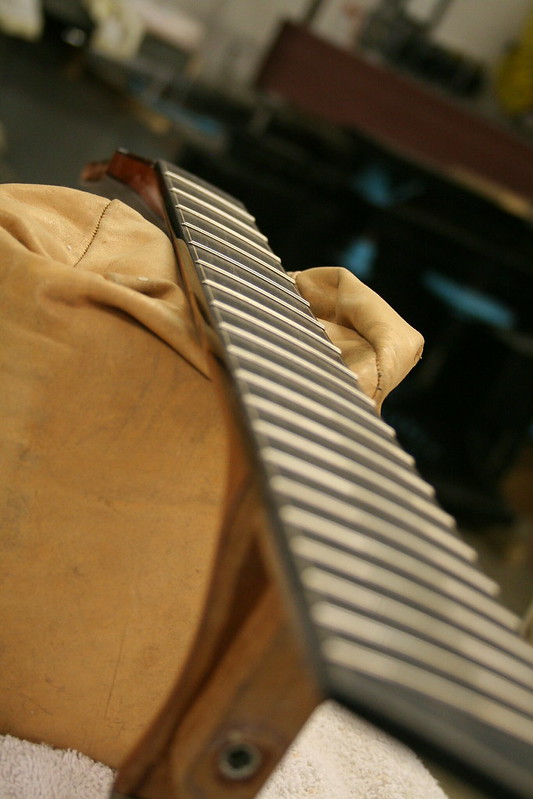 More to come.
__________________
Chris Ensor
|
|
#124
07-14-2016, 06:35 AM
|
|||
|
|||
|
Chris, your build is looking great! I agree completely with you regarding finishing. For those of us that still do it in house, getting to the finishing stage still has a bit of a 'stepping into the unknown' feel. I have done so much finishing over the years, but lacquer still seems to behave a bit differently each time. Water-based lacquer seems even more finicky. It is so hard to control all the variables, so I always worry that the lacquer will build, cure, and buff properly. And if the finish isn't perfect, no one will see past the defects in the finish to all of the other great work lying underneath.
Ken
|
|
#125
07-14-2016, 07:41 PM
|
|||
|
|||
|
Why I'm I just seeing this now......? Obviously I don't spend enough time here....
Chris, this is great work (as usual) and I really like the tail wedge. Any chance of a close up of it? That's a great set of walnut too! Good stuff, good stuff!
__________________
Rod True, aspiring luthier My current project A guitar I built for my Father in Law The Celtic Beauty - The Epic Journey True SJ - #9
|
|
#126
07-15-2016, 04:36 AM
|
||||
|
||||
|
Chris,
I finally went though (albeit) quickly this thread. Nice work. Thanks for showing the process. There seem to be quite a few parallels in our approach. For example, you mention the Glitter patterns as not a be-all/end-all, but just a way to guide you. Also I like you deflection, testing. I used to do that too, but now do a dynamic test which allows me to start off with any size wood. Anyway great work. Thanks again for the tour.
|
|
#127
07-15-2016, 12:07 PM
|
|||
|
|||
|
Quote:
Your perspective on finish is interesting. I don't know that I had ever put it into words, but "stepping into the unknown" seems appropriate. This may be the biggest reason so many people farm it out. The stress of achieving a perfect finish is very real. Quote:
Thanks for the kind words. I should have a nice picture of the tail wedge when I do final photos. I will be sure to post it for you. Quote:
I am glad you like what you saw. I have always enjoyed seeing your work and it was a pleasure to meet you Memphis. Your approach and attention to detail is impressive.
__________________
Chris Ensor
|
|
#129
07-18-2016, 09:28 AM
|
||||
|
||||
|
Way to go Chris!!!
The amount of information, beautiful photography, and sense of fun and enjoyment of your work are very inspiring! No wonder you builders are as obsessed as some players.... Maybe MORE! I need to spend even more time here in the custom build section. This is the funnest spot on the AGF!!! A fun Monday to all Cheers Paul
__________________
3 John Kinnaird SS 12c CUSTOMS: Big Maple/Cedar Dread Jumbo Spanish Cedar/WRC Jumbo OLD Brazilian RW/WRC R.T 2 12c sinker RW/Claro 96 422ce bought new! 96 LKSM 12 552ce 12x12 J. Stepick Bari Weissy WRC/Walnut More
|
|
#130
07-18-2016, 09:46 AM
|
|||
|
|||
|
The finish looks great in the photo--glad you found something you're really happy with! This has been a great thread, Chris--looking forward to hearing this one.
__________________
2013 Stehr Auditorium (Carpathian/Myrtle) 2015 Stehr Auditorium (Adi/BRW) 2020 Baranik Meridian (Blue Spruce/Manchinga) 2020 Wilborn Arum (Tunnel 14/Coco) 2021 Kinnaird Graybeard (BC Cedar/Bog Oak) 2022 Kinnaird CS Student Build (Adi/Padauk) 2023 Kinnaird FS (Italian/Koa)
|
|
#132
07-25-2016, 09:53 AM
|
|||
|
|||
|
A new bridge means a new clamping caul, but the same ole procedure. I removed the finish in the bridge area first.
 The bridge gets placed under a halogen lamp to gently warm it. 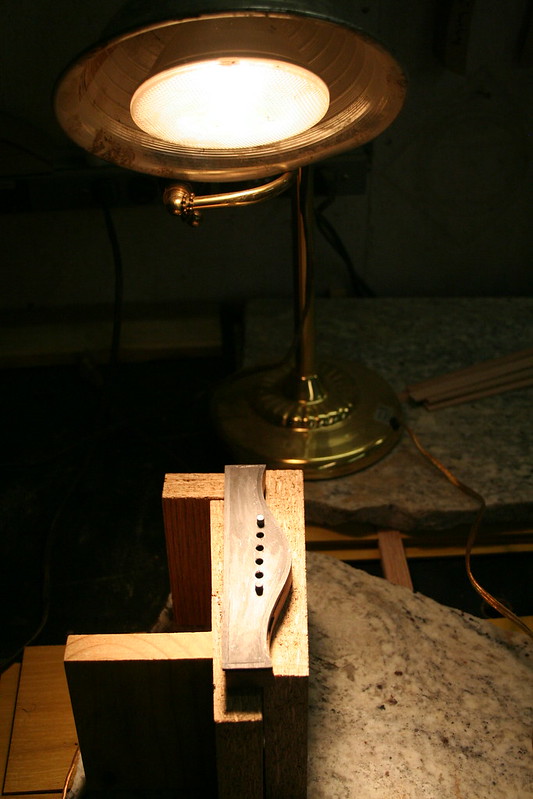 Then the HHG is applied and the entire assembly is clamped. Because HHG has a short open time, I have already placed the clamping caul inside, inserted the clamps through the sound hole, and assembled the bridge with its locating pins (drill bits) and clamping caul into a stack. All that is left is clamping it down and then cleaning out the squeeze out. 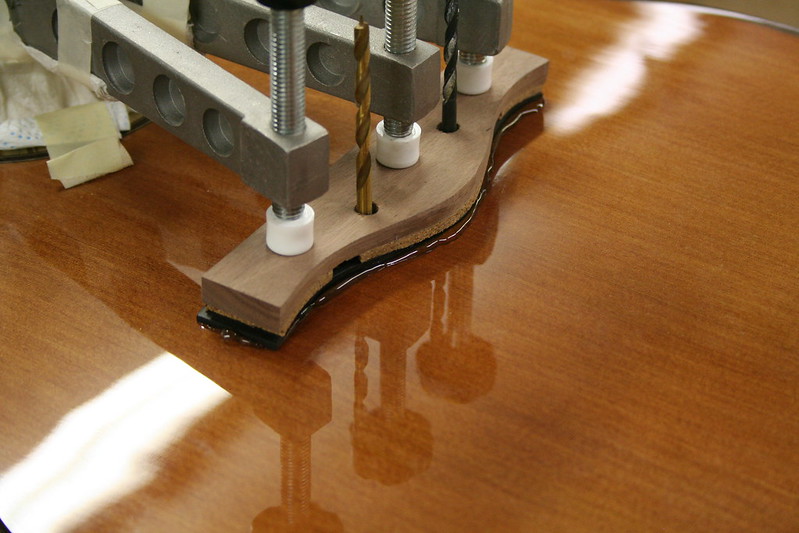 I let the bridge sit under clamping pressure for at least 12 hours. It won't get strings for at least 24 hours. In the mean time, I reamed the pin holes to each pin and marked the pins for their corresponding holes. I also slotted the bridge to accept the strings. 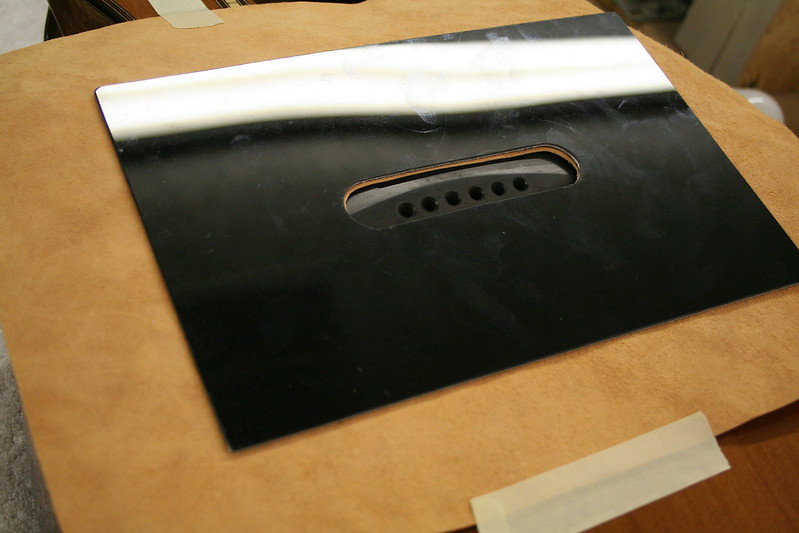 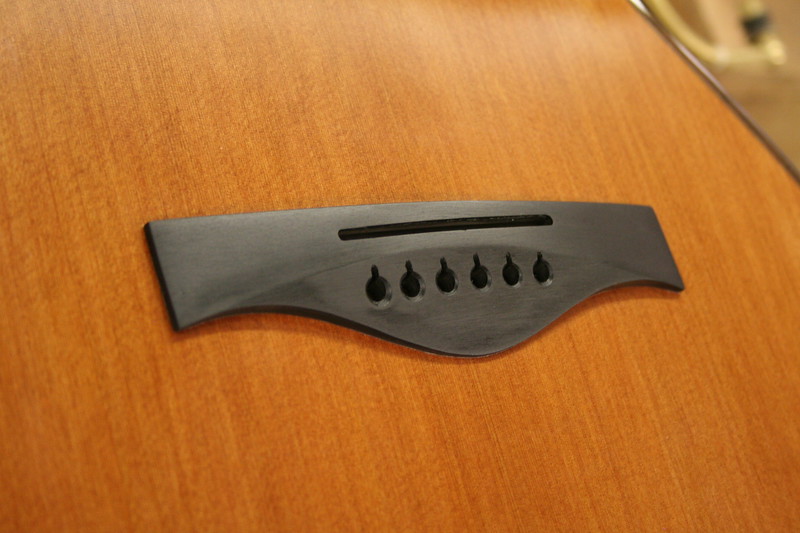 Lastly, the bridge will get a protecting coat of finish oil/wax.
__________________
Chris Ensor
|
|
#133
07-25-2016, 09:58 AM
|
|||
|
|||
|
Chris this is such a tease! Yet, it won't bee too long till we finally see the finished guitar!
|
|
#134
07-27-2016, 08:39 PM
|
|||
|
|||
|
Quote:
I'm dealing with a hard drive crash right now. I may have been able to recover the majority of the data- most of it my guitar work, website, and business documents, but I now have to sift through around 50,000 files to get everything sorted out. I will try to update this build when I can.
__________________
Chris Ensor
|
|
#135
07-30-2016, 08:23 PM
|
|||
|
|||
|
Earlier, John Kinnaird had asked for a bit more detail about my fingerboard extension support system. This is the final photo from that process. The body side needs to be drilled so that the fingerboard can be bolted down. This is how I transfer the hole location of the threaded inserts from the neck side to the body side:
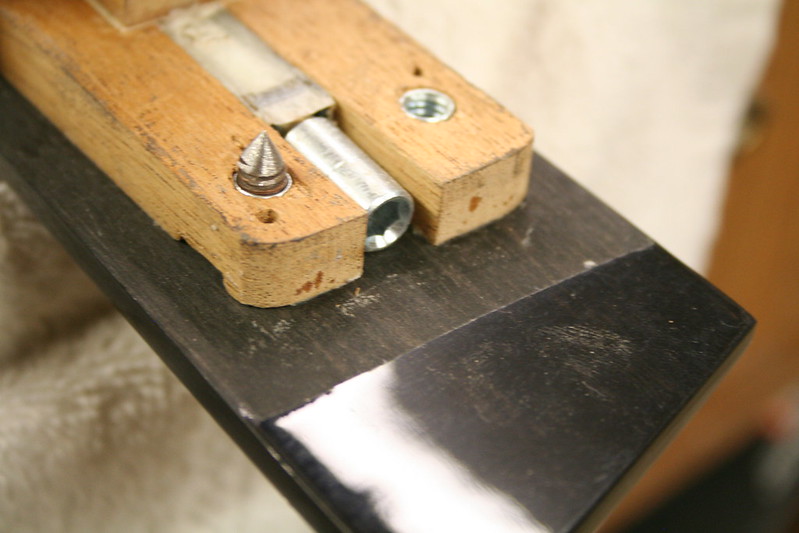 Works like a charm. The final touch on this guitar is the tuner buttons. I decided I wanted ebony tuner buttons on this one. So I grabbed a piece of the left overs from the billet where I got the fingerboard, and started cutting. 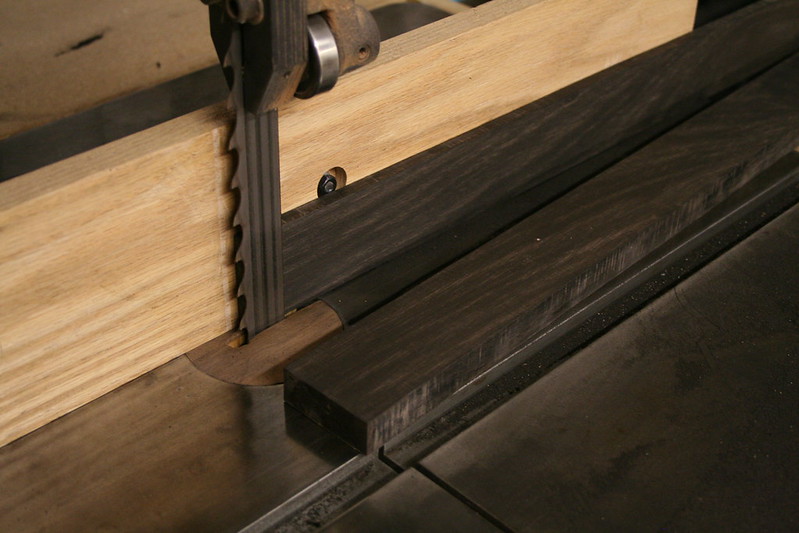  Next, the blanks are drilled. This hole is used as a reference on the rest of the remaining processes. 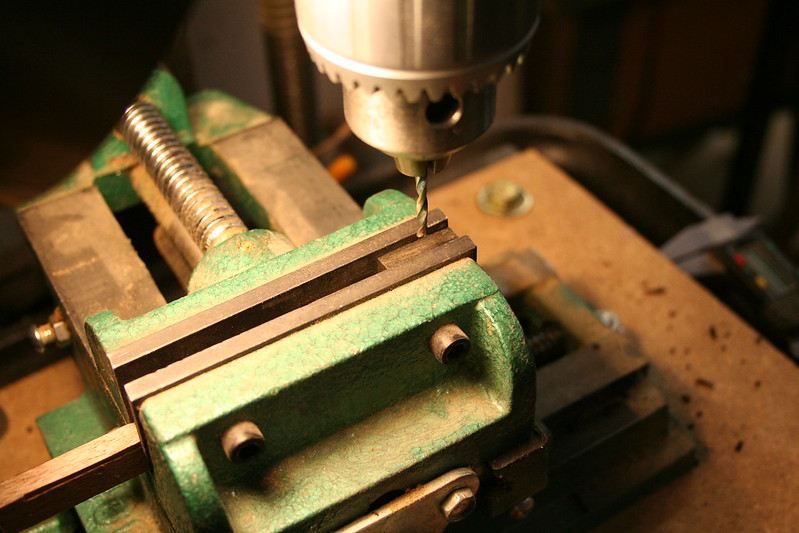 The outside of the button is shaped using routers.  I then shape the face of the button to add a nice radius to it. 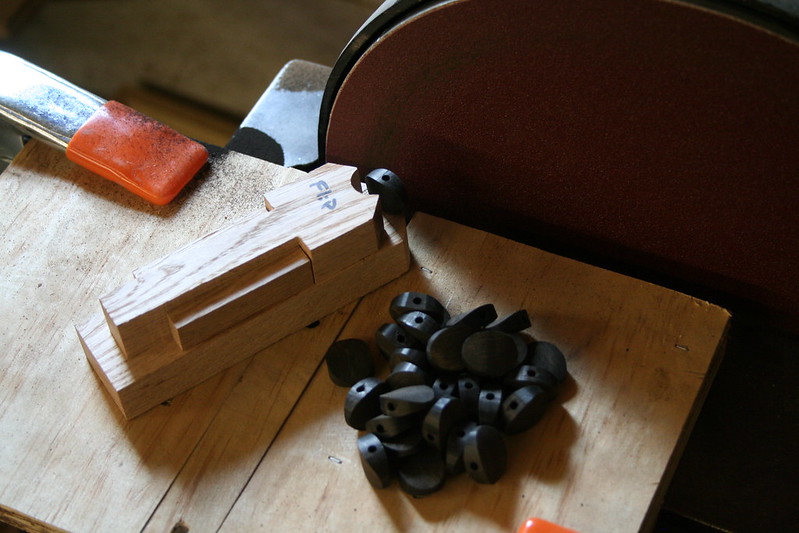 I then slot one side of the button so it fits on the Gotoh 510s post. 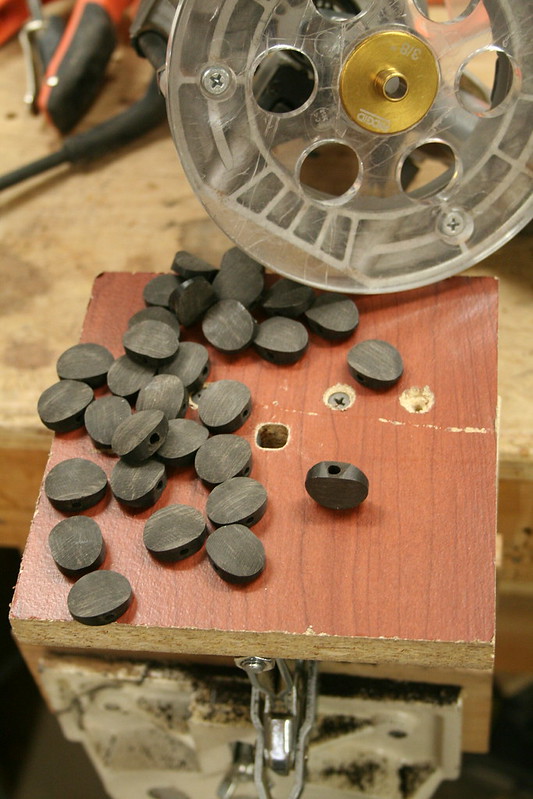 The screw holes need to be countersunk. 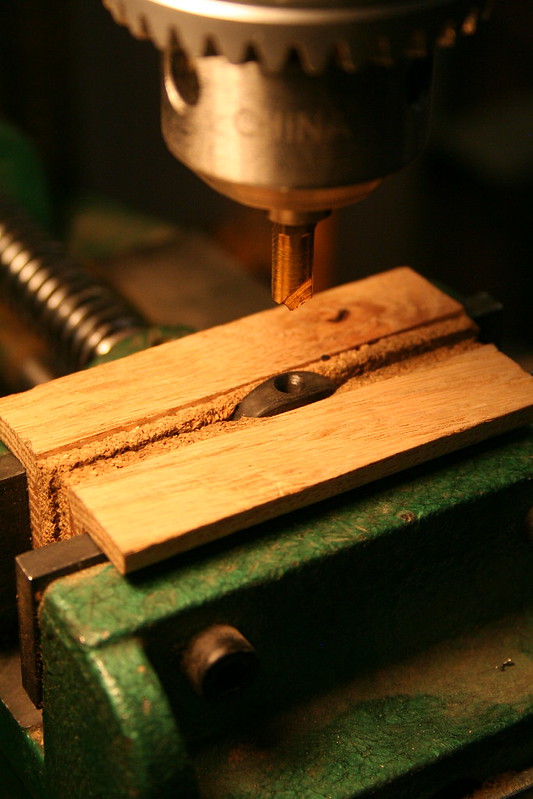 Then theres lots of sanding and polishing by hand. And then there's this: 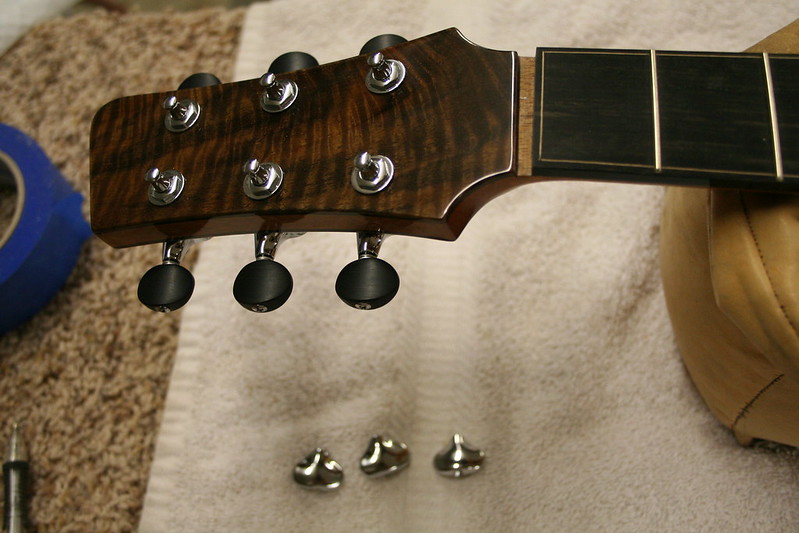 So that's how I made my ebony tuner buttons... this time. I seem to change my process every time! 
__________________
Chris Ensor
|