
|
|
#1
 11-27-2013, 12:10 AM
|
|||
|
|||
|
Hello AGF,
I've never liked the sound of the Taylor ES-T (undersaddle transducer version) in my 114ce so I've been trying to improve it since I bought the guitar. I started by swapping out the undersaddle transducer for the K&K Pure Mini soundboard transducers, but still running it through the Taylor ES-T preamp, EQ controls and battery/endpin assembly. (For more information on this effort, please see this thread: SUCCESS: K&K Pure Mini SBT's with Taylor ES-T onboard preamp!) Although I was successful at achieving great sound with this configuration, it required some significant EQ modeling due to the impedance (and pre-EQ?) mismatch. Always looking to improve, I've now moved on to replacing the Taylor preamp and EQ controls. Considering the unique cut-outs of the Taylor ES system (e.g. 3-holes in upper bout and endblock battery assembly), its a bit of a challenge. K&K recommends a 1MOhm input impedance for their Pure Mini pickup, which is implemented in all their preamps. This thread will detail my modification process to retrofit the K&K UltraPure Mini System into the Taylor ES/ES-T cut-outs. Note: This modification requires basic soldering skills with circuit board components.  The first thing to do is remove the ES-T preamp/EQ controls. For detailed information on this process, please see this thread: A simple way to remove Taylor ES knobs (EQ/preamp controls) 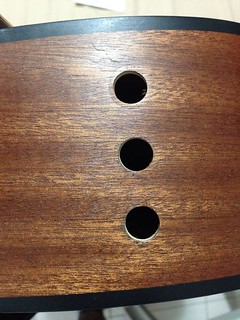 The next step is to remove the endpin/battery assembly. Although I don't have detailed photos, this is very simple. Just remove the battery compartment, remove the attaching screws and pull it out. Some older versions have a plastic cover hiding the screws, use a hobby knife to carefully pull it off, it's only attached with a small dot of super glue. Here's some pictures of the assembly removed. 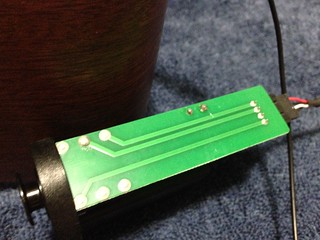  The next steps will be to work on the UltraPure System components, I'll post the pictures and info in the next posts. Cheers! ... Joe Last edited by joeguam; 11-27-2013 at 01:31 AM. 
|
|
#2
11-27-2013, 12:59 AM
|
|||
|
|||
|
Because the Taylor ES endblock assembly is so unique, its tough to replace. There are some aftermarket solutions for this (e.g. TruPlug), however considering this assembly is just a battery compartment and a TRS 1/4" jack, why not use it! After all, the endblock battery assembly of the Taylor ES system is the only component I actually like! I think the easy access and ease of changing your battery is a fabulous design.
So we start by removing the battery compartment of the UltraPure system. This is simply done by heating the soldered points and removing the wires. Note: Be sure to take a picture or record the color of wires for the +/- leads as they are not identified on the UltraPure circuit board. For my specific version, the white = positive and the brown = negative. 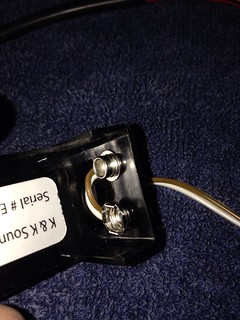 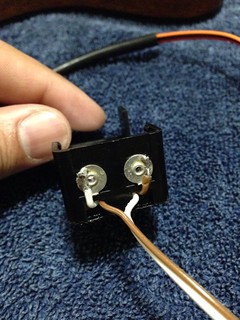 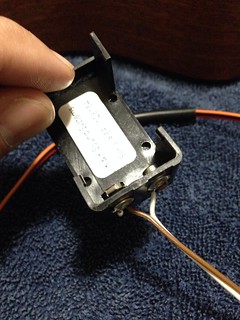 Following the same process, remove the 1/4" endpin jack. Once again, be sure to take a picture or record the color of wires for the tip, ring and sleeve leads as they are not identified on the UltraPure circuit board. For my version, red = tip, orange = ring, and black = sleeve. OPTIONAL: The UltraPure System has an RCA jack intermediate disconnect between the pure mini transducers and the preamp. It is your choice if you want to keep this in the circuit or remove it. I removed it because I believe the more connections, the more signal degradation you'll have. So I just eliminated this male/female jack and soldered the signal and ground wires inline. You'll notice that the RCA plugs are filled with epoxy to ensure insulation and prevent shorting, just cut the wire off and re-strip it to solder it together. 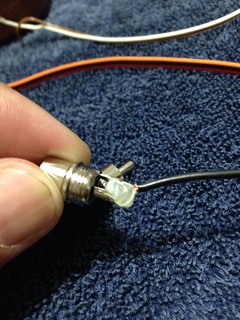 Once you have all the components removed, the next step is to solder them to the Taylor endblock battery and endpin jack assembly. You'll notice that the leads into the plug are labeled for easy identification. 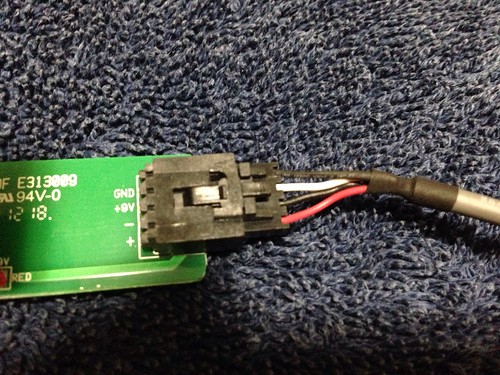 If you also follow the lines on the underside, you could also figure out where the terminals connect. I didn't take any chances and plugged a TRS-XLR into the jack and used a multi-meter to test each connection exactly.  To connect the UltraPure system, just cut off the plug at the other end of the Taylor cable and in-line solder the appropriate leads. For my specific version, here are the color connections of the leads in this order: LEAD -> UltraPure Lead -> Taylor Endblock Assembly Lead - GROUND -> BLACK (TRS Jack) and BROWN (Battery) -> SHIELDING (Covered in black shrink wrap) - 9V+ -> WHITE -> WHITE - TIP -> RED -> RED - RING -> ORANGE -> BLACK If done correctly, your connections should look like this. I've added shrink wrap and electrical tape to prevent any shorting. 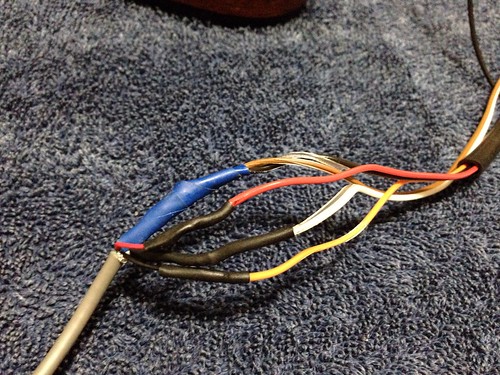 I used additional shrink wrap for some cable management. 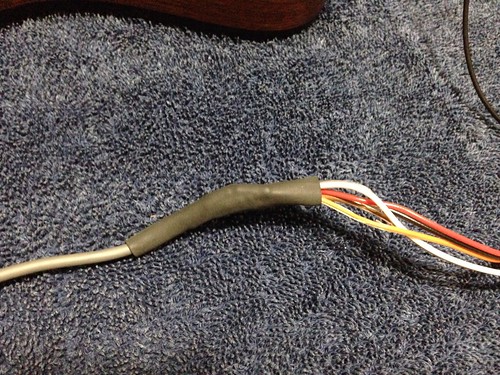 The next step in the process is to work on the UltraPure preamp circuit board itself. I'll post pictures and instructions in the next posts. Cheers everyone! ... Joe
|
|
#3
11-27-2013, 01:30 AM
|
|||
|
|||
|
I tested the UltraPure system with the Taylor battery and endpin asembly, and it works perfectly! The next step is to address the preamp and EQ controls. As shown in this picture, the EQ controls are pots that require a mini screwdriver to adjust.
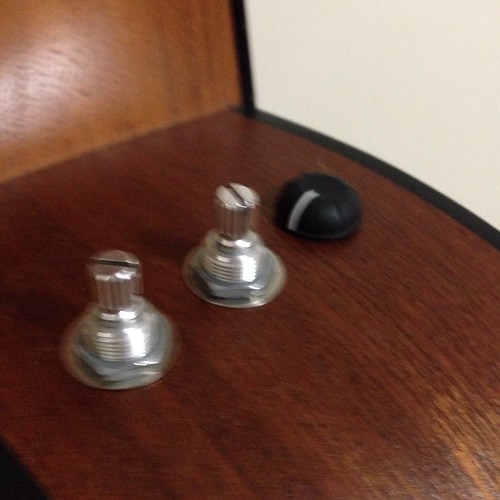
 Unfortunately, I have the need to adjust the EQ on the fly, depending on the song I'm playing in a gig, so this won't work for me. I've been speaking with a tech from K&K and he was kind enough to provide the following specifications for each of the pots: - Bass: 100K at 100hz - Mid: 10K at 1.5kHz - Treble: 100K at 10kHz - Volume: 10K Using this information, the goal is to relocate the onboard pots in the preamp to pots that can be mounted in the 3-holes in the upper bout. So I purchased some mini panel bushiing mount pots online from allparts.com.  I purchased the mini pots to ensure that it would fit in the 3-hole configuration as the holes are really close together. 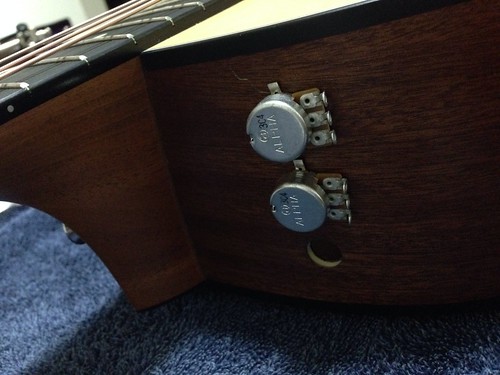 The next photo shows how I removed the onboard pots and soldered on leads to connect the panel pots. I only removed the bass and treble pots, you can see the mid and gain pots still on the circuit board. To remove the original pots, heat up the solder from the terminal point on the bottom of the circuit board. It helps to use a solder pump remover to clear the excess solder first. Once you soften the solder point, a little pressure will lift the pot out of the circuit board. Then, using the same process in reverse, solder in the leads. You can see in the picture the following wiring configuration: Panel Pot #1 (far left) -> Bottom left screwdriver pot terminal Panel Pot #2 (middle) -> Top single screwdriver pot terminal (Black lead) Panel Pot #3 (far right) -> Bottom right screwdriver pot terminal You can see the removed screwdriver pots laying on the side in the photo. (Sorry for using the same color leads, its all I had.) 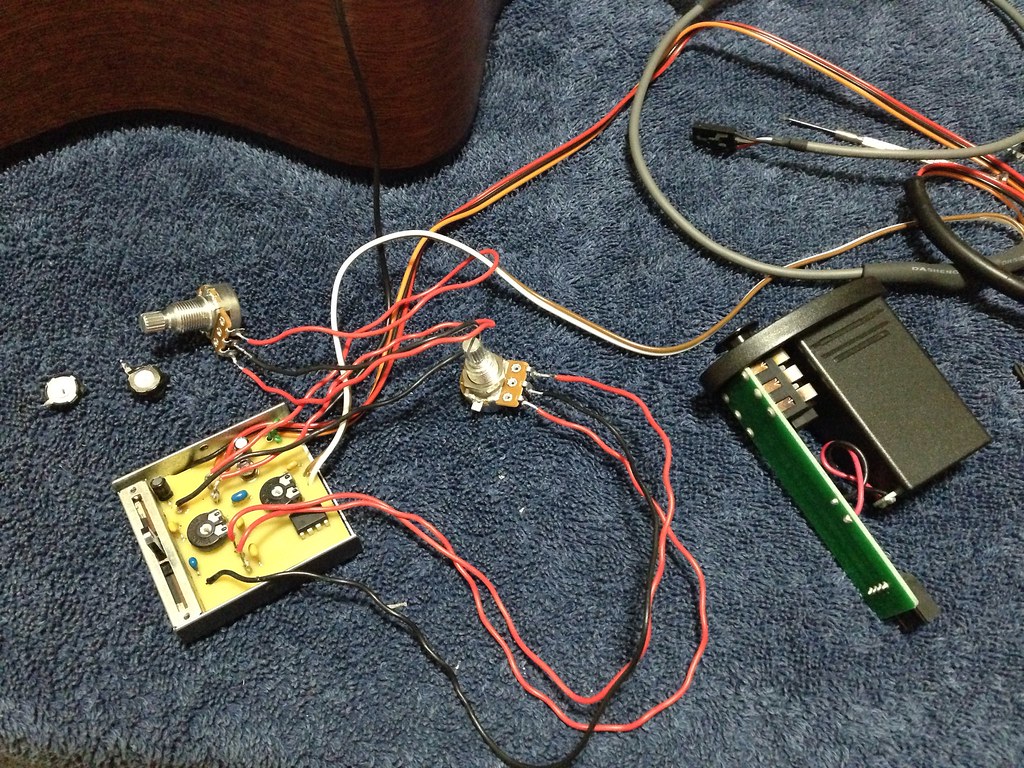 Once you have everything wired up, just install the pots using the nut and washer. Here are shots of the pots with the knobs dry-fitted. 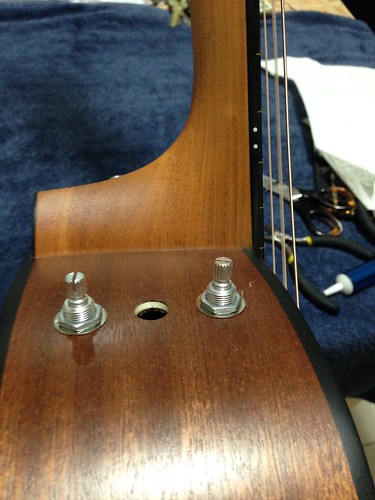 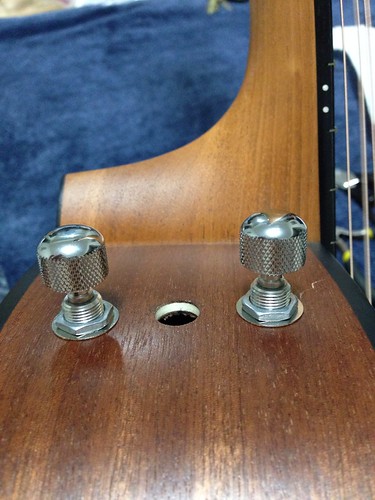 I tested it and it works perfectly!! Not to mention, I really like the chrome knobs better than the cheap Taylor knobs. I didn't swap the mid pot because it is a different ohmic value (only 10K and not 100K), and I'm still waiting for it to arrive in the mail. I'll try and record a video to let you hear that the pots work exactly the same. Cheers everyone, Happy Thanksgiving! ... Joe
|
|
#4
11-28-2013, 11:07 PM
|
|||
|
|||
|
Hello AGF,
So after doing some EQ testing with this newly retrofitted system, I've decided that I won't be changing out the pot for the mid-range EQ. The pure mini has a really hot mid range and the best sound I found was with the mid EQ cut entirely. So because of this, I will always keep the midrange EQ cut as low as it can go and there's more benefit to relocating the volume control to one of the upper bout holes instead. Here's where I had the volume slider pot initially:  This volume slider acts the same as the other potentiometers, just in a different configuration to make it easy to visually identify it's level. So, the process to relocate it is the same as the other pots I did for the bass and treble EQ knobs. I have to say, this straight volume slider pot wasn't so easy to adjust in the soundhole when I tried it, so I'm glad I'm relocating it. The process is the same to remove the slider pot, just have to heat up the solder points and pull it off. The pot pins that are affixed to the solder points are actually bent over on the underside of the circuit board, so you'll have to soften the solder, then use a small flathead screwdriver to straighten it out. I find that using a solder pump to remove the solder helps a lot. Here's a shot of the solder points after I've removed the excess solder and straightened the pins, you can see the slider pot is still attached to the board. 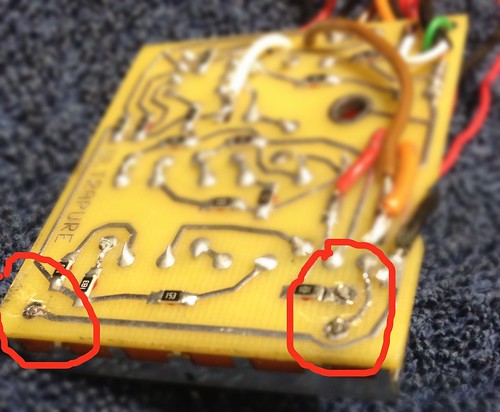 And here's a shot of the circuit board with the slider pot removed and the solder points cleared. 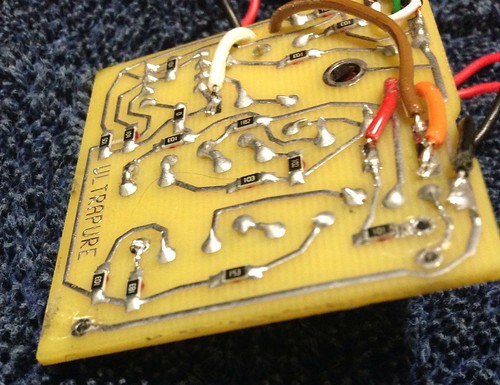 The process to solder the pot is the same as the bass and treble pots, sorry i forgot to take a pictures. Here's a shot of the preamp put back together, the 3 black wires are the leads to the 1-2-3 terminals of volume pot - its the only color wires I had leftover. 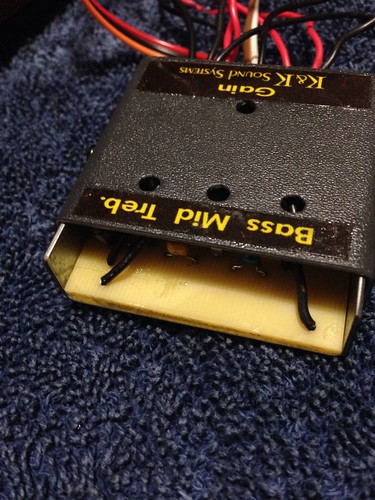 Because the volume pot is only 10K, I'm just using the 10K pot that I pulled off the Taylor preamp while the panel bushing pots (like the treble and bass pots) that I ordered arrive in the mail. I'm very proud to say that everything works perfectly! Even though I don't have all the pots and knobs completely installed, I'm actually using the guitar in a gig this weekend just to celebrate the fact that I've found a solution to retrofit the K&K pure mini into the Taylor cutouts! Cheers AGF, once the other pots arrive, I'll wire it all up, mount the pots, add the knobs and do some cable management on the wiring inside the guitar so it looks neater. If you have any questions or comments, please share them. Hope this helps someone out there. ... Joe
|
|
#5
12-02-2013, 03:10 PM
|
|||
|
|||
|
Joe,
Thank you for posting this retrofit and steps you took. Glad it worked out so well for you.
__________________
Acoustics: Martins 1936 00-18, 1958 00-28G, 000-18GE, OM-1, J12-65, B-65, Olson SJ, Dobro Duolian Electrics: Callaham S-model, Sadowsky Vintage P/J bass, Gibson '58 Historic Les Paul, Gibson '59 Historic ES-335, Afri-Can Art: http://www.brianandersongallery.com/
|
|
#6
12-02-2013, 07:13 PM
|
|||
|
|||
|
Are the knobs stick out too much? I didn't read it all (I don't have any taylor but interested in your project through) but I think you can get the knobs closer to the side, or something like that, it'd be nicer.
|
|
#7
12-02-2013, 08:12 PM
|
|||
|
|||
|
Pete, the knobs in the picture are just dry fitted for photo purposes because I still have to remove them again to finish the install of the 3rd and final knob (volume control). Once it's all ready, the knobs actually descend down to cover the entire shaft of the potentiometer - so will look like normal knobs do on electric guitars.
__________________
AGF rules say I must tell you that I'm a KoAloha Ukulele sponsored artist.
|
|
#8
12-04-2013, 12:19 AM
|
|||
|
|||
|
I used this guitar for my last gig and it worked so perfectly for me. The 10K pots still have not arrived (delay due to the holiday weekend), so I'm still using the original Taylor ES 10K pot and knob. It doesn't look pretty but it gets the job done.
 I just changed out the Taylor tuners for Gotoh 1:21 Deltas, so can't wait to install the chrome knobs on these pots which will match nicely. 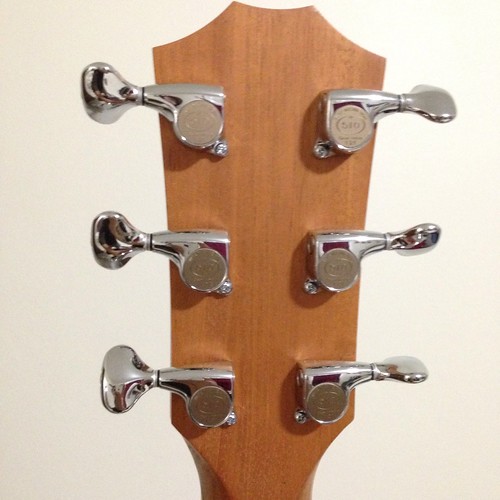
|
|
#9
12-04-2013, 01:23 AM
|
|||
|
|||
|
Hope to see the knob soon joe, better control and unique look I think.
|
|
#10
12-09-2013, 09:44 PM
|
|||
|
|||
|
The final 10K pot finally arrived yesterday so I completed the installation, here are the final photos.
First, I did some better cable management of the lead wires: 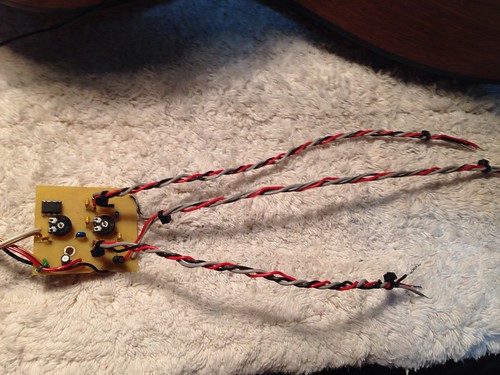 Then, I wired up each pot: 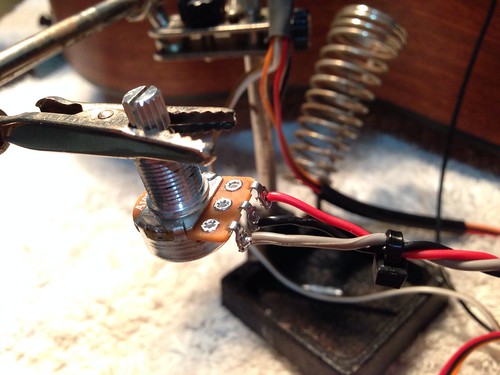 Then, I did a little testing to make sure everything was wired correctly before I mounted them:  And then I mounted each pot and added the knobs: 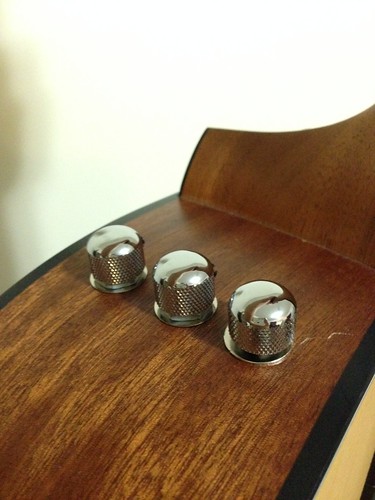 Now the job is complete and I've used it for 2 gigs already with some very fabulous results. All in all, if you're familiar with basic electronics, electric circuits and soldering, you can do this modification yourself as well. All you're essentially doing is replacing the components of the K&K UltraPure system with the same built-in components of the Taylor ES-T and relocating the onboard pots with ones that you can mount into the upper bout. Hope this helps someone, somewhere. ... Joe
|
|
#11
01-06-2014, 09:20 AM
|
|||
|
|||
|
Thanks for the very informative thread Joe, you got the forum a new member in the process! I stumbled upon your thread while researching a project I had in mind. If you don't mind, I have some info that may help some members doing a similar project...
I wanted to re-use the existing 3 controls on the taylor ES system but go with a K&K setup. I have been looking into the K&K PowerMix Trinity system which includes an internal mic, mini, and undersaddle pickup. The EQ pots are all intalled inside the guitar but they use 3 thumbwheel pots that attatch under the soundhole to control the mix of the 3 pickup sources. From your thread I learned that the Taylor pots in these guitars are 10K ohm so I emailed K&K and sure enough they let me know that the 3 thumbwheel volumes that come in their system are 10K linear taper pots! I think one could skip the K&K thumbwheel pots and solder up the existing Taylor ES pots to the K&K system and have a great sounding setup that also would appear stock. Hope this helps somebody. If I go through with it I will try and post something. Thanks
|
|
#12
01-06-2014, 05:01 PM
|
|||
|
|||
|
braderrick, welcome to the AGF!
Your idea and project seems a lot more simple to accomplish than what I did. Considering that the thumbwheel pots on the trinity system already have leads into the circuit board (I had to make my own), all you would need to do is resolder them to the new pots that you're going to locate in the 3-holes in the upper bout. I have a question, do you really need to use the stock Taylor pots? The reason why I ask is because the Taylor pots are a pain to remove from the Taylor ES preamp circuit board, it's not as straight-forward as the K&K mini-screwdriver pots. The mounting frame which secures the Taylor pots the circuit board is actually the housing for the pots themselves, I didn't realize this until I accidentally opened it up and the pot fell apart into pieces. I couldn't use all three Taylor pots because the Ultra Pure EQ pots are not all 10K, but I love the look of my new pots/knobs. In addition to the look, when I gig with my 114ce, people are amazed at the sound and when they see the non-Taylor pots, they often ask what I've done to modify it because they know the sound is much better than the stock ES. I've even had someone mistake my 114ce for a much higher model Taylor, haha. It's definitely possible to remove and reuse the pots though, I was able to use one temporarily while I waited for the ones I ordered to arrive in the mail:  ...you just need to take extra care in removing it from the circuit board. Out of 3 pots, I was only able to salvage 2 of them as I destroyed one when I removed it. If you have a lot of experience with micro-electronic circuitry, you probably already know this, but try to use melted solder on the tip of the iron to unsolder circuit board terminals instead of just the iron tip (it's much more effective). Good luck with your project, it sounds like something I would have lots of fun completing. The best part of my modification on this 114ce is that I have the best of both worlds: the awesome sound of the K&K Ultra Pure Mini System and the Taylor endblock battery/jack assembly (and no unusued holes in my guitar)! If you have any questions or if there's any way I can help, feel free to send me a PM or just post here for others to benefit from as well.
|
|
#13
07-06-2014, 08:15 PM
|
|||
|
|||
|
That is so freakin' cool. You ROCK. Someday I might have to duplicate your work...
__________________
'10 Wechter 5712c - Fishman Rare Earth '13 Jaffrey #26 - Malaysian Blackwood! '21 Gretsch 5622 '22 Furch Red Pure G-LR - Barbera Soloist ST-300 Mini + DIY mic preamp
|
|
#14
07-06-2014, 10:26 PM
|
|||
|
|||
|
Quote:
A couple of months ago, while in a gig, one of the non-Taylor pots shifted out of place. Although it didn't affect the sound, it made it difficult to adjust the levels. The problem is that the 3 holes were cut a bit larger than a normal size pot needs. So I decided to find a way to make the pot fit the holes better. I didn't use the stock Taylor pots, but instead just used the collar, bushing and knobs. Here's a picture of the parts, you can see the collar still on the Taylor pot: 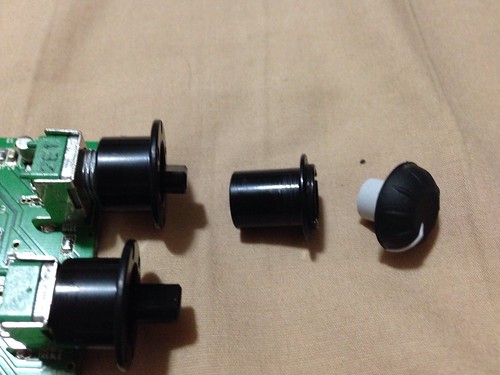 I found replacement pots online at http://www.amprepairparts.com/ that fit the knobs perfectly and were the right ohms: 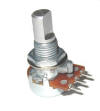 To make it easier, if you need the model nos.: - P-V100KL-M13 - P-V10KL-M13 There's a little more work needed as the threads of the Taylor bushing doesn't fit the threads of the pot. To make the bushing fit the pot, I basically epoxied the nut that came with the pot to the bottom of the bushing. Adding locking washers as needed, everything fit perfectly. Today, my 114ce + K&K Ultra Pure Mini is my main gigging guitar for my weekly solo gigs. I still use my Taylor 700 for my high-ticket gigs, but have grown to be so comfortable with my 114ce. Hope this helps, let me know if you have any questions.
|
|
#15
12-09-2015, 06:47 PM
|
|||
|
|||
|
Im planning to buy a Taylor 114ce this weekend. Also, I'm aware that the ES system is not good so I look for solutions and lucky enough to stumble on this thread. However, Im just wondering if you could record a sample of it coz I believe it will definitely help me decide wether to buy it of no. Thanks! I hope to hear from you soon.
 
|
 |
|
| Tags |
| k&k ultra preamp, taylor es, taylor es-t |
|
|


