
|
|
#46
 01-11-2017, 06:06 PM
|
|||
|
|||
|
Hey Chris, really enjoying watching the process unfold. How do you go about picking a particular top bracing over another? I know a lot of vintage builders are into the 3 tone bar thing right now, some scalloped some not, and just curious how you decide on the top bracing. Or is it a matter of letting the wood decide?
__________________
Dump The Bucket On It! 
|
|
#47
01-12-2017, 07:58 AM
|
|||
|
|||
|
Quote:
Originally, I started out using the bracing pattern that I was taught by Sergei de Jonge. Over the years, I have made small tweaks here and there. It really comes down to experimenting and what you are trying to achieve. Some times it's for tone, other times it's for structural reasons. Once the braces are on, then I utilize tapping, flexing, and frequency analysis to let that exact top and bracing combo tell me where to take it.
__________________
Chris Ensor
|
|
#49
01-13-2017, 09:30 AM
|
|||
|
|||
|
Quote:
I like my guitars to respond well to a light, sensitive touch- volume and projection help with this. A guitar's back over time can tend to loose its radius and flatten out. This allows more forward rotation of the neck and leads to the need for a neck reset. By strengthening the back's bracing by adding an x brace in the lower bout, the tendency to flatten out is reduced and, in theory, the need for a neck reset is lessened as well. When carving the back braces, I am looking for light, strong braces. I remove enough material that the back rings well but still has some flex to it. But I don't remove so much as to weaken the overall radius. With both my top and my back bracing, I use tapered braces. They make the most since to me. More strength is needed further away from the sides. The opposite is also true. So I remove more material closer to the edge of the plate and leave the braces taller and stronger where they have less support- and, in the case of the top, where there is more pull and force being exerted on the braces.
__________________
Chris Ensor
|
|
#50
01-16-2017, 04:29 PM
|
|||
|
|||
|
For quite some time, I've been wanting to do laser burned wooden tags for the inside of my guitars. Not wanting to learn a new software or buy a new, large, expensive piece of equipment that would rarely get used has always kept me from doing so. Then, lo and behold, I have a friend who recently bought a nice laser. Now we're off to the races.
Originally, I was going to inlay the tag into the back strap like I would a brace. But when I set the tag in position on the back, I thought it looked great floating. So I went for it. Being supported by the two back straps necessary for the 3 piece back makes it very stable. I'm thrilled with how the whole thing turned out. 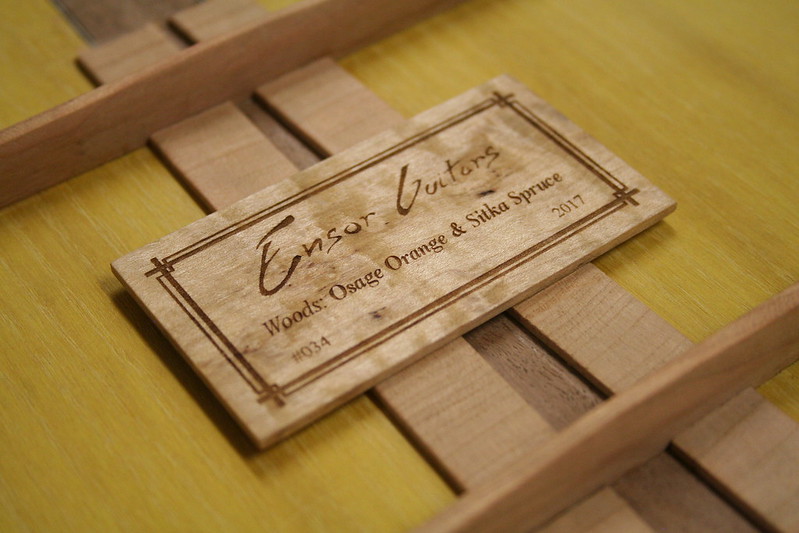 The sides are all ready for the plates and the plates are all ready for the sides. Only one thing left to do- make a guitar box. 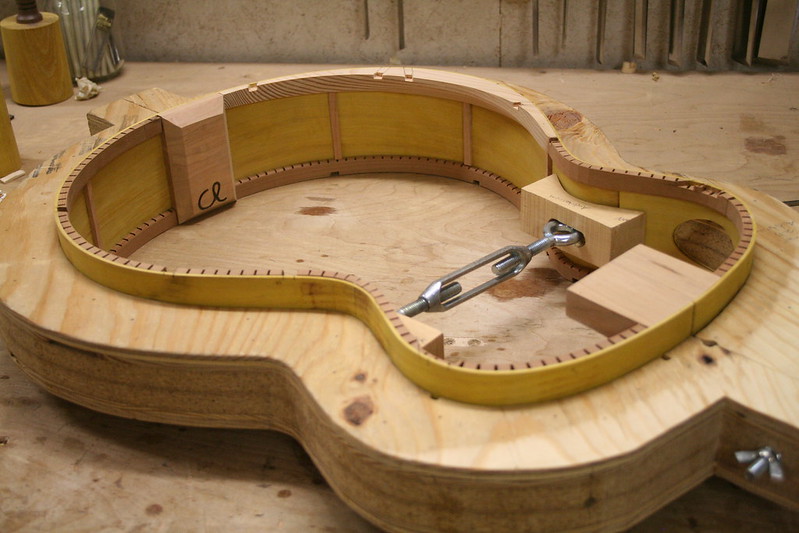 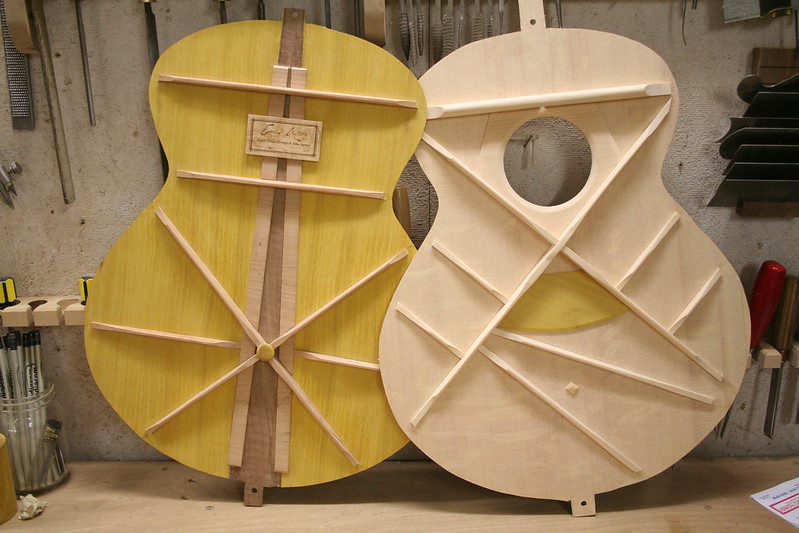  Thanks for following along.
__________________
Chris Ensor
|
|
#51
01-16-2017, 05:56 PM
|
||||
|
||||
|
Love that Osage, Chris!
Steve
|
|
#53
01-19-2017, 11:03 AM
|
|||
|
|||
|
Quote:
 Quote:
__________________
Chris Ensor
|
|
#54
01-19-2017, 11:12 AM
|
|||
|
|||
|
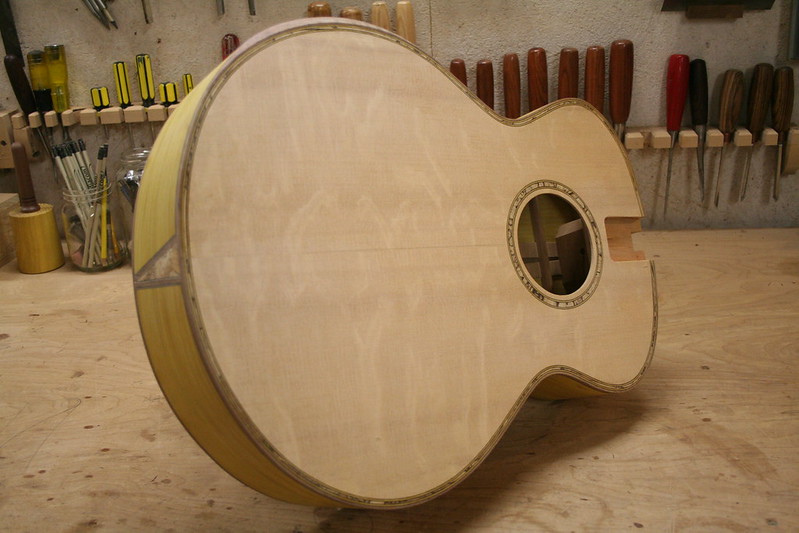
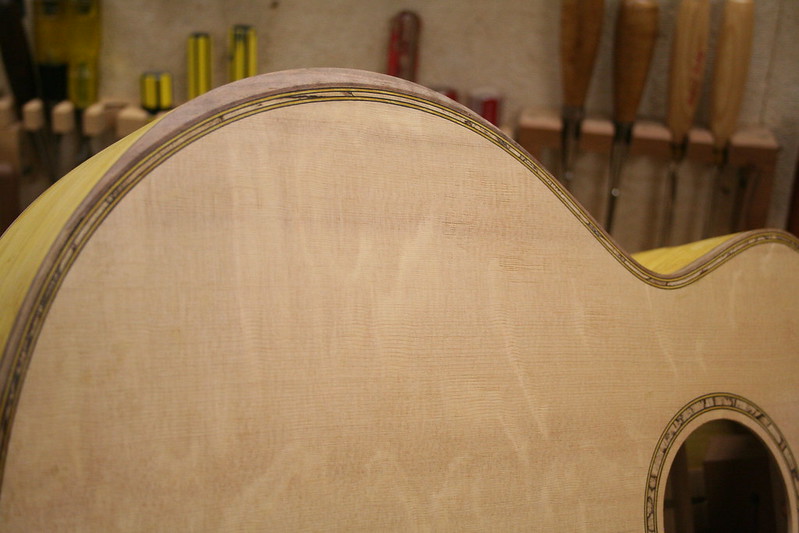
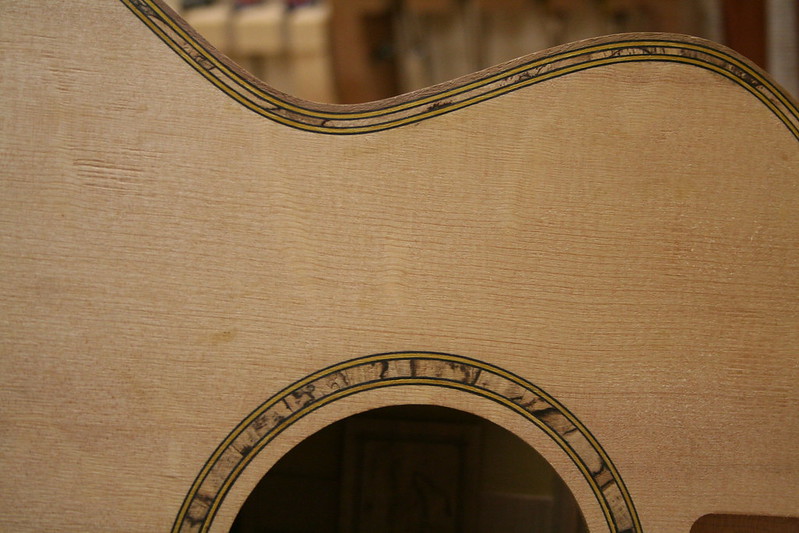
Binding is one of those processes that is crucial to a great looking instrument. I have spent a ton of time perfecting my process. It is, besides finish, the slowest process of the build. And it should be. I take my time to make sure it comes out perfect.
First the binding channels are routed. Then the end wedge is inlayed and flushed back to the sids. 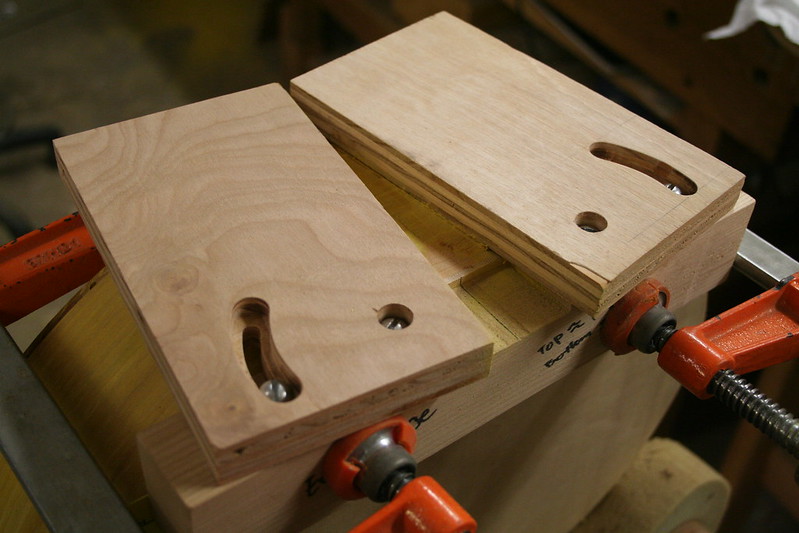 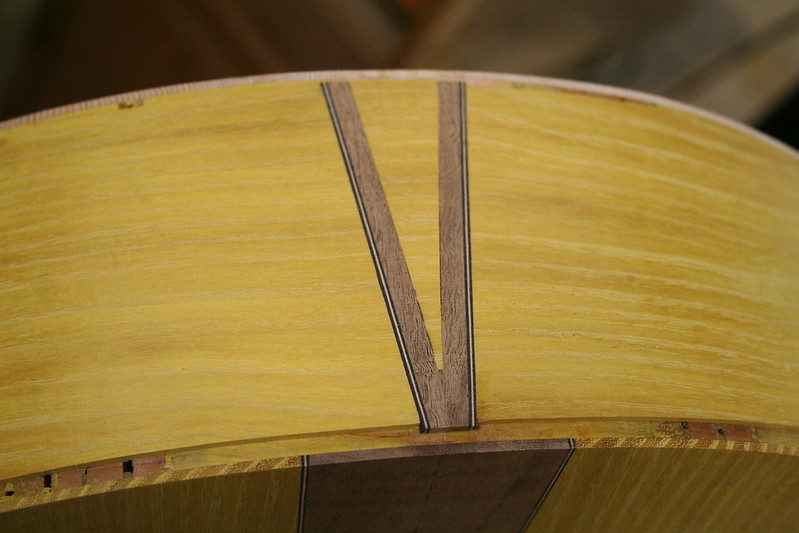 In this case, the center piece of osage is simply a filler that allows the purfling channels to be routed. It will be replaced with a piece of spalted firewood later. Before the purfling channels are routed, I cut the wedge down to the correct height for the mitered purfling. Then I route the final channels. 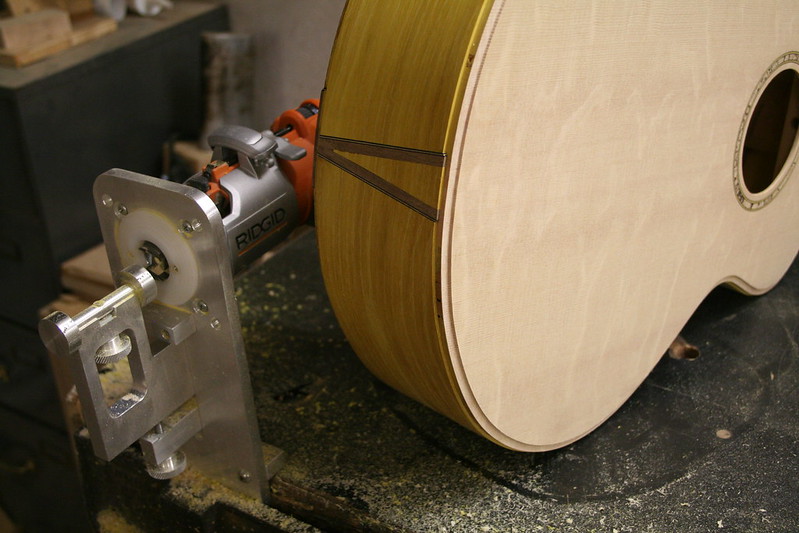 I love this jig. It has made my binding so much cleaner and consistent. It's also nice to be able to route a super wide purfling channel all in one pass without any issues. The final process to get this body ready for all the trim is to carve the armrest channels. In the past I have made templates and routed the channels. I decided this time to do it by hand. 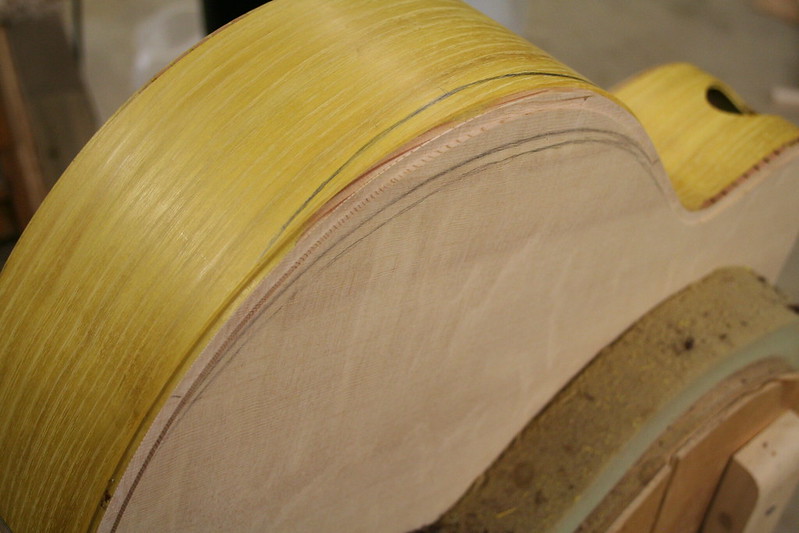 I liked carving them this way so much, I think I'll start doing it that way on all my guitars with armrests.
__________________
Chris Ensor
|
|
#55
01-19-2017, 09:25 PM
|
|||
|
|||
|
I'm dying to see a full shot of the back. I went to Google images and was looking at the color Osage takes on in time and it is beautiful, some of it turning to a dark amber-honey color. But I really like the yellow it is now too.
|
|
#56
01-24-2017, 10:31 AM
|
|||
|
|||
|
If you've followed along with some of my other build threads, you've seen the exact details of how I glue on my binding, purfling, and armrest overlay. The process is the same, so let's skip all that time it took and get to the good part:
   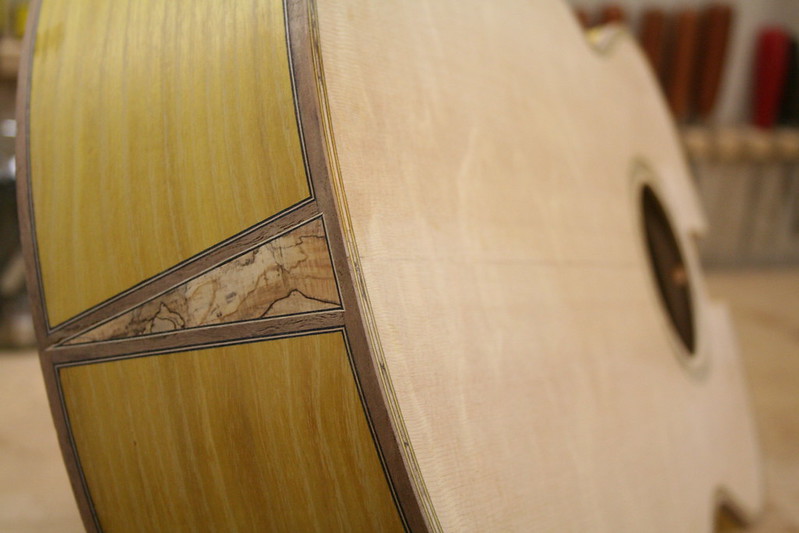  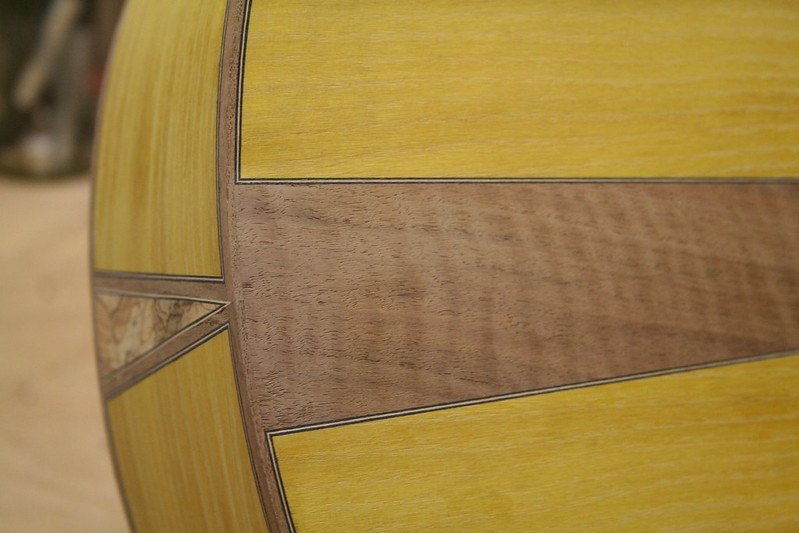 I'm super happy with how everything turned out. I had never done an end wedge quite like this one before now. I can see doing it more often in the future. Now that everything has been scraped flush, you can start to see the figure in the back wedge and the bear claw in the top coming through. There's still a little bit of prep to do before finish, but not much.
__________________
Chris Ensor
|
|
#57
01-24-2017, 10:49 AM
|
|||
|
|||
|
Holy cow, the end graft is fantastic. I'm really impressed with how clean it is and really love the design. I also really like the tag. When the thread started I wasn't sure what I'd think. I've never really been a fan of Osage Orange because it's so yellow, but man, you're making this work. I can't wait to see it under finish now.
|
|
#58
01-25-2017, 12:23 AM
|
|||
|
|||
|
Looking great Chris. Love the concept and the execution.
|
|
#59
01-25-2017, 07:04 AM
|
|||
|
|||
|
I think that burl purfling looks fantastic, as does the whole guitar! I'm curious, did you bend it in long strips or did you have to lay short bits in by hand?
__________________
Hatcher Woodsman, Collings 0002H, Stella Grand Concert
|
|
#60
01-25-2017, 10:41 AM
|
|||
|
|||
|
Very cool endgraft, Chris--realy dig how it looks like a wedge going into the wedge of the back. Great stuff!
__________________
2013 Stehr Auditorium (Carpathian/Myrtle) 2015 Stehr Auditorium (Adi/BRW) 2020 Baranik Meridian (Blue Spruce/Manchinga) 2020 Wilborn Arum (Tunnel 14/Coco) 2021 Kinnaird Graybeard (BC Cedar/Bog Oak) 2022 Kinnaird CS Student Build (Adi/Padauk) 2023 Kinnaird FS (Italian/Koa)
|


