
|
|
#1
 12-30-2012, 08:13 PM
|
|||
|
|||
|
I just got this lightly used fixer-upper for $25.
I used to have an Alvarez Yairi, so I knew this would be a very good economy guitar, and it certainly is. **** good tone for it's going price. Good bass response. There is a slight hump at around 14-15th fret, which appears like it could have been where the upper fret "fall-away" began, but it's making a slight buzz at the 12th and 13th frets now, so a light fret job is in order. There is a bit of a hump on the top: 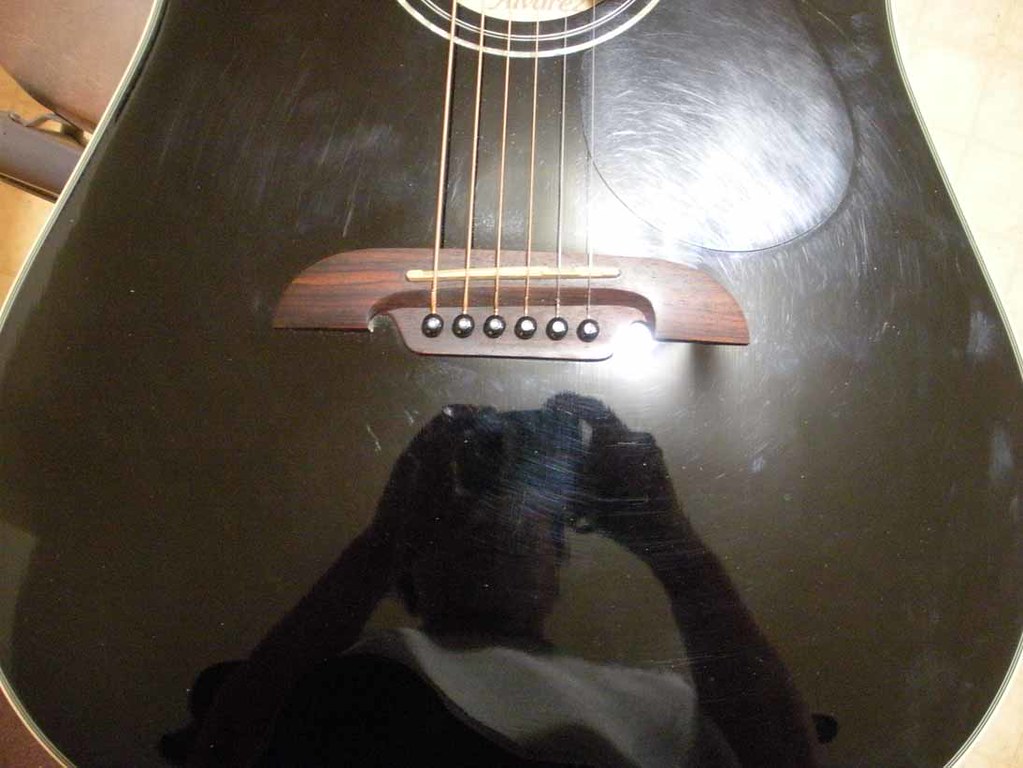 And it's causing one side of the bridge to lift a bit: 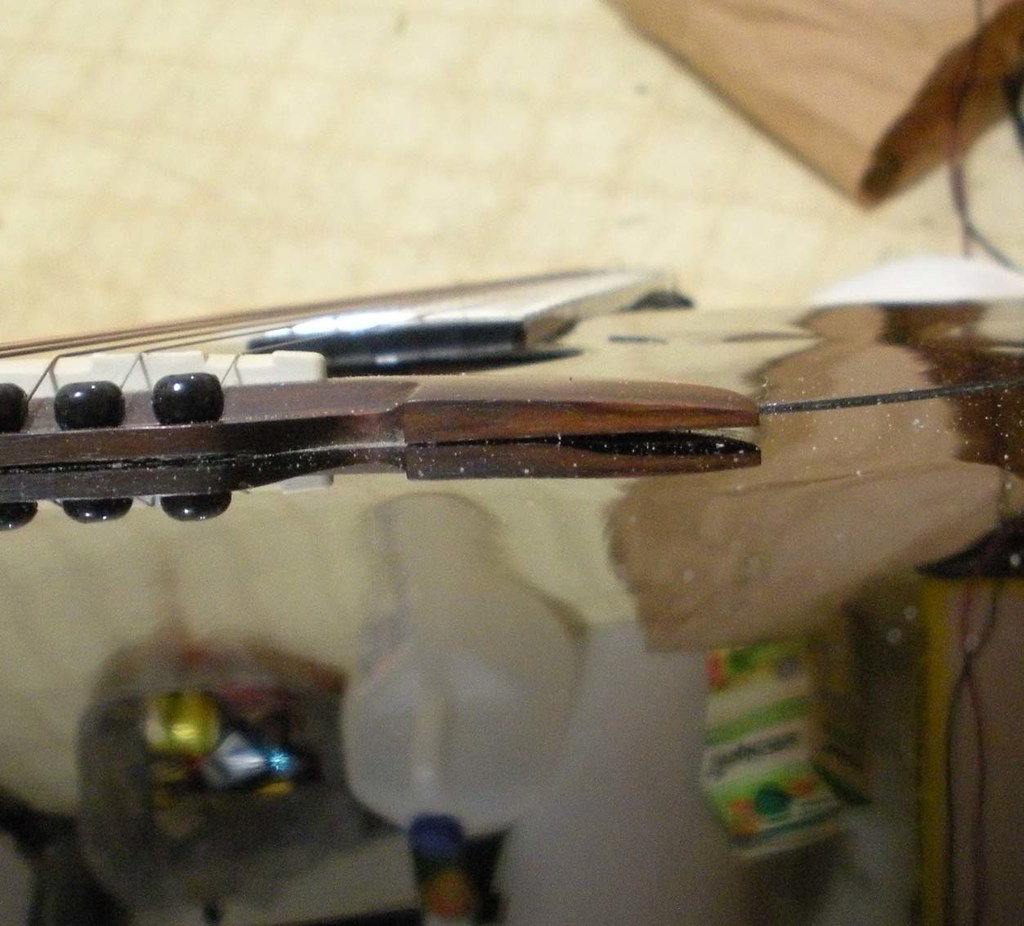  I've re-glued a lifting bridge on my Martin guitar, so it wouldn't be my first time doing this. I'm hoping to get this thing playing really well, and either keeping it for myself, or selling it to make a few bucks. Feedback greatly appreciated. 
|
|
#2
12-30-2012, 08:34 PM
|
|||
|
|||
|
The bridge could be lifting because of the belly in the top, or it could just be a faulty glue joint. Get the strings off it right away. Examine under the bridge and check for loose braces. A cool method for doing this that a local luthier showed me is to push on the top in various places and listen for creaking. Creaking means a loose brace. Look at the bridge plate and make sure it isn't loose or cracked. If everything looks ok, you need to remove the bridge. They make heaters for this purpose. You heat up the bridge and gently work a very thin knife or spatula under the bridge until it is removed. If the knife catches, pull it out, don't force it, and rotate it around to a different area where it can move freely.
When the bridge is off, remove all the glue from the bridge and top with a scraper and sandpaper. The top does not look that distorted to me. I would shape the bridge to conform to the contour of the top. You do this by taping sandpaper to the top where the bridge is going to go, and move the bridge back and forth and sideways over the spot until the bridge perfectly conforms to the top with no gaps. I reglue bridges with aliphatic glue and they never come off. Ok, so I've only done 3 or 4, but they stayed put. You could use the bridge pins to locate the bridge until you get the clamps in place, then remove the bridge pins so they don't get glued in the holes.
__________________
Warren My website: http://draudio56.wix.com/warren-bendler "It's hard...calming the Beatle inside of me."
|
|
#3
12-31-2012, 01:47 AM
|
|||
|
|||
|
Quote:
Thanks for the feedback. It's normal to have a bit of a top hump, due to the tension of the strings, but top humps are usually pretty flat and wide. This was the case with my Martin, and it was pretty straightforward to glue the bridge back on (it's still holding well after 4 years or so). Yes, I used aliphatic glue. It's hard to see in the photos, but for this guitar, the top is no longer very flat. In the first photo, on the right side of the bridge, you can see where the bulge is lifting the bridge. I like your idea of shaping the bridge to the top, but in this case, the shaping would be rather extreme. I'd rather try to get the top flat again, if that's possible??? If it's not possible, shaping the bridge may be the only way to ensure good contact, and a good glue joint.
|
|
#4
12-31-2012, 06:49 AM
|
|||
|
|||
|
The cross brace on the treble side has come loose beneath the bridge. The neck issue you describe could be due to dryness.
If you fix it yourself, I strongly suggest reading this article on loose braces: http://www.frets.com/FretsPages/Luth...xwrinkle1.html Last edited by nate clark; 12-31-2012 at 07:13 AM.
|
|
#5
12-31-2012, 09:39 AM
|
|||
|
|||
|
Quote:
__________________
Warren My website: http://draudio56.wix.com/warren-bendler "It's hard...calming the Beatle inside of me."
|
|
#6
12-31-2012, 10:02 AM
|
|||
|
|||
|
Quote:
type of wrinkle I have, except mine is on the treble side (there is a tiny bit of lifting on the bass side too). Took the strings off and looked at the braces with a dental mirror and flashlight: the braces are not separated from the top as they are in the article. My braces appeared to still be solidly glued to the top, with no gap. I reached in and tried to feel for any looseness....none. They feel solidly glued to the top still. I also pushed on the top to check for creaking....none. Is it possible to get this kind of wrinkle without the braces being loose? Or am I just not seeing or feeling or hearing the looseness? The top of this guitar is a super glossy black, and I can "see" the X bracing in the reflections off the top. I suppose I should go ahead and remove the bridge, as I'll have to do that anyways, right? And I imagine if I try to flatten the top, it would be easier with the bridge removed. Or is it possible I should just do the fret job, and leave the bridge alone until it really starts to be a problem....right now, it still appears to be glued fairly well to the top, despite the lifting on the treble side. The original owner was detuning it about a whole step, because he thought it would be safer, but when I tuned it to pitch, it didn't seem to affect the spacing of the gap. Thanks for the advice.... Last edited by paul678; 12-31-2012 at 10:45 AM.
|
|
#7
12-31-2012, 12:00 PM
|
|||
|
|||
|
I would remove the bridge and then try to flatten the top. It sounds like the braces are ok. You might want to try applying some heat, like a heat lamp or heating pad as you apply pressure to flatten the top. Support the braces while you do this so that if the glue softens they don't come unglued. My thinking here is to soften the glue and allow the braces to reposition themselves with the top flat, to keep it in that position. Otherwise, if you just flatten the top, it might go back to the belly shape once it has tension on it. For a weight, I used a large power transformer I had laying around. If you can see the outline of the braces, that makes me think the top is pretty thin, and that could be why it bellied up. I think if you use light gauge strings it should be ok.
Hmm, now I am thinking that the braces have probably bent along with the top, and heating things up may make them come loose when the top flattens. Maybe better to try it without heat first.
__________________
Warren My website: http://draudio56.wix.com/warren-bendler "It's hard...calming the Beatle inside of me."
|
|
#8
01-07-2013, 09:21 AM
|
|||
|
|||
|
Hey! The guy in the other thread inspired me to use
my small point and shoot camera to take pics inside this guitar. Now I have photographic proof the braces are in good shape, and are not loose, under the wrinkle on the top: 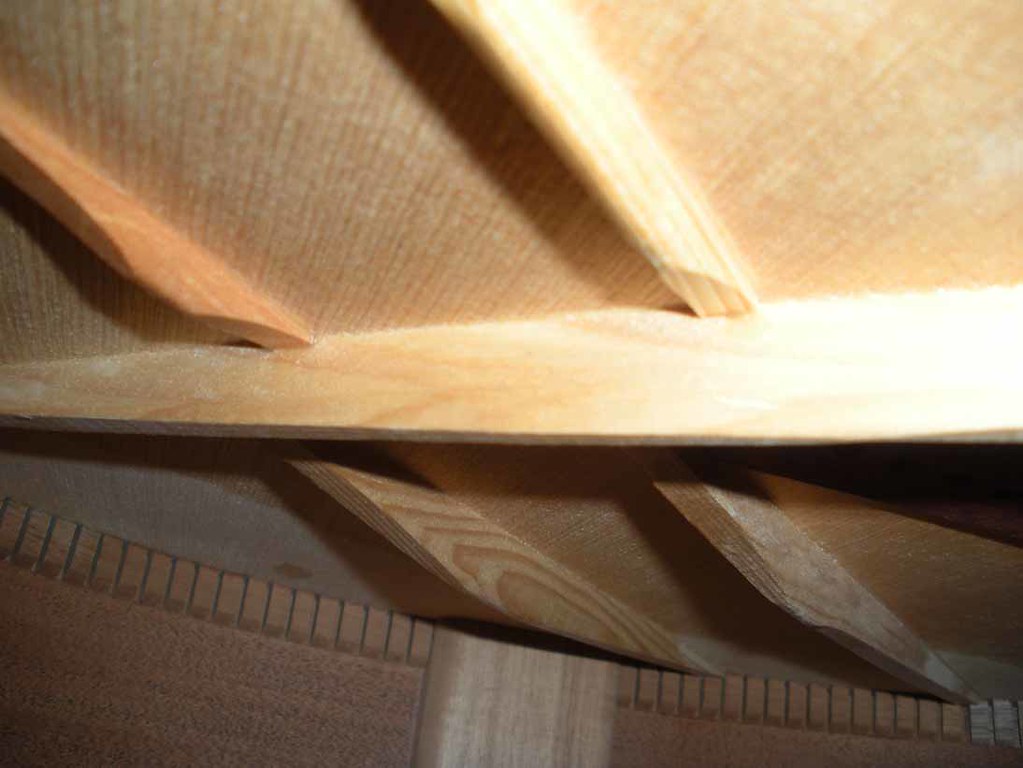 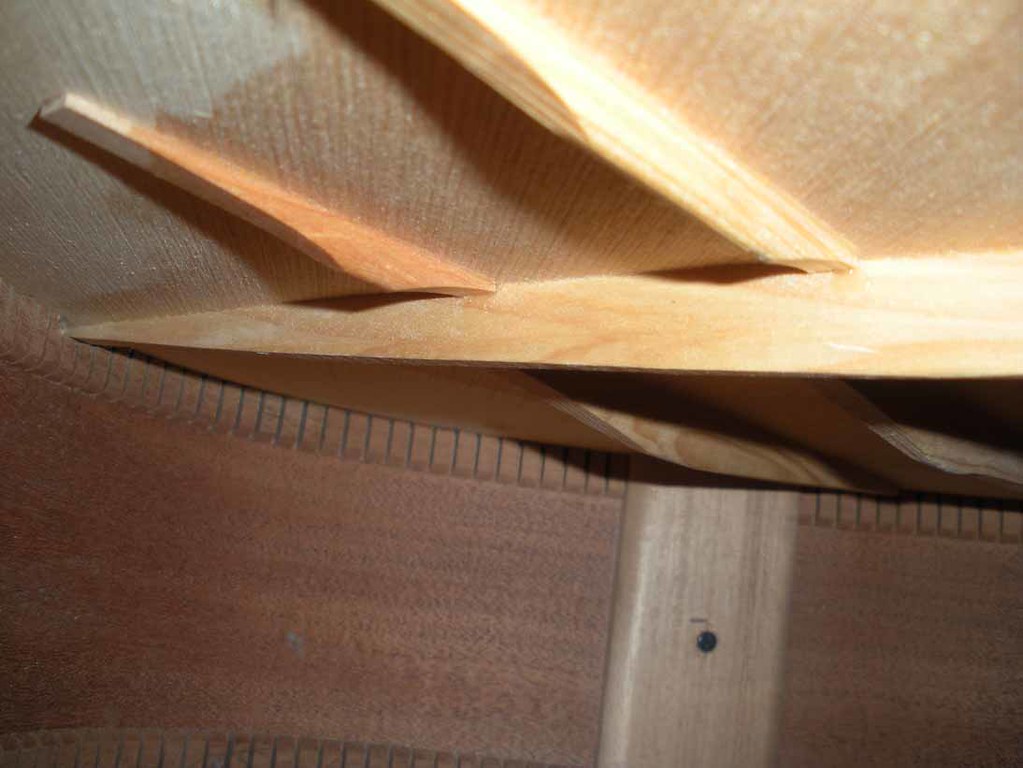 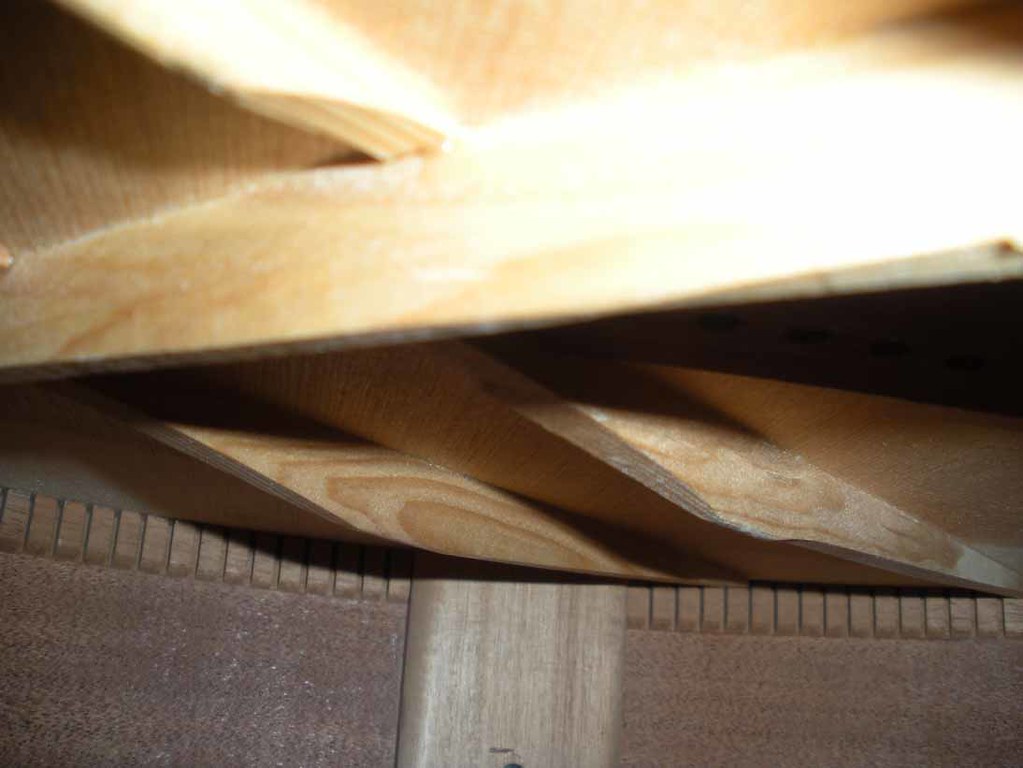 Cool, eh?
|
|
#9
01-09-2013, 02:44 PM
|
|||
|
|||
|
Ok, I took this to a local shop, and the guy said it would be
$70 to re-glue the bridge, but he wanted me to re-humidify the guitar first, before we went ahead. He said a straight line from the fret tops should end up hitting the top of the bridge, and since on this guitar, it was higher than that, he said the saddle may end up being too tall. Ok, well, I went ahead and took the bridge off anyways:  And you can see the original person who put the bridge on didn't bother to spread the glue evenly over the exposed wood of the top, and this was only exacerbating the fact that there was very little exposed wood to begin with, because the black finish is left about 1/8" inside the edges of the bridge, for cosmetic reasons. But it looks like I should be able to fix this one, because the wrinkle has gotten smaller with the strings off, and when I did a dry-run of the clamping, it looks like I can make a tight fit now: 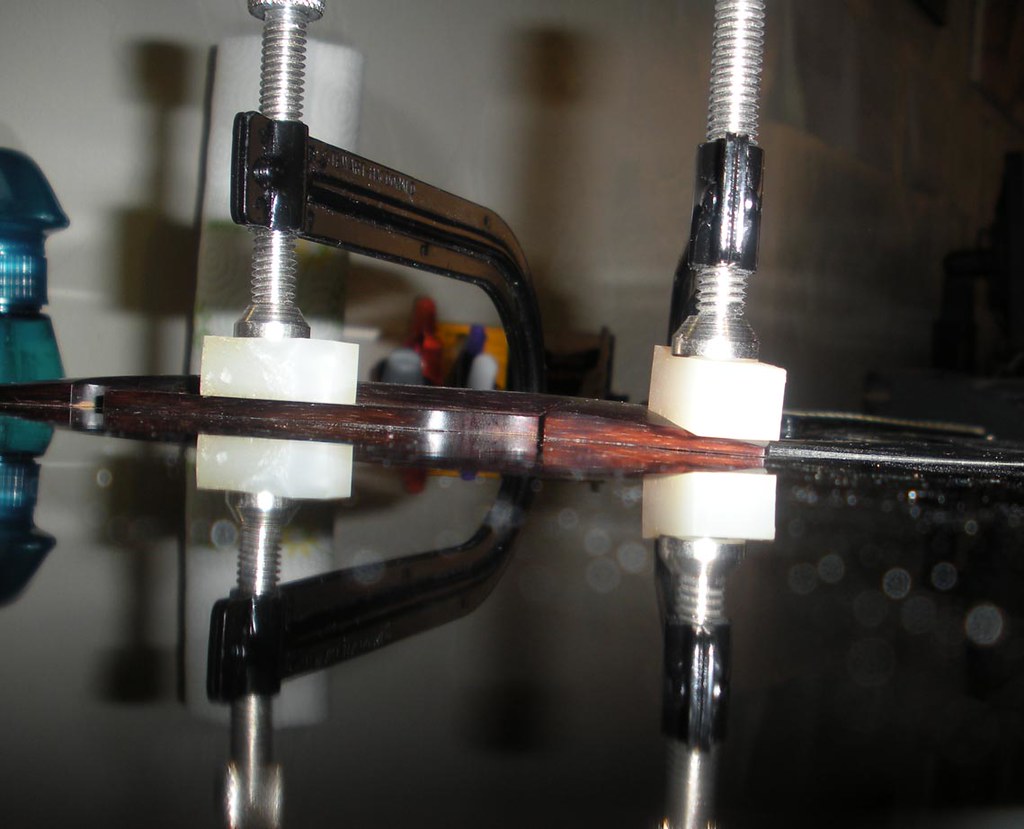 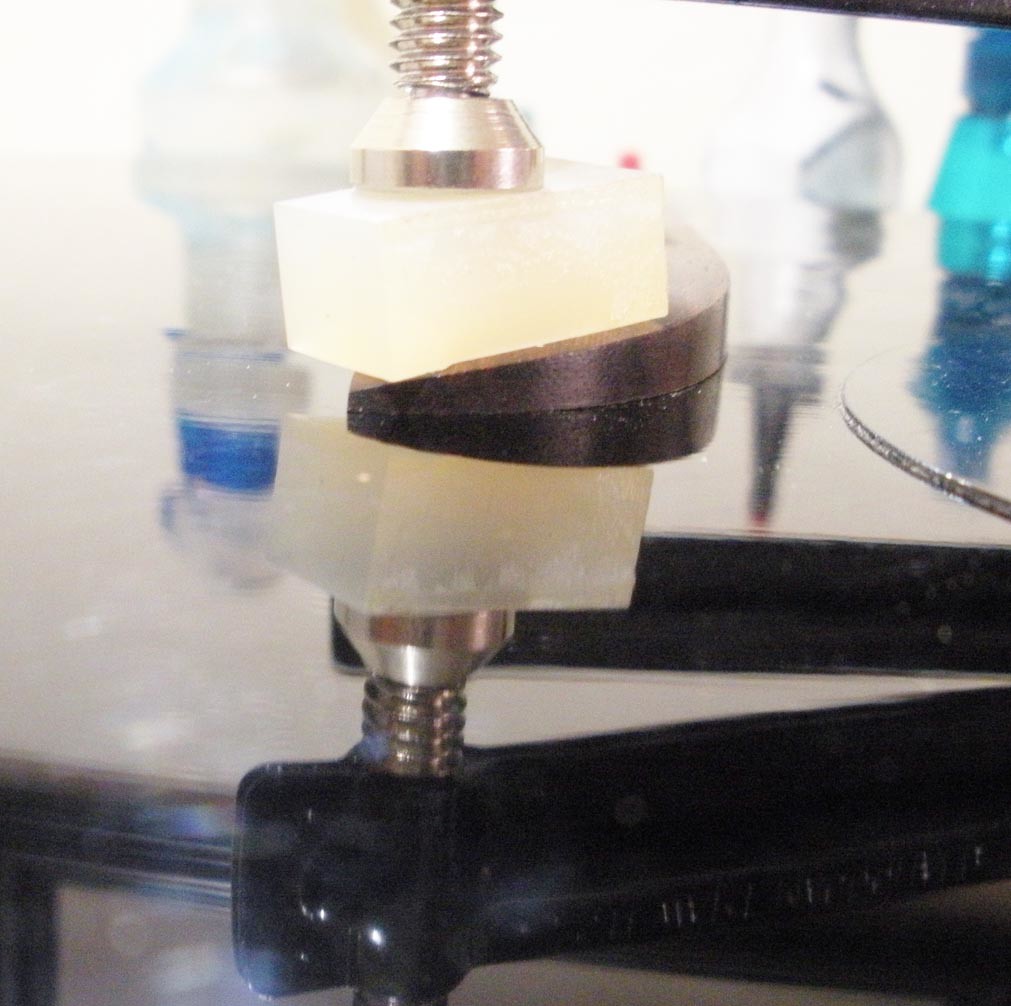 So it looks like if I spread the new glue nice and even over the bare wood, I should make a much stronger joint than the original, and even though the wrinkle will still likely be there, at least the bridge will still be solidly connected. Do you think I should perhaps even trim off about 1/16" of the black finish on the lifting side, just to create more bare wood to glue to? Or would that risk making the glue line too visible? I can just wipe off the excess glue with warm water, right?
|
|
#10
01-09-2013, 03:21 PM
|
|||
|
|||
|
Quote:
2. If the bridge lies flat without the clamps and there is not gap between the bridge and the top, you can go ahead and reglue it. If there is a gap, you must sand the bridge to fit the top or straighten the top or both. 3. There is a chance that the paint being under the bridge is keeping it from having intimate contact with the top. Hold the bridge in place and lightly scribe the perimeter of the bridge. Then carefully remove the paint inside the scribe line. 4. Glue squeeze-out is removed with a damp rag, not wet.
__________________
Warren My website: http://draudio56.wix.com/warren-bendler "It's hard...calming the Beatle inside of me."
|
|
#11
01-10-2013, 12:10 AM
|
|||
|
|||
|
Quote:
This site claims to scape off the finish within 0.033" of the edge of the bridge (less than 1 mm): http://liutaiomottola.com/constructi...mozTocId852444 So that's what I'll do. The last time I did this with my Martin, I remember scoring the bridge (and maybe the top as well?) with a bunch of "X"s, to give the glue something to grab onto. Do you guys recommend this?
|
|
#12
01-10-2013, 07:10 AM
|
|||
|
|||
|
Quote:
__________________
Warren My website: http://draudio56.wix.com/warren-bendler "It's hard...calming the Beatle inside of me."
|
|
#13
01-10-2013, 10:49 PM
|
|||
|
|||
|
Paul, I've recently had a lot of guitars come into my workshop with the same problem. Usually, when factory guitars are made they only clear an area of finish underneath the bridge that is SMALLER than the actual area of the bridge. Then, the glue that they use... Is that a glue gun...??? So, often only 80 or 85 percent of the bridge surface area is glued to the top, causing the joint to fail and the bridge to pull up and warp itself (and sometimes the soundboard).
You'll want to clean off all the glue, clamp the bridge to the guitar top, use a sharp thick needle like object to score the finish all along the perimeter of the bridge (3 or more passes should be okay). Then, remove the clamped bridge and use chisel and scraper to carefully remove all finish and flatten the underlying top-wood so that the underside of the bridge can contact the top 100% flush and gap free. When you glue and clamp, you may be able to clamp just the wings of the bridge and have the middle be tightened as well, or you may have to use 3 clamps - L, R, and middle. You can use several thicknesses of tape and/or bridge pins or PLASTIC or METAL posts in the pin holes to keep the bridge from skating/sliding when the glue is on and clamping pressure is increased. Scoring isn't necessary.
__________________
---- Ned Milburn NSDCC Master Artisan Dartmouth, Nova Scotia Last edited by Ned Milburn; 01-10-2013 at 11:08 PM. Reason: Additional info.
|
|
#14
03-06-2013, 11:04 AM
|
|||
|
|||
|
Ok, ANOTHER problem with this guitar!
The bridge is now glued on properly, but: There was sort of an extreme "fall away" around the 16th fret (body meets the neck at the 14th fret) before I removed the strings, and it was still there afterwards. It looked shallow enough of a fall away for me to just do a fret leveling, and perhaps make the fall away less extreme, and it should have been ok. But since I have left the strings off, in low humidity Arizona, the fall away appears to have gotten worse: 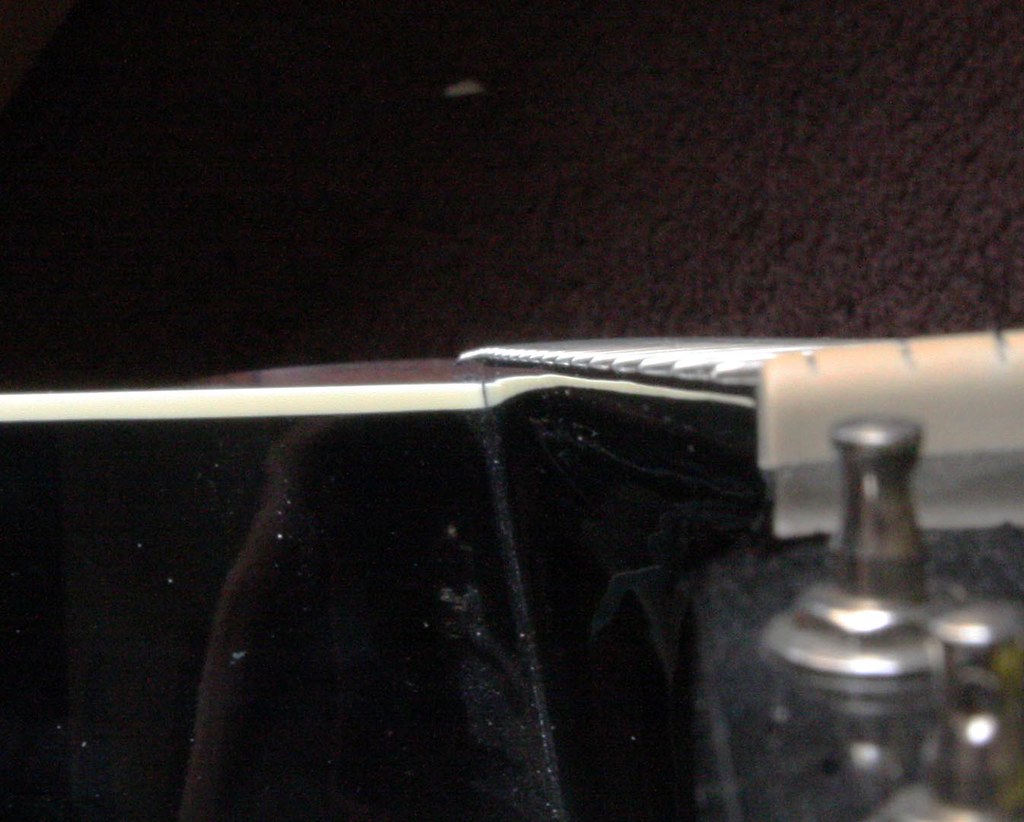 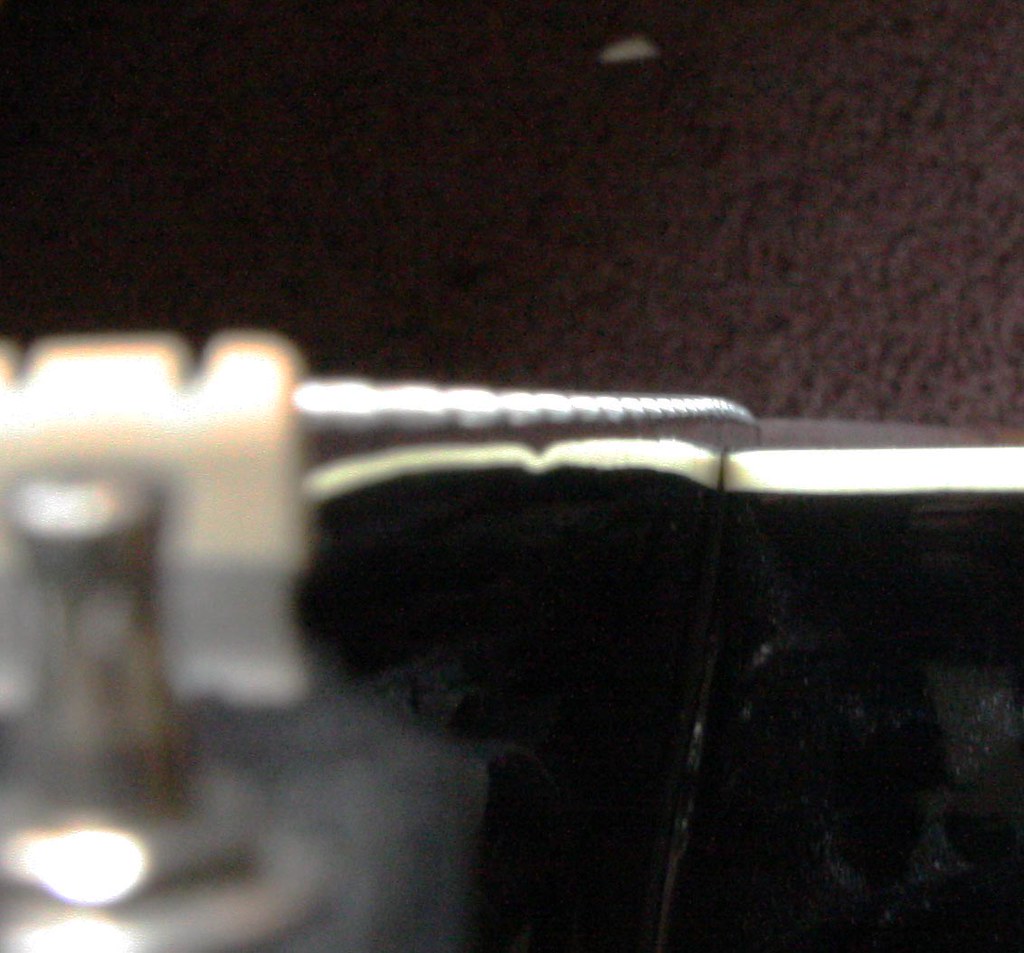 Now it appears I have a neck angle problem, right? Not solvable with the truss rod, of course. It's hard to photograph looking down the frets, but I think you can still tell that if you put a straight edge one the fret tops, they ruler ends up WAY above the bridge. Am I in deep S#@t now? Is there a way to bend the neck back? I swear to God it wasn't that bad when I first took the strings off, so I think it might bend back if I put thick gauge set on it. I have never done a neck angle reset, and I don't really want to, but I only spent $25 on this guitar, so it might be a good learning experience. Advice greatly appreciated, thanks.....
|
|
#15
03-06-2013, 02:54 PM
|
|||
|
|||
|
When you say "if you put a straight edge on the fret tops, the ruler ends up WAY above the bridge," How much is "WAY" above? Have you measured it with the strings off and the FB adjust to dead flat? If it is more than .093" (3/32) you may have an issue with too tall a saddle. I'd start there
__________________
Tim B
|


