
|
|
#1
 11-29-2013, 05:41 AM
|
|||
|
|||
|
So, I have taken on my first student. Well, a friend that wanted to build a guitar and I must have said yes to helping him at some point. Anyway, he is an accomplished singer songwriter (Mike McCarthy) and wanted to build a Tenor guitar. So, the search was on for plans etc, timber etc. After much searching, I decided to create my own plans. I like a challenge and this seemed a good one.
We are almost finished the build and I will post finished pics later but I thought I'd share some of the build pics. Timber choices are: Back and Sides: Tasmanian Fiddleback Blackwood Soundboard: Reclaimed old growth Western Red Cedar Neck: Recycled Western Red Cedar Fretboard and Bridge: Australian Gidgee For those interested, the plans are here. Feel free to use them. They are at actual size in PDF format. Joining the Blackwood back pieces 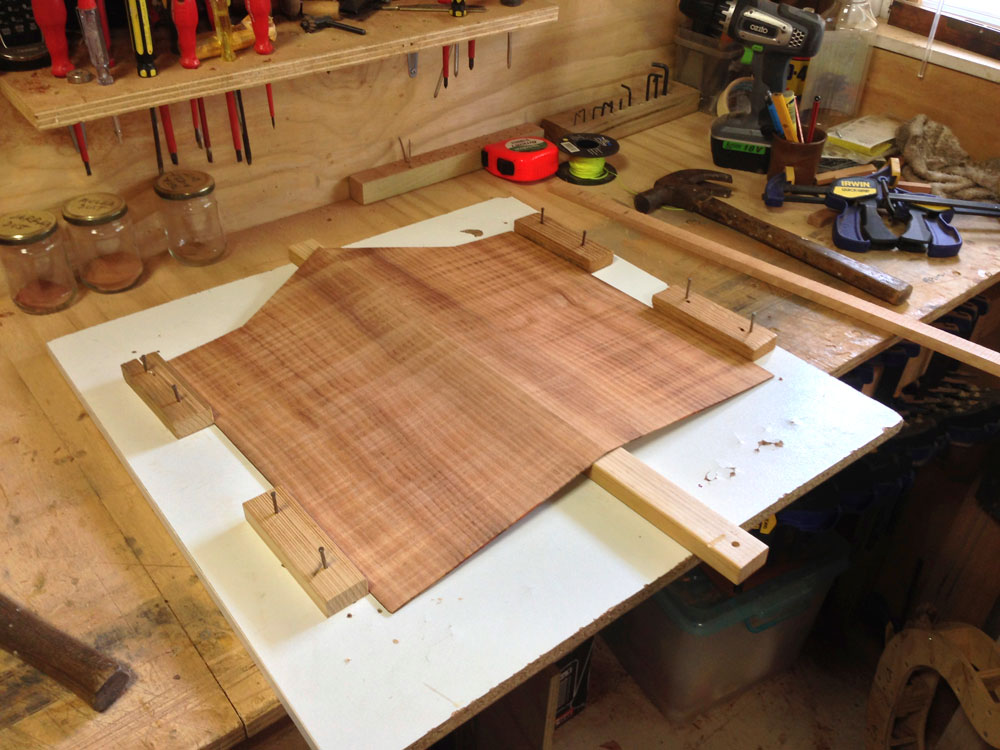 Cutting the sides 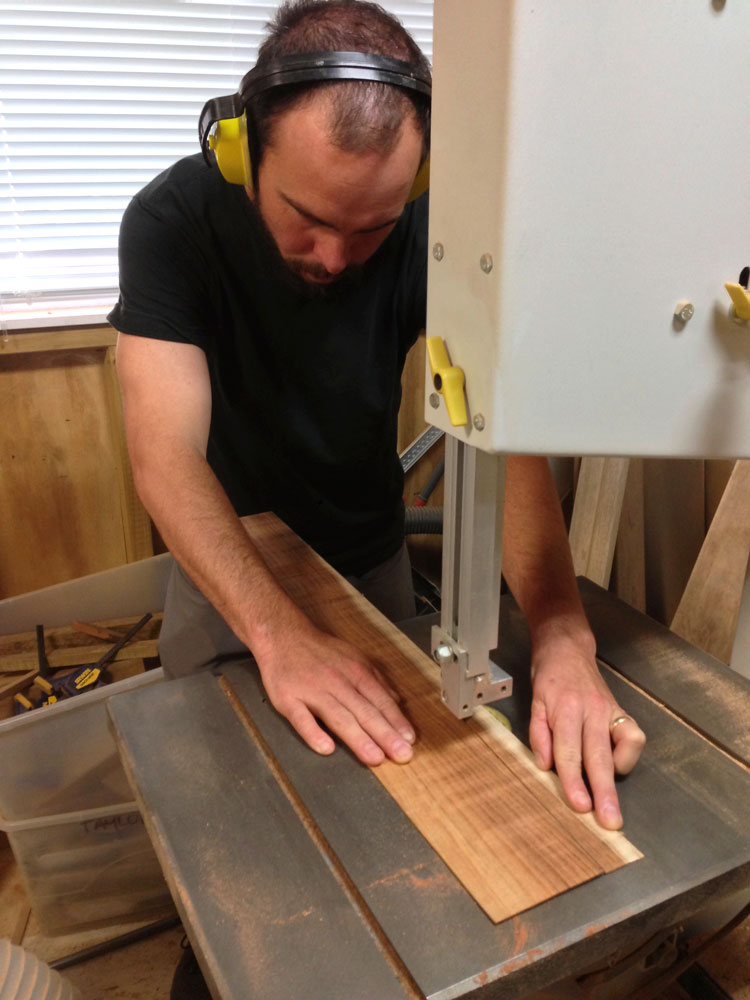 Bending the sides 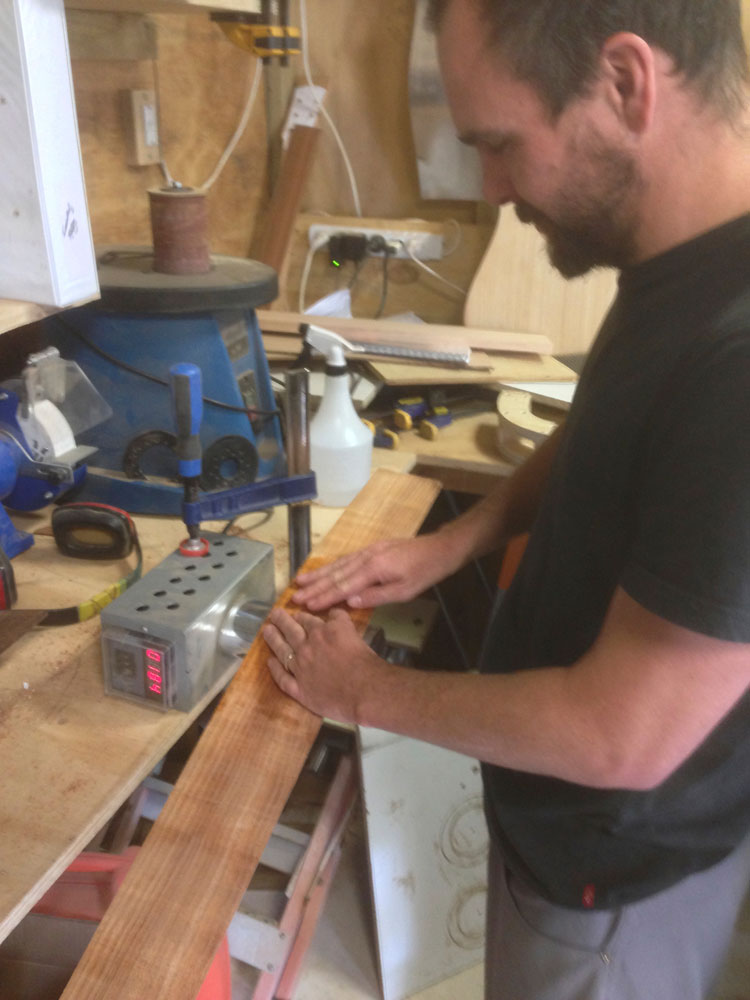 Sides in the forms  Back bracing done 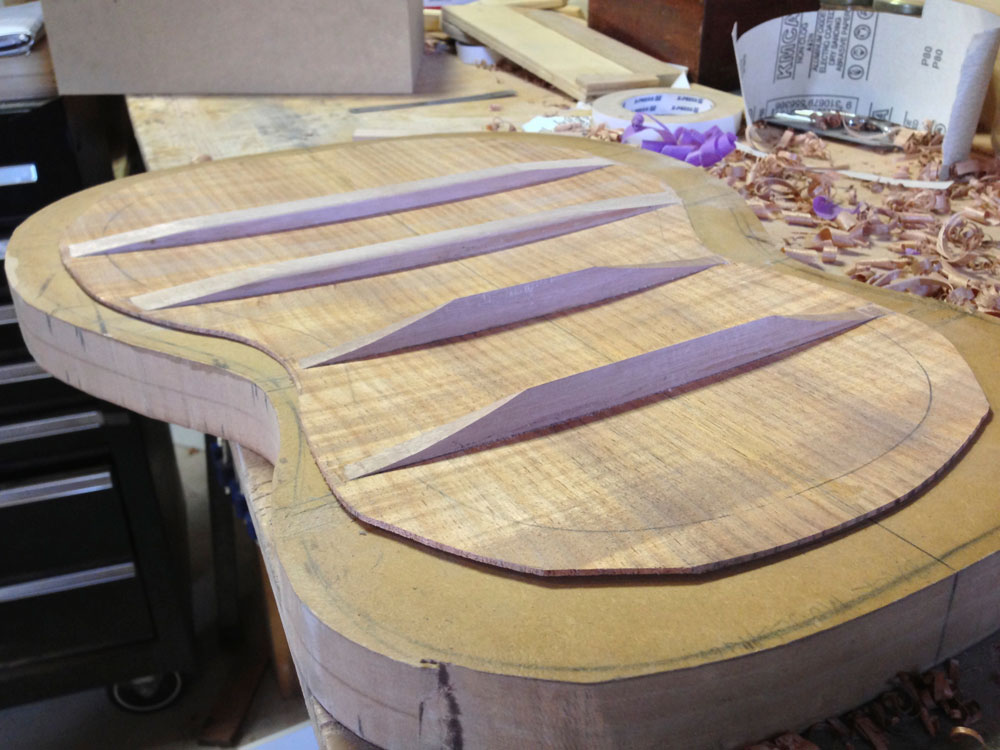 Nice subtle rosette of Blackwood 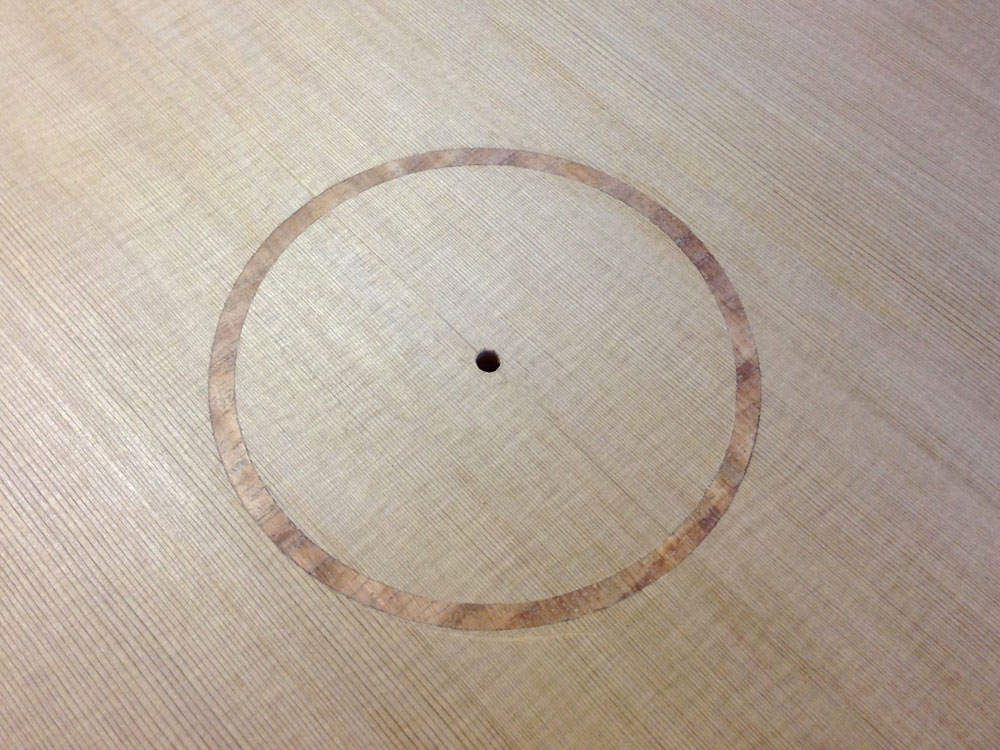 Soundboard bracing done 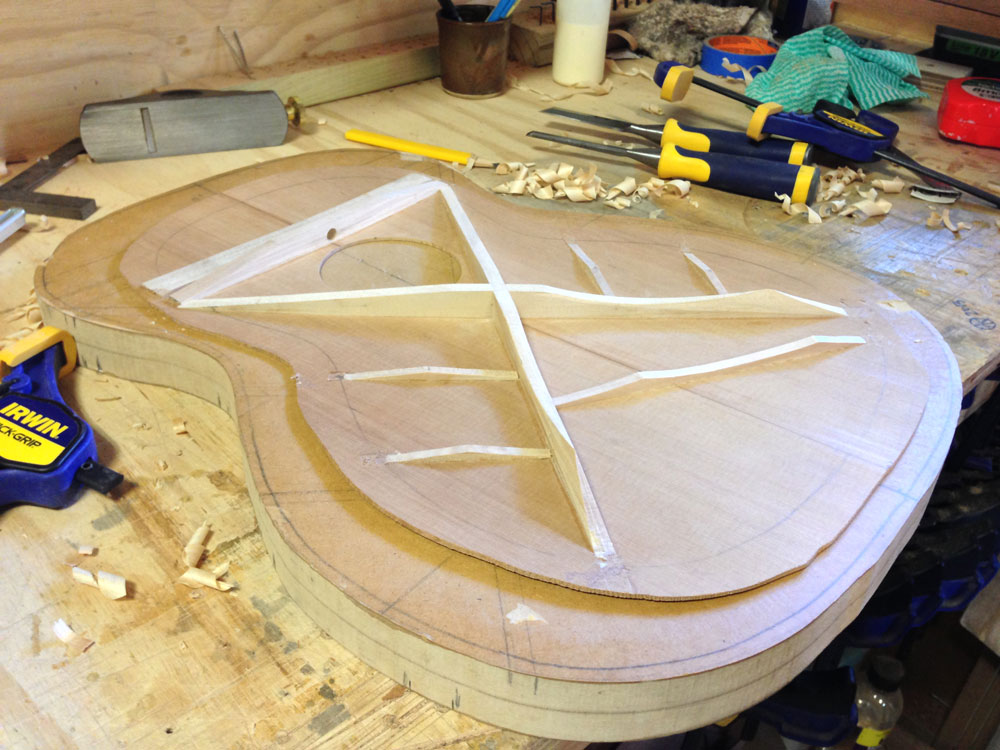 Hand shaping the neck with a spokeshave 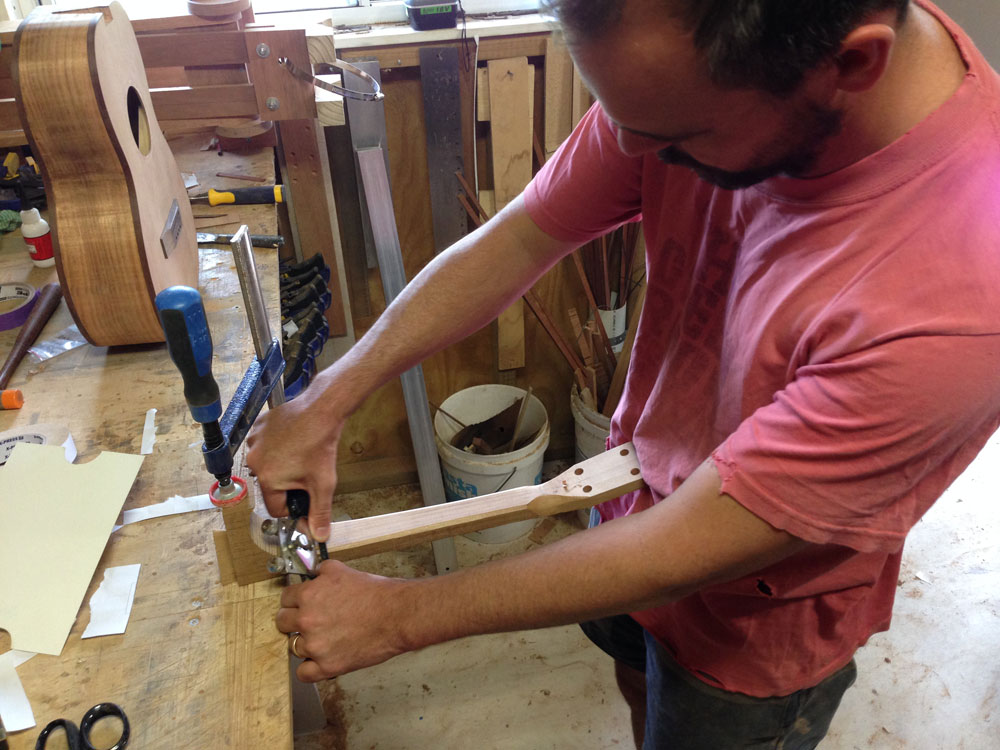 Fitting the bridge 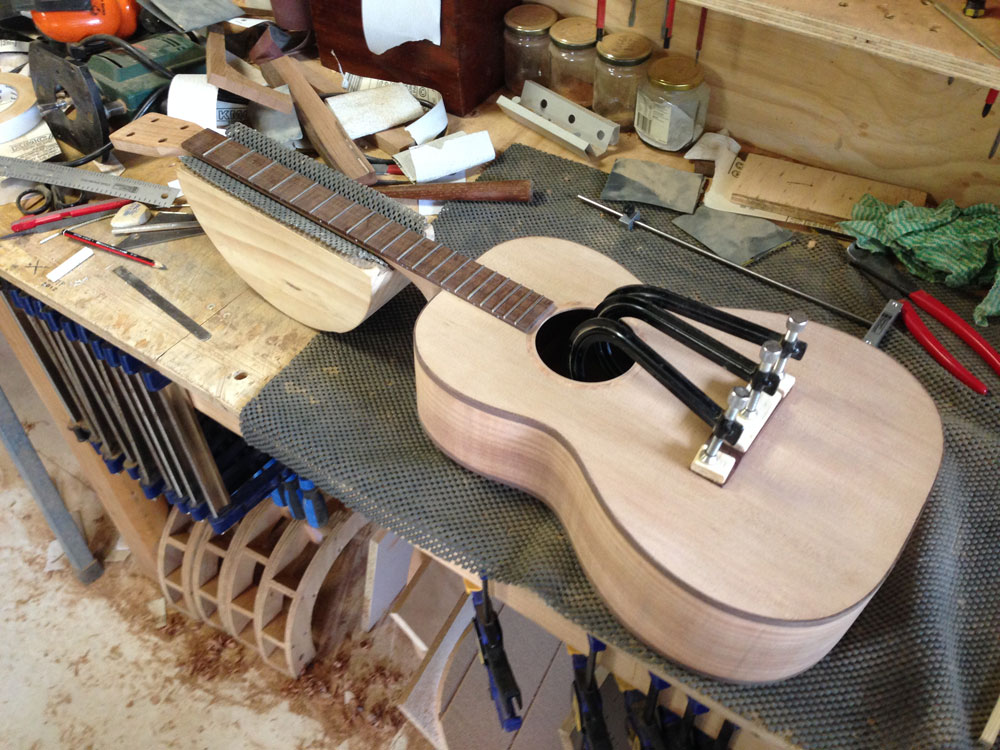 Ready for Oiling  It's been a great journey so far. Teaching someone really forces you to think through what you do by habit as opposed to knowing if you should do it that way or if anyone else can do it that way. Anyway, will post pics when it is finished.
__________________
Martin Taylor 
|
|
#2
11-29-2013, 07:57 AM
|
|||
|
|||
|
Wonderful thread. Thanks for posting these pics and plans. Could you explain the picture of joining the back? Is the wood sort of tented up in the middle to facilitate the slightly arched back?
__________________
My YouTube Page: http://www.youtube.com/user/ukejon 2014 Pono N30 DC EIR/Spruce crossover 2009 Pono koa parlor (NAMM prototype) 2018 Maton EBG808TEC 2014 Hatcher Greta 13 fret cutaway in EIR/cedar 2017 Hatcher Josie fan fret mahogany 1973 Sigma GCR7 (OM model) rosewood and spruce 2014 Rainsong OM1000N2 ....and about 5 really nice tenor ukuleles at any given moment
|
|
#3
11-29-2013, 03:18 PM
|
|||
|
|||
|
Quote:
First, make sure the joins are straight. Place one side on the board and nail two small blocks against the outside edge. Next, place a strip of timber under the other edge and then line up the other side against it. Then nail two more blocks against the other outside edge. Take out the strip under the middle and see if you can push down on the two sides so that they will go flat (under pressure). If there is too much pressure you will need to remove one side of the blocks and move them out a fraction. Prepare 2 strips of Baking paper long enough to go under the full length of the join. Place one strip of Baking paper down on the board. Glue along the joining edges of the plates (I use Titebond I). Place the plates down against each other so they for the "tent". It might be easier if the timber strip is there to support them but I usually do it without it. Take the strip out. Push down on the plates with baking paper strip on top of the join and then clamp the timber strip on top of the join. If you get any buckling just clamp timber strips on top of the so that the whole plate is flat. I use this method for my back and tops and even if I bookmatch headplate veneers. This process gives a lot of joining pressure, is really quick to set up (once practiced) and works with hard and soft woods and best of all can be done with scraps of timber and a couple of nails. I also use a piece of Melamine as the base because it is pretty stable, flat and strong.
__________________
Martin Taylor
|
|
#7
12-05-2013, 08:53 AM
|
|||
|
|||
|
That's a beauty.
|
|
#8
12-05-2013, 06:37 PM
|
|||
|
|||
|
For those wanting a video/sound sample, this is a very short iPhone vid. Already starting to open up a bit.
http://martintaylorguitars.com.au/vi...nor_sample.mp4
__________________
Martin Taylor
|


