
|
|
#181
 05-31-2015, 03:12 PM
|
|||
|
|||
|
Quote:
Quote:

__________________
-- Nick 
|
|
#182
05-31-2015, 07:15 PM
|
|||
|
|||
|
Quote:
I was taught to use a radius that has a 3/16" drop in a 16" span. I still use that for back braces. Over the years, I've probably calculated what radius that is, but I've forgotten. Since I don't use radiused dishes, the actual radius isn't terribly relevant to me. It's pretty easy to work with. I'm not saying it's better, just that it is a different approach.
|
|
#183
05-31-2015, 07:56 PM
|
|||
|
|||
|
Quote:
Here is a handy calculator that will crunch the numbers if anyone wants it. http://www.mathopenref.com/arcradius.html And yeah, precision in some regards isn't required to make a good sounding instrument. My brain wants to know and be intentional with things that I can be intentional with though.
__________________
-- Nick
|
|
#184
05-31-2015, 08:42 PM
|
|||
|
|||
|
Quote:

|
|
#185
06-01-2015, 10:57 AM
|
|||
|
|||
|
Quote:
__________________
-- Nick
|
|
#186
06-20-2015, 06:32 PM
|
|||
|
|||
|
It's been a very satisfying couple of weeks since my last post. I built the brace radiusing jig that Charles suggested, with a couple modifications. It worked well. Then I completed the back of the guitar. Ready to move on to thicknessing the sides and building a side bending jig.
Here is the completed brace radiusing jig. The end caps are made of a cross piece with a shelf for the braces to rest on. They are adjustable to accommodate braces of different initial height. Another interesting feature is that the radiused guides that the plane rides on are removable, so I can cut different guides with a different radius and re-use the jig. 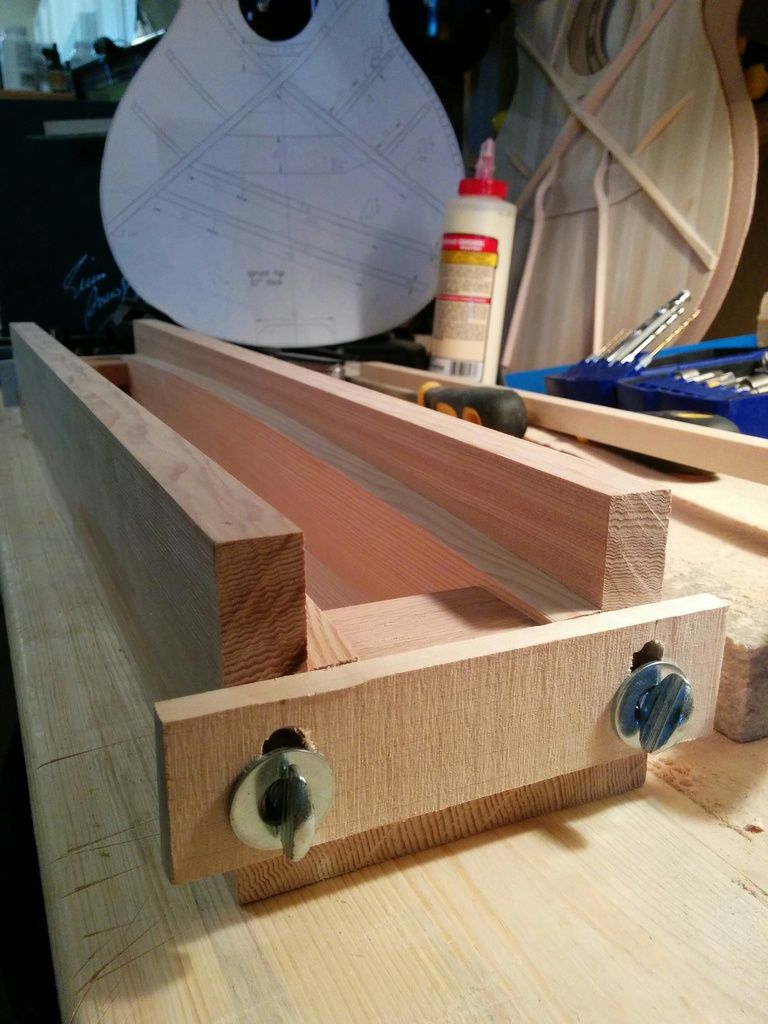 Loaded with braces and the plane in place. 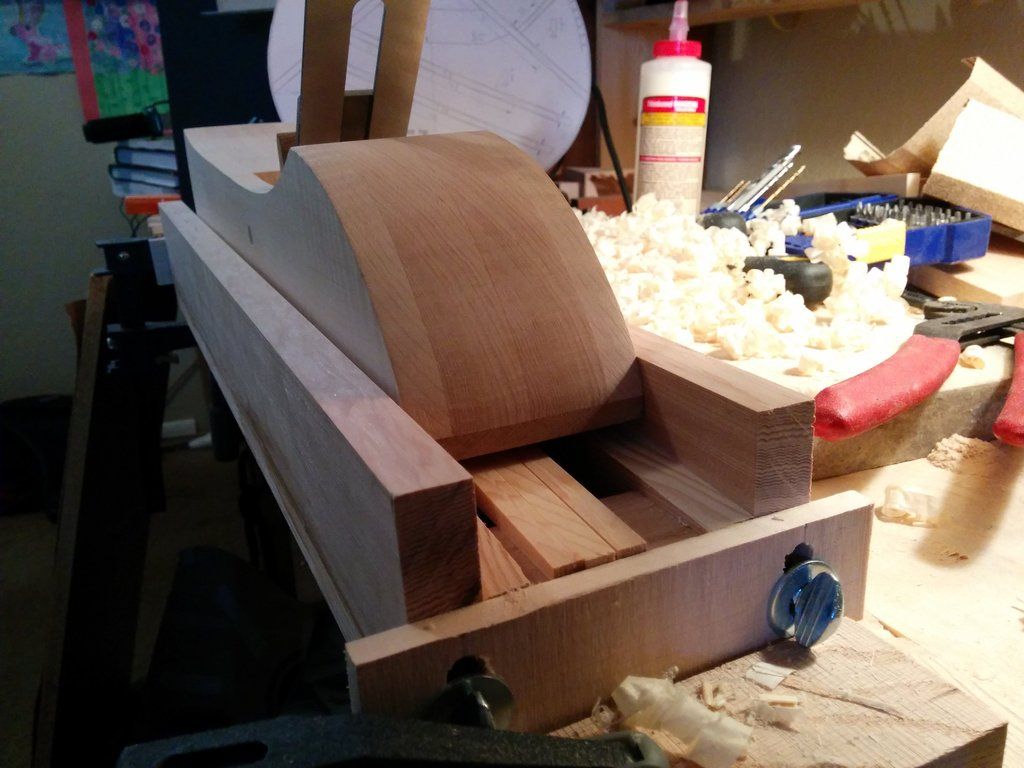 Radiused braces. 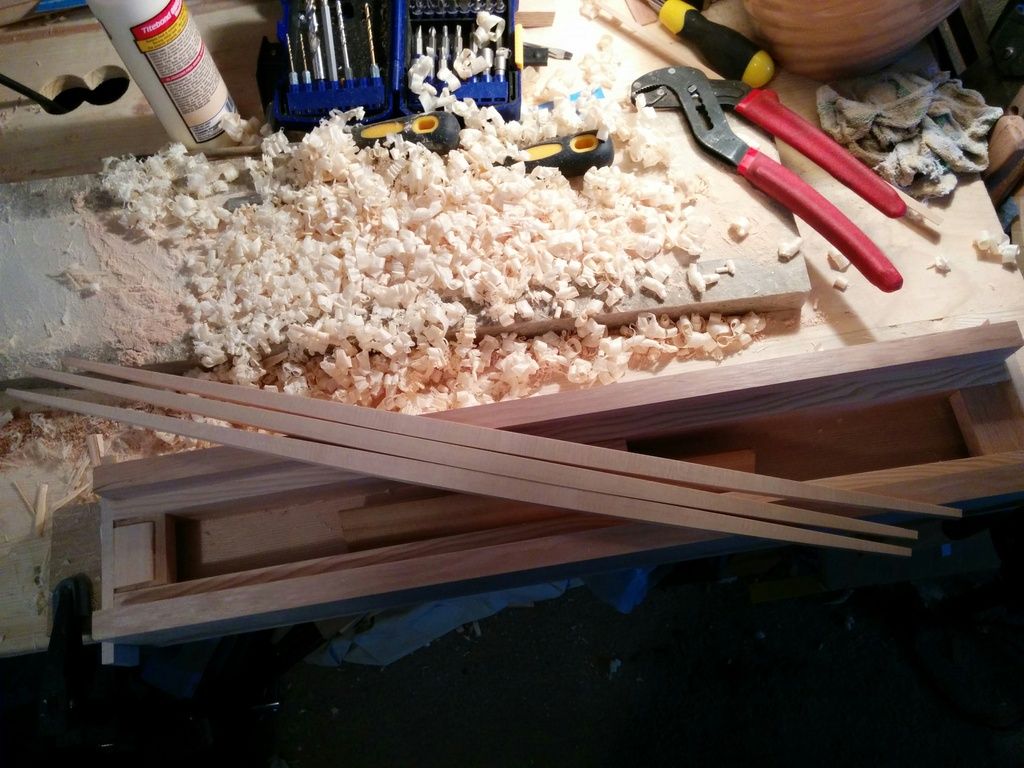 Cutting the back x brace lap joint. 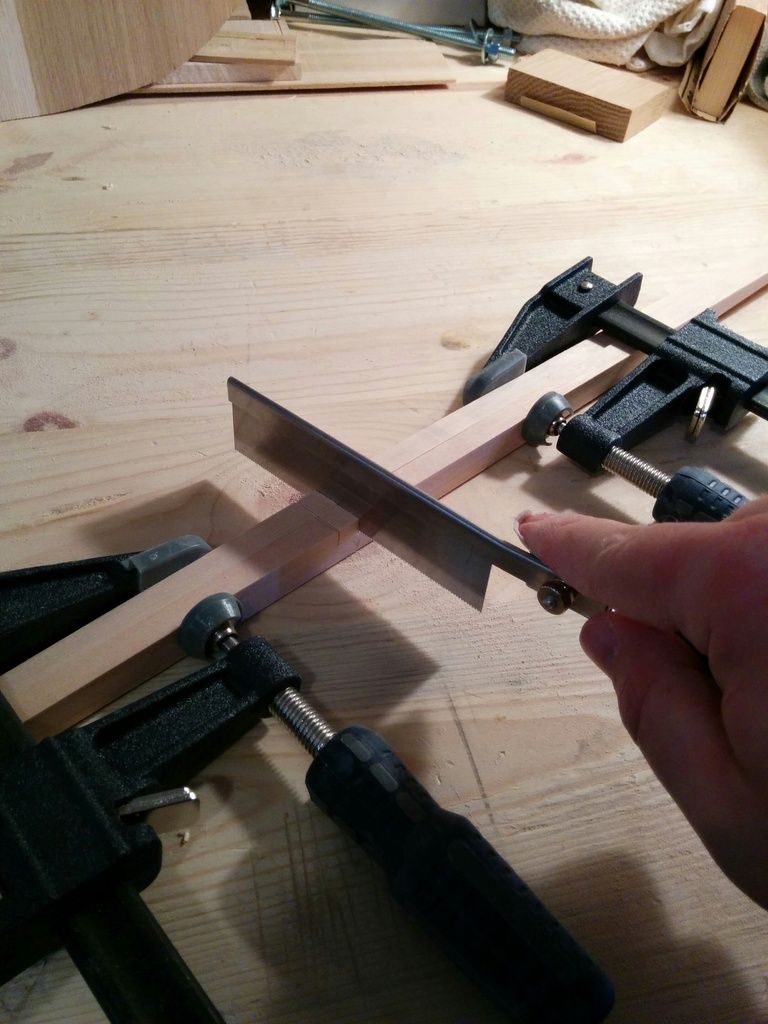 Gluing braces in place. 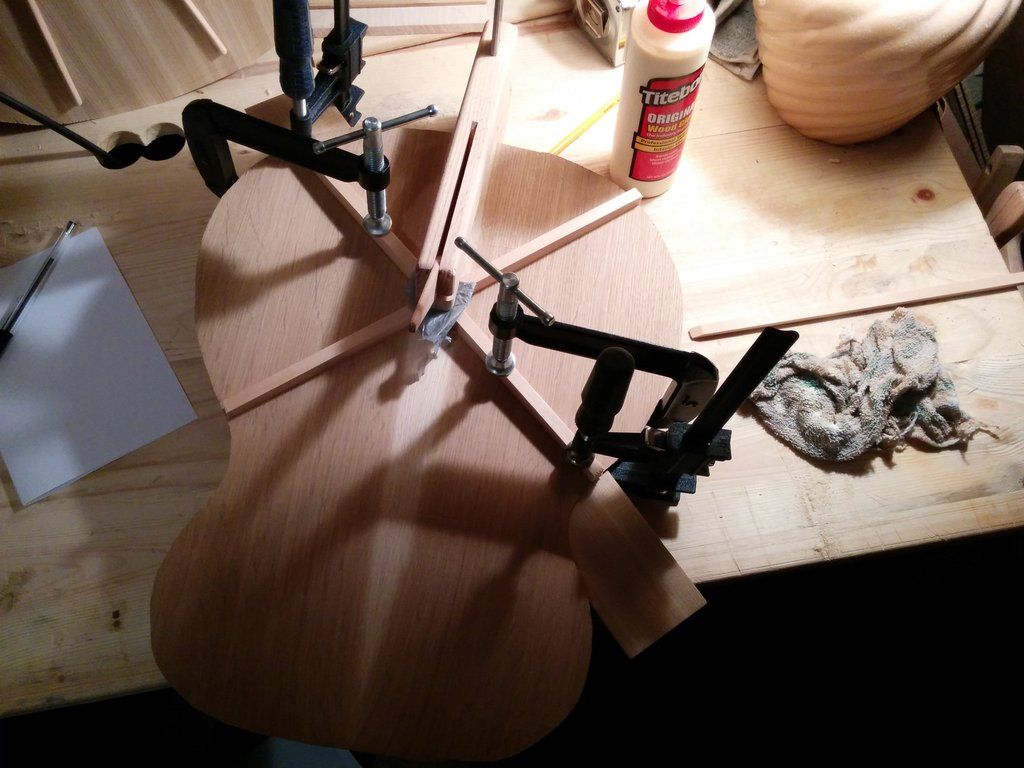 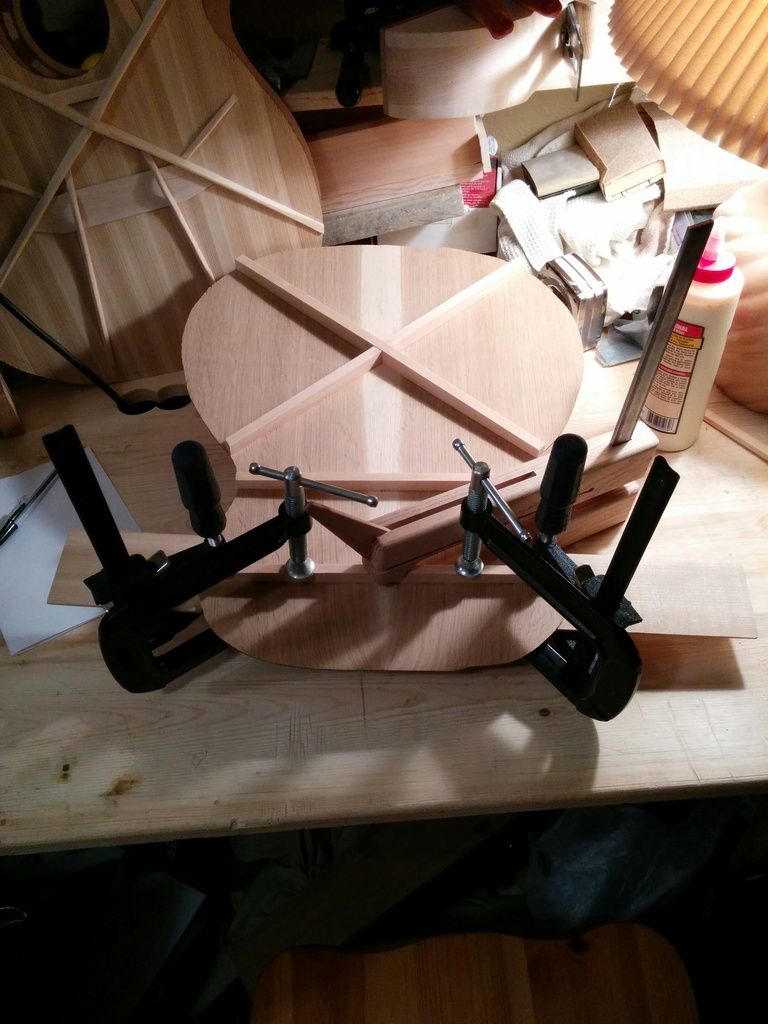 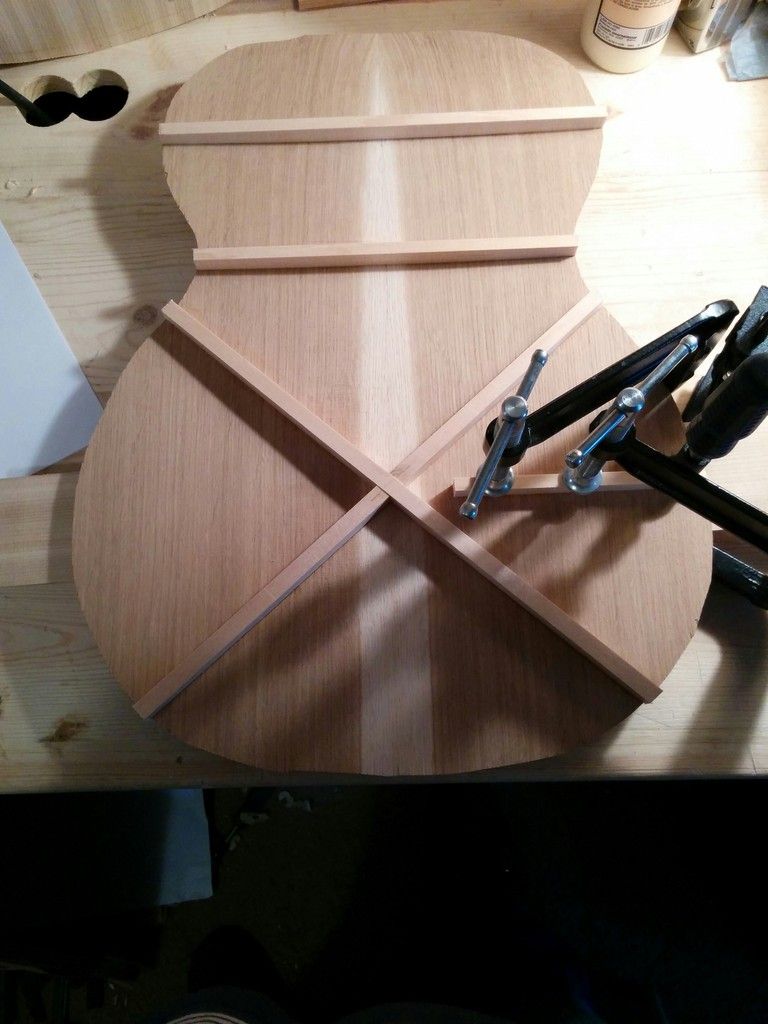 Braces glued. And the center reinforcing strip dry fit into place. 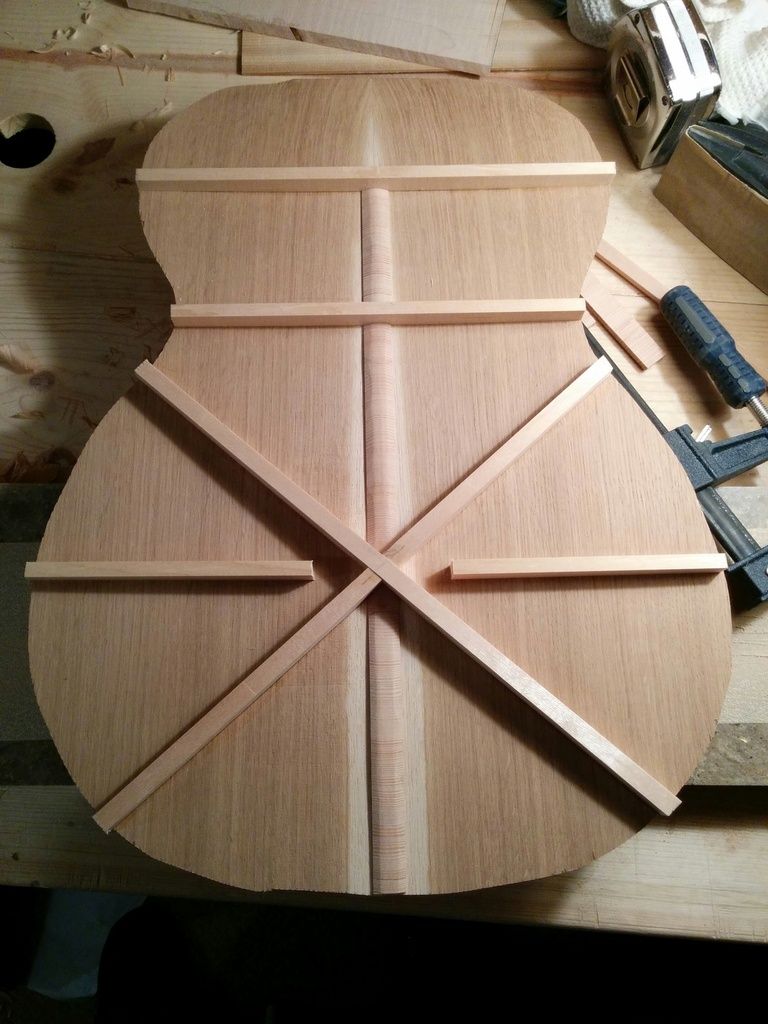 Shaping the braces. 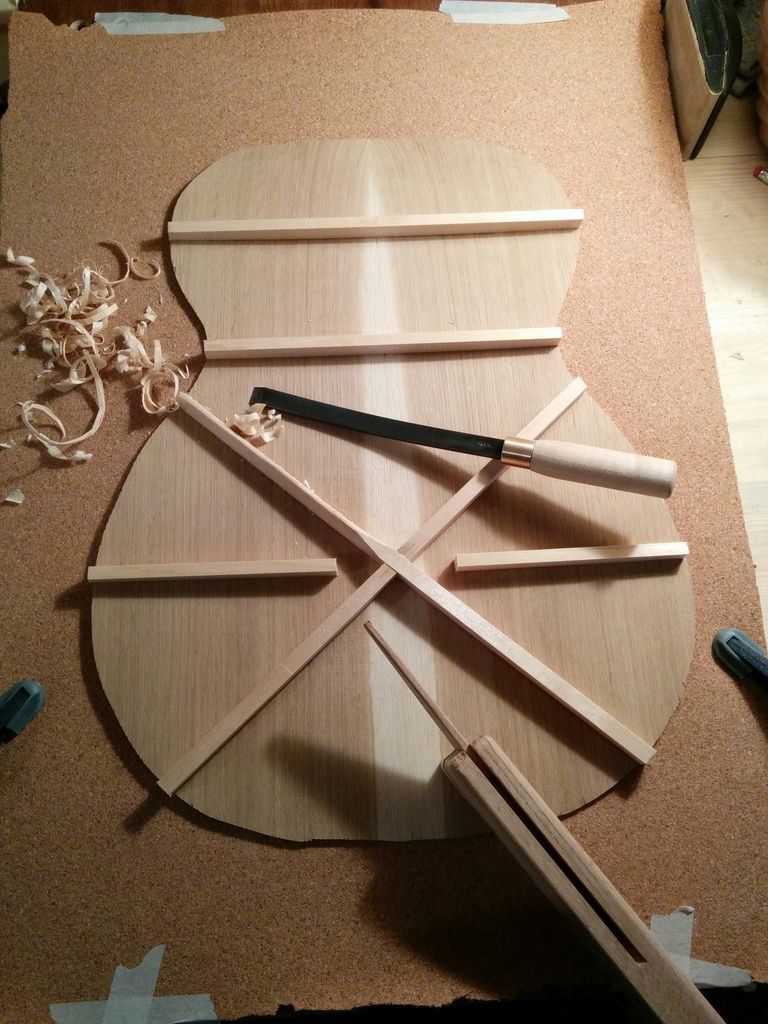 Shavings everywhere. Love the smell of spruce being cut. 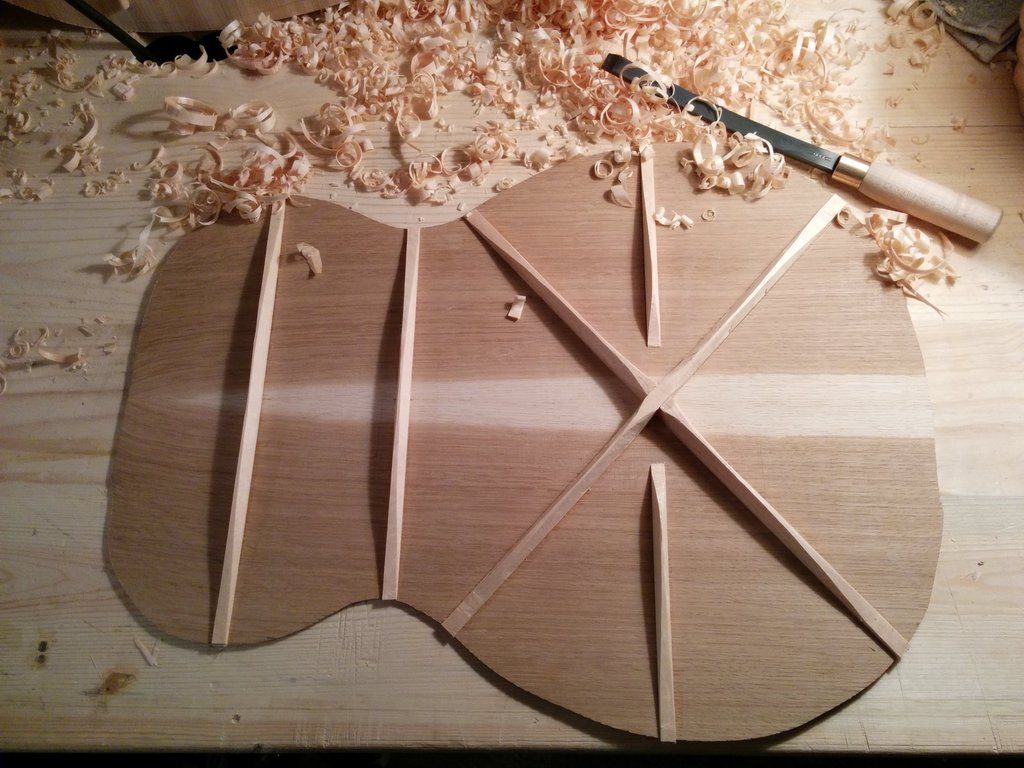 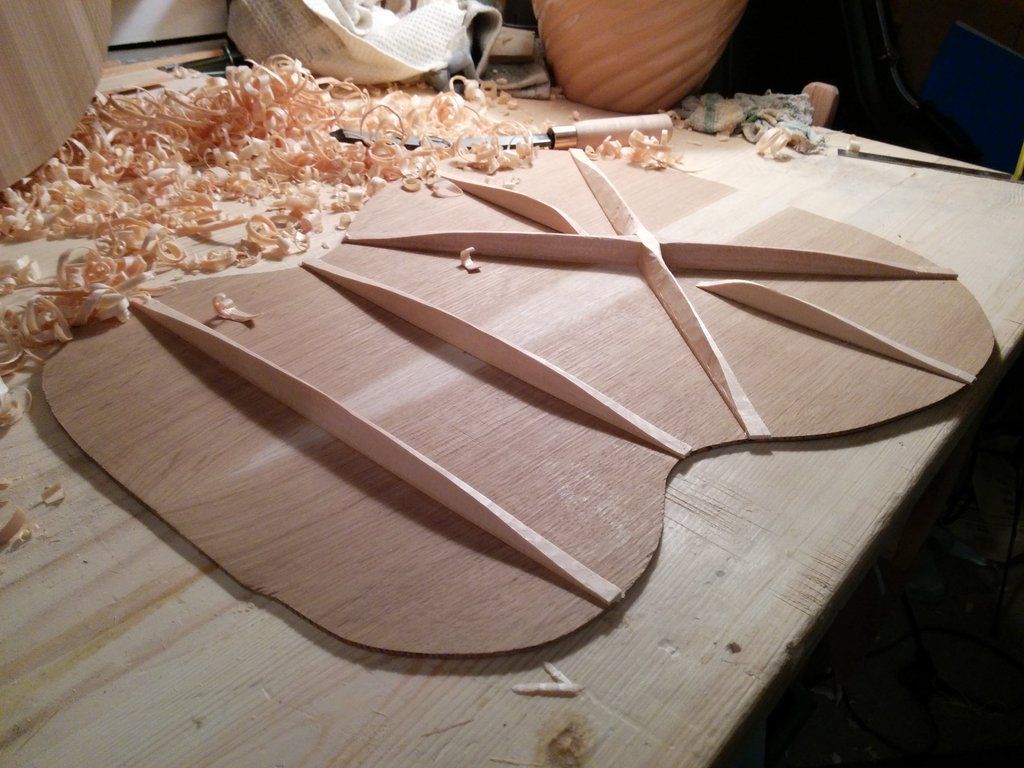 Gluing the x brace patch. 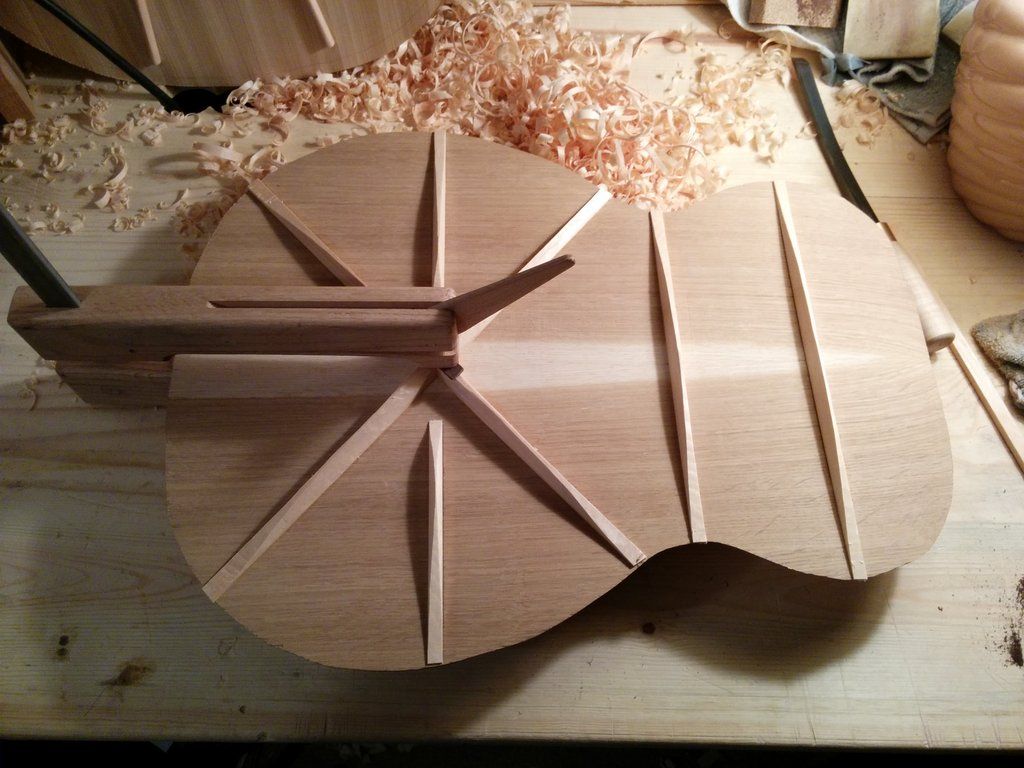 Shaping the patch. I used a small piece of walnut for a nice contrast. 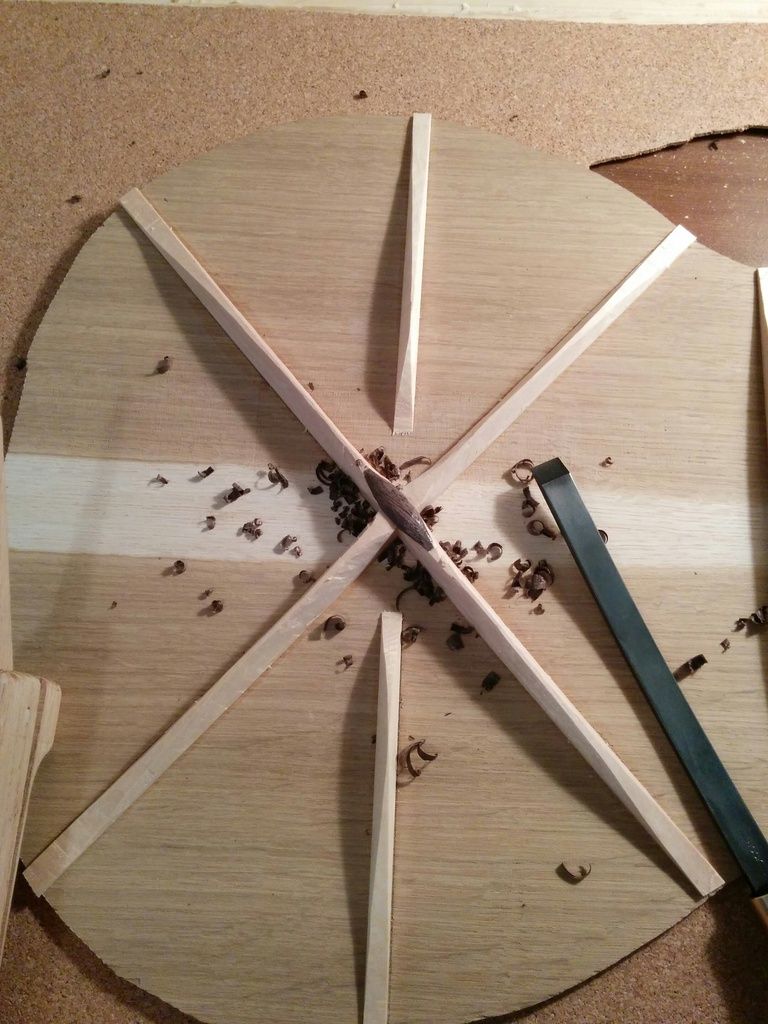 The finished back. Center reinforcing strip glued in place, and all has been sanded. 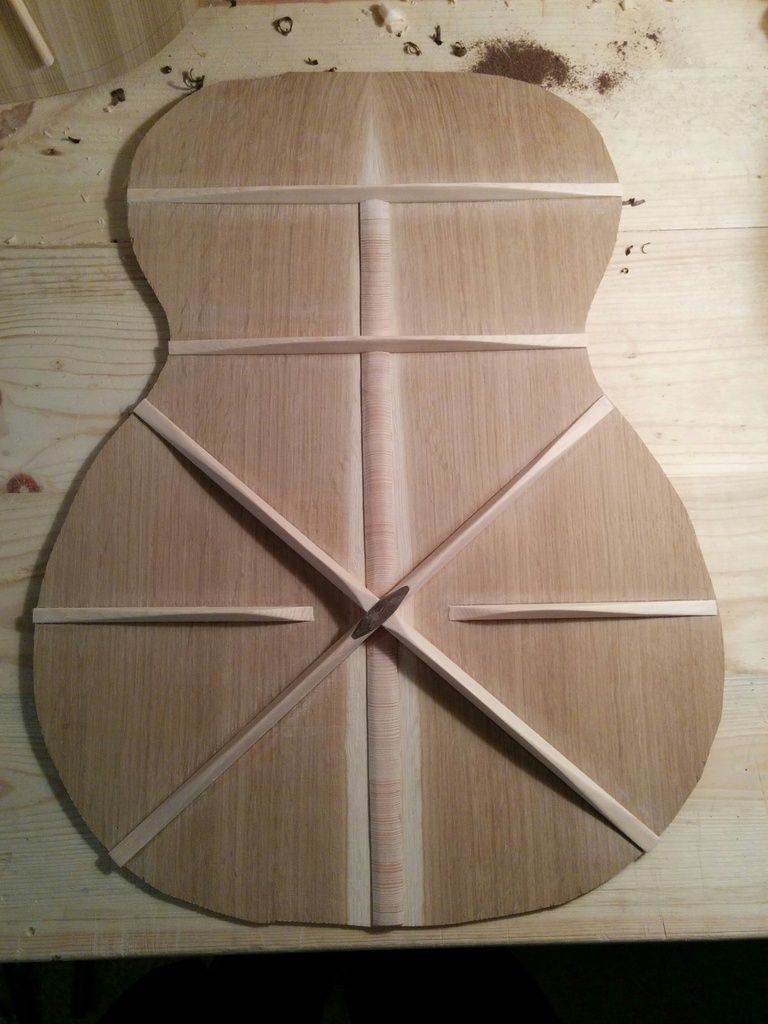  For the side bending machine, I'm going to be building one of these.... http://www.lint.org/index.php/articl...ending-machine
__________________
-- Nick Last edited by Viking; 06-20-2015 at 06:48 PM.
|
|
#187
07-05-2015, 04:46 PM
|
|||
|
|||
|
Finished the side bending machine. Light bulb style. 2 150 watt bulbs and 1 200 watt bulb.
Form building with my newly constructed router table. I built that too since I last posted here. It was handy for several tasks I've had to do over the last couple weeks. 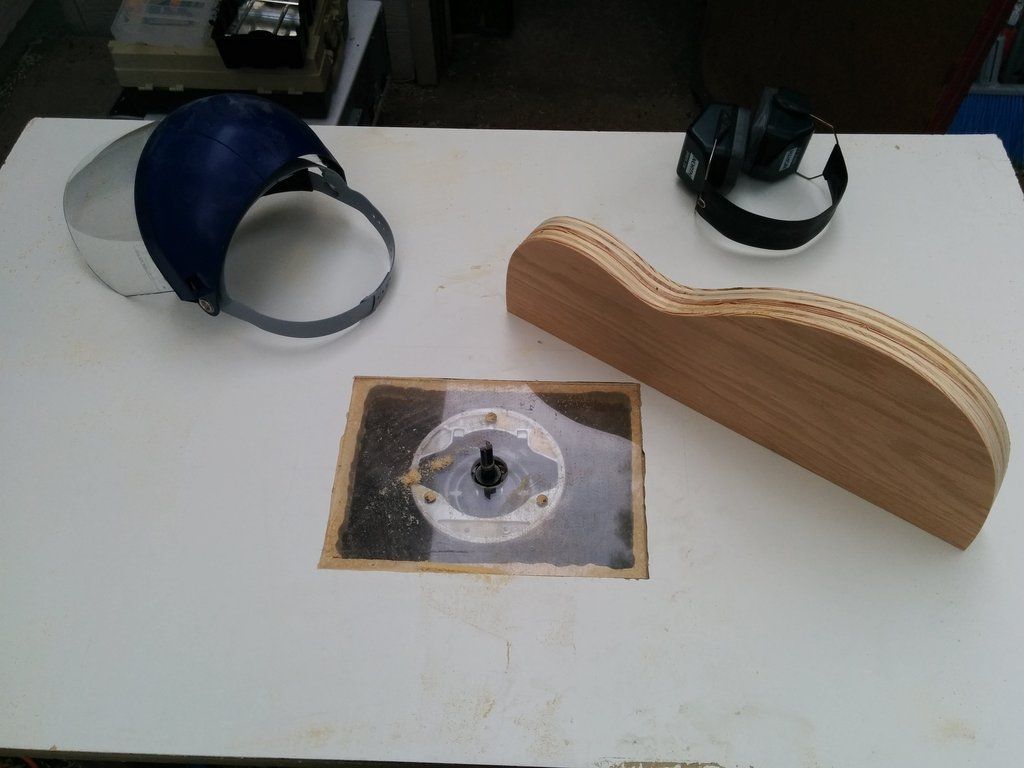 The form with the aluminum bars in place. 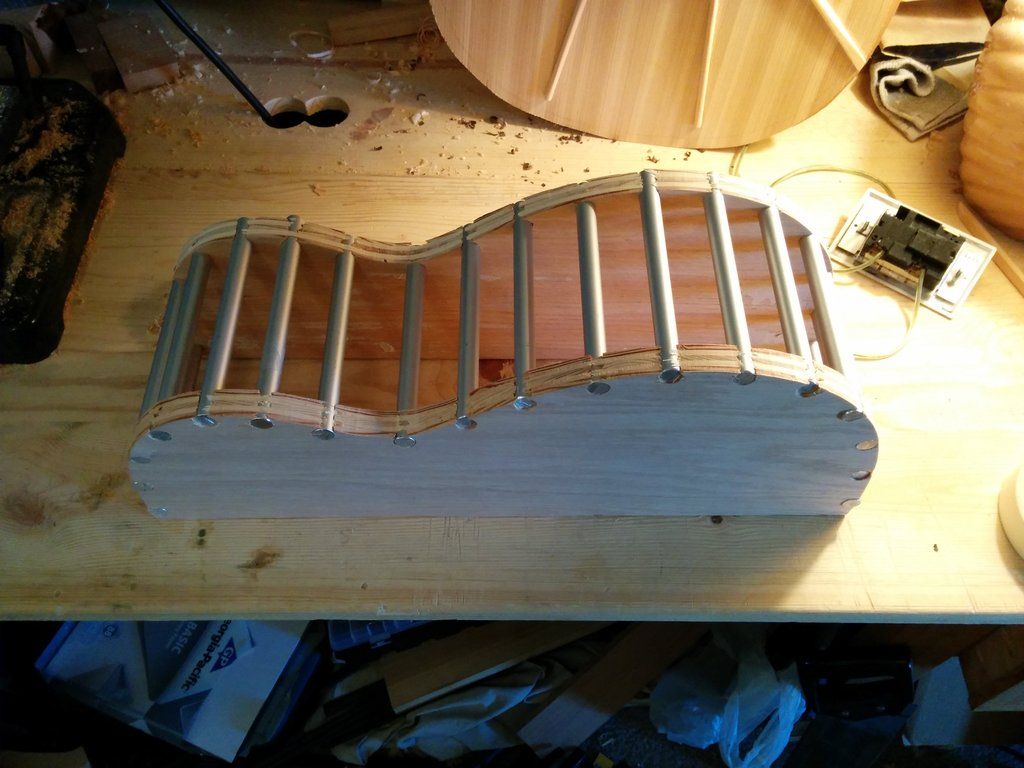 The completed bending machine. 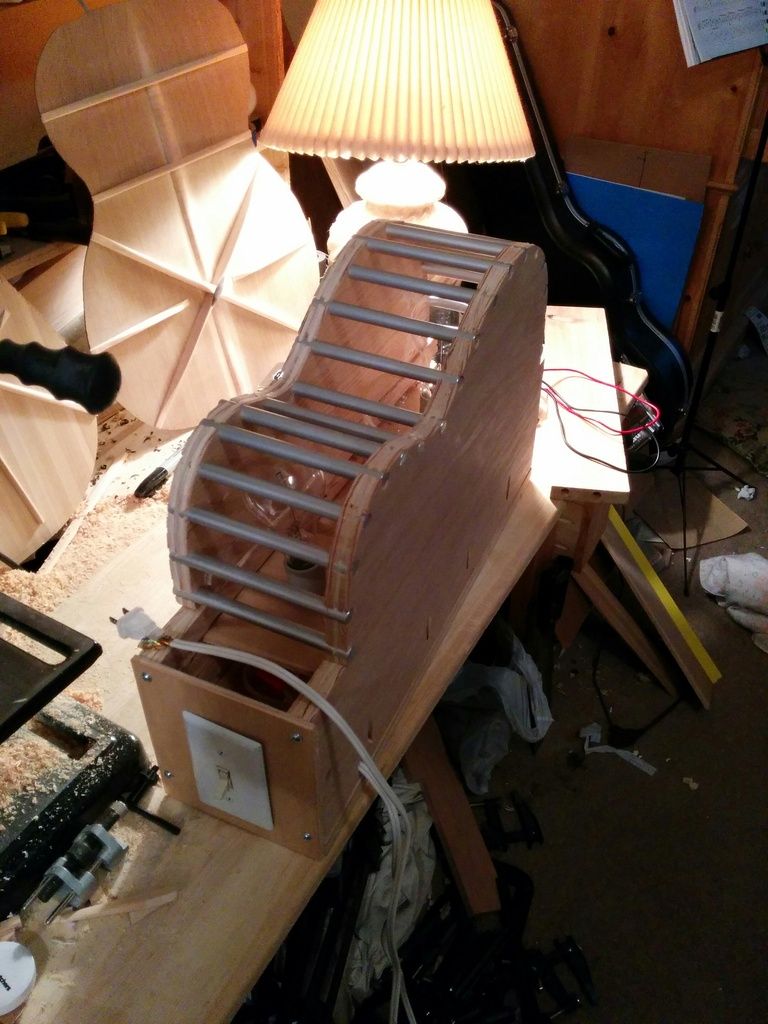 The first side cooling in the machine. Crazy how hot that thing got from just a couple light bulbs. It was hot to the touch through a pair of leather gloves. I had thicknessed the sides to just under .1 inches. 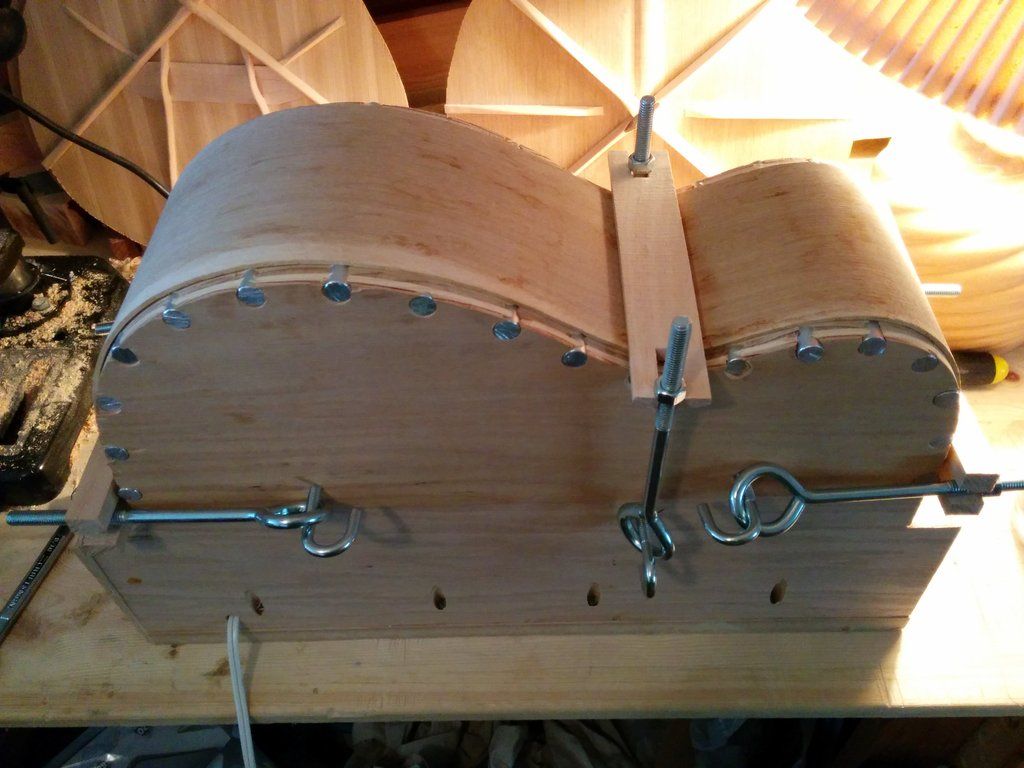 Took a bit longer than I expected, but no matter. Feels like a colossal hurdle has been passed, having successfully bent a piece of wood. Now I just have to thickness and bend the other one. After that, on to building the mold that will be the side's home during block and kerfed lining installation. I'd like to hear some commentary on the way I went about bending the wood. I would spritz a little water on, then wait a couple minutes for it to heat up and begin to evaporate, the steam being what I believe is heating and allowing the wood fibers to relax. Then I would crank down the nuts on the eye bolts a couple turns. Once the wood was dry, I would crank another time or two, and then slightly re-wet. Should I wet the wood multiple times? Or just once at the beginning? This was successful, but I wonder if I used too much water. I suppose it doesn't much matter as long as it worked. Sigh. Dreams are 1 small step closer.
__________________
-- Nick
|
|
#189
07-05-2015, 08:05 PM
|
|||
|
|||
|
Looking solid Viking! Nice work.
Sam
|
|
#190
07-05-2015, 08:16 PM
|
|||
|
|||
|
Quote:
As you may be aware, most benders of this general design sandwich the wood between two metal slats - usually spring steel - rather than have bare wood against the bender. The primary reasons for the slats is to retain heat, support the wood while bending - reducing side cracking in difficult woods - and keep moisture in during the being process. With the wood sandwiched, it is generally inaccessible during the bending so that one can't add water while bending. Instead, the sides are spritzed with water prior to bending, then bent. Most of the benders of this general design also have spring loaded "batons" that are used to actually bend the sides as they are drawn from the waist to the ends of the side, usually in a single, smooth motion. Think rolling pin type motion. With the pre-heated bender, the actual side bending only takes a minute or two. It's then left to "cook" for 15 minutes or so, before turning the bender off to cool. (Or the sides can be removed while still hot and then placed in a form to maintain their shape while they cool.) The half forms between which the 1/2" rods run have the bends in the waist and ends exaggerated a little to decrease spring back. Ideally, the holes in the half forms are drilled so that the circumference of the rods are tangent with the curve of the half form. That prevents kinks in the sides and ensures that the bend follows the desired curvature of the half forms. As you said, none of this much matters if you are satisfied with the result you obtained.
|
|
#191
07-05-2015, 08:35 PM
|
|||
|
|||
|
Quote:
Quote:
 Quote:
I did take the lower bout caul off after the side cooled, and it sprang back pretty good. So I clamped it back up and turned the lights on again to cook it a bit more. Maybe I'll cook it again this evening and then leave it clamped up till morning. See if that convinces it to stay put.
__________________
-- Nick
|
|
#192
07-05-2015, 09:26 PM
|
|||
|
|||
|
Quote:
|
|
#193
07-05-2015, 09:48 PM
|
|||
|
|||
|
Quote:
__________________
-- Nick
|
|
#194
07-05-2015, 10:58 PM
|
|||
|
|||
|
Quote:
|
|
#195
07-06-2015, 05:32 PM
|
|||
|
|||
|
Looking really good Nick,
I spritz my sides with home made super soft... 1/2 water 1/2 fabric softner Especially on figured wood...still not sure if it works better than just water..but I haven't cracked a side since using it...but then I haven't bent that many sides since I started using it.... Oh..and I don't get any static cling on my sides either..... Stu
__________________
I'm not a luthier...luthier's know what they are doing. 
|


 Flexing by hand to feel the stiffness, but not checking often enough.