
|
|
#1
 02-18-2011, 10:31 AM
|
||||
|
||||
|
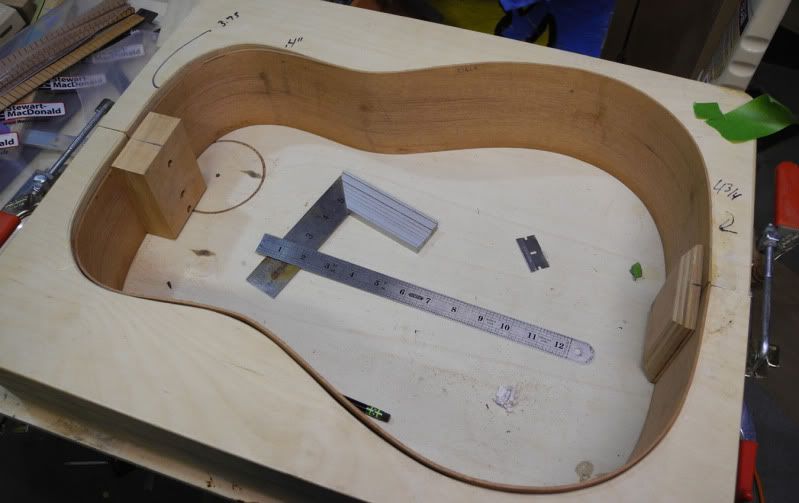
I am kinda confused on Forum categories. So, I will post clean progress photo's of my first client build "The Peach" over in Custom. I'll show you guys the dirty pictures
 and ask my questions here. and ask my questions here.The guitar is a Mahogany/Lutz Dred with a ( I never did before) Venetian Cutaway, and (I never did before) Pickup. So far I have the Headplate art done (see post), the back and top joined. Most of the Rosette done, I still have to drill a gazillion marker holes in it for the theme. I have both sides bent, and today I made the cutaway Form and got the Cutaway bent! Its cooling. I have my fingers crossed. I heard NO cracking! Lots of photo's to follow! If anyone has photo's of how you joined your Venetian Cutaway please post them! What kind of a Pickup to I want? He wants knobs on the upper bout. He plays Blues, Southern Rock, Rock. 
|
|
#2
02-18-2011, 10:45 AM
|
|||
|
|||
|
only have one pic of the clamping......
this one was pretty straight forward as the point was pretty much 90 degrees. pointier points make clamping more complex. 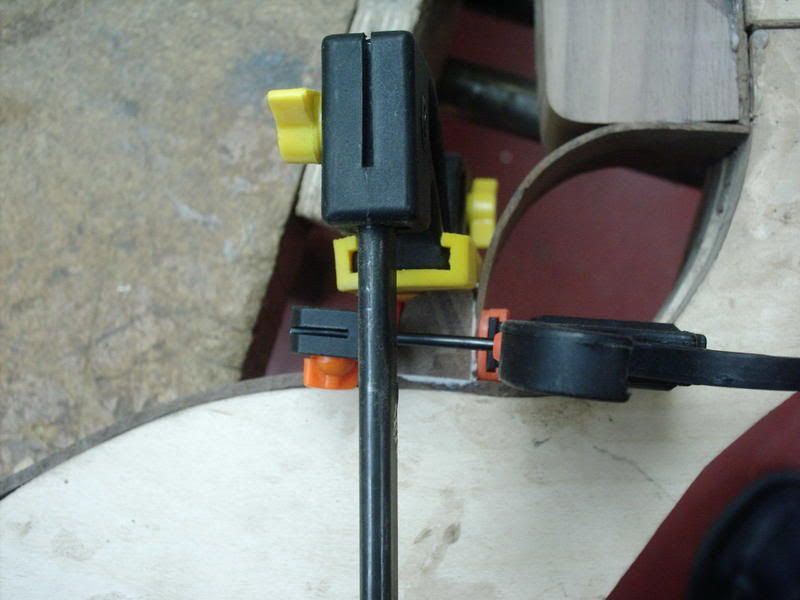 the pointy edge then routed and bound.... 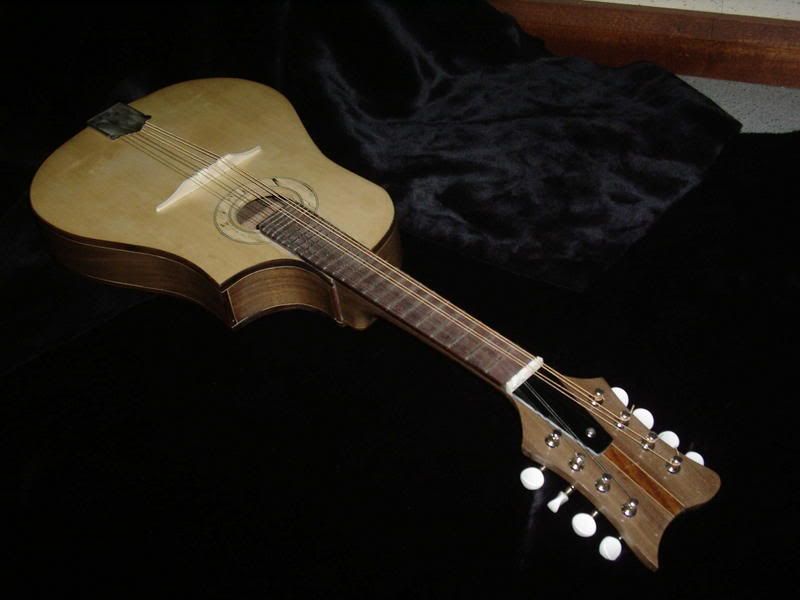
__________________
Quote:
|
|
#3
02-18-2011, 01:59 PM
|
||||
|
||||
|
Is that a Mandochello? Thanks for the pictures
|
|
#4
02-19-2011, 01:01 AM
|
|||
|
|||
|
nope, mandolin. wider than usual nut, but regular scale length.
__________________
Quote:
|
|
#5
02-19-2011, 04:40 AM
|
||||
|
||||
 Productive day yesterday. First I made my cutaway form out of an old Dresser drawer. It worked well but I had to start the bend with a wood scrap so I could fit the center press in place 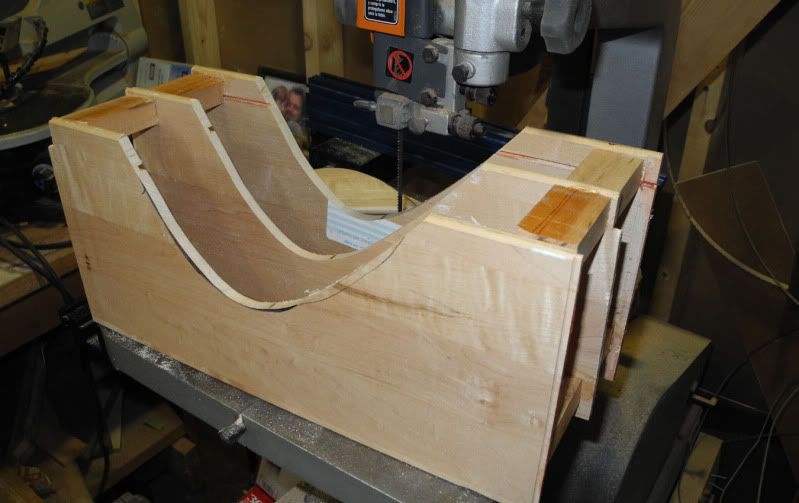   Resting peacefully after surgery 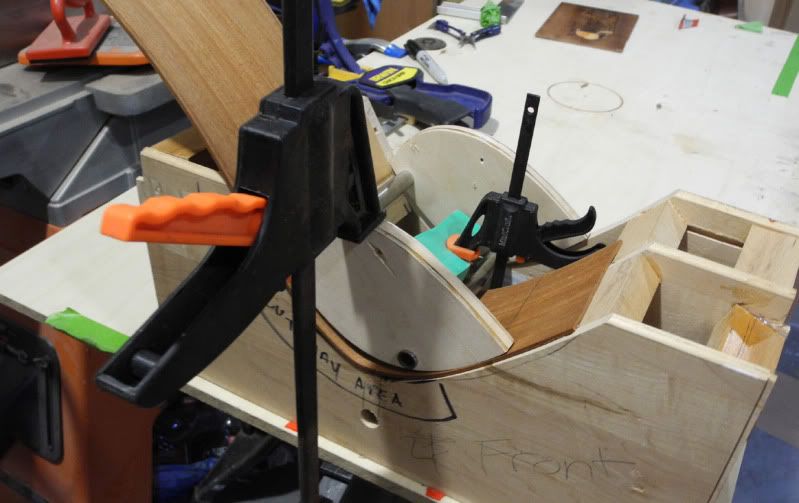 Then I installed the base and neck block 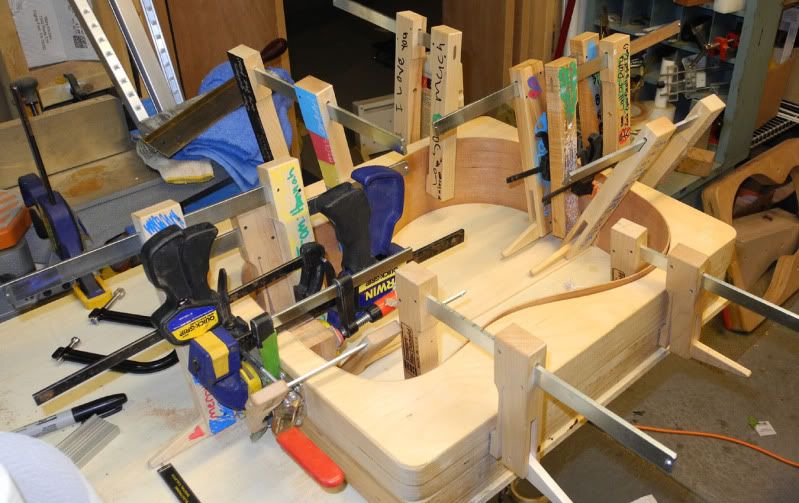 Onto sizing, cutting and installing the skunk stripe  I am eyeing up this 100 year old door piece for the end jack and strap hook up 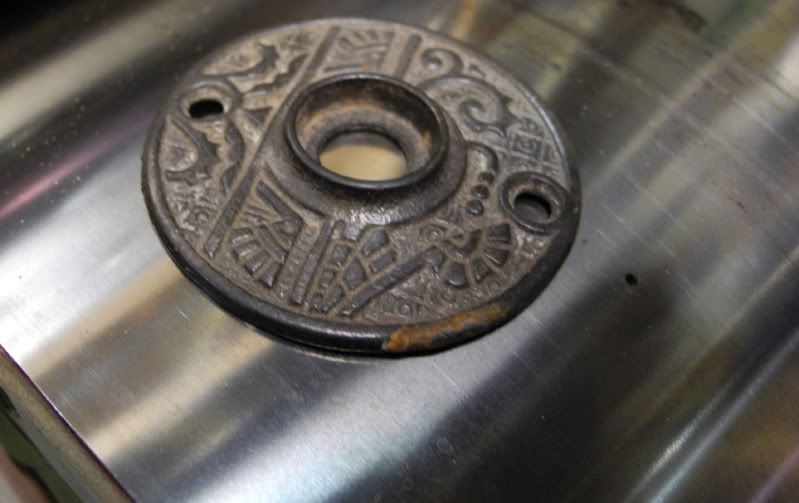 Today I will install the cutaway!
|
|
#6
02-19-2011, 08:17 AM
|
|||
|
|||
|
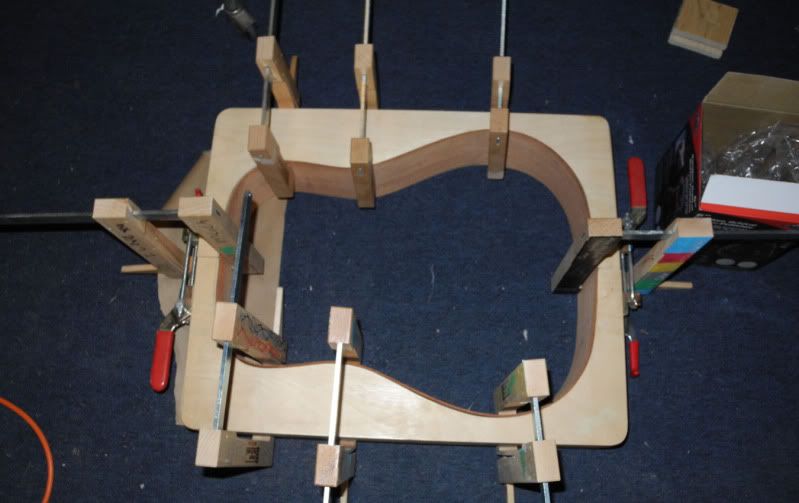
Nice work. Cam clamps instead of spreaders in the mold. Very efficient.
 I'd have weight issues with that vintage plate though.
__________________
(2006) Larrivee OM-03R, (2009) Martin D-16GT, (1998) Fender Am Std Ash Stratocaster, (2013) McKnight McUke, (1989) Kramer Striker ST600, a couple of DIY builds (2013, 2023)
|
|
#8
02-19-2011, 11:55 AM
|
|||
|
|||
|
Quote:
John doesn't have to answer to anybody here though, but I just gotta know: is that thing cast iron? How about an old copper collar as an alternative?
__________________
(2006) Larrivee OM-03R, (2009) Martin D-16GT, (1998) Fender Am Std Ash Stratocaster, (2013) McKnight McUke, (1989) Kramer Striker ST600, a couple of DIY builds (2013, 2023)
|
|
#9
02-20-2011, 02:46 AM
|
|||
|
|||
|
Quote:
I HAVE a pair of turnbucke spreaders that have sat in a drawer since my first build.
__________________
Quote:
|
|
#10
02-20-2011, 03:47 AM
|
||||
|
||||
|
Ya, the only reason I did that was you had the spreaders tied up. You know? I like the clamps better. I don't know if you guys noticed. A dozen of my clamps were decorated as Christmas gifts from my kids
|
|
#11
02-20-2011, 07:56 AM
|
||||
|
||||
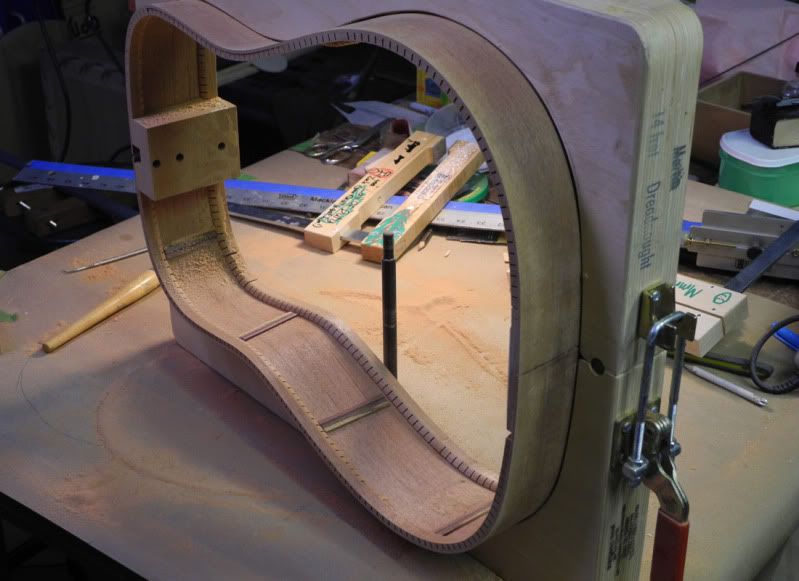
 Today I sanded the skunk stripe. I put 3 layers of tape on the inner side. Then pinned the back down to give it a slight arch. I sanded gently with 220. 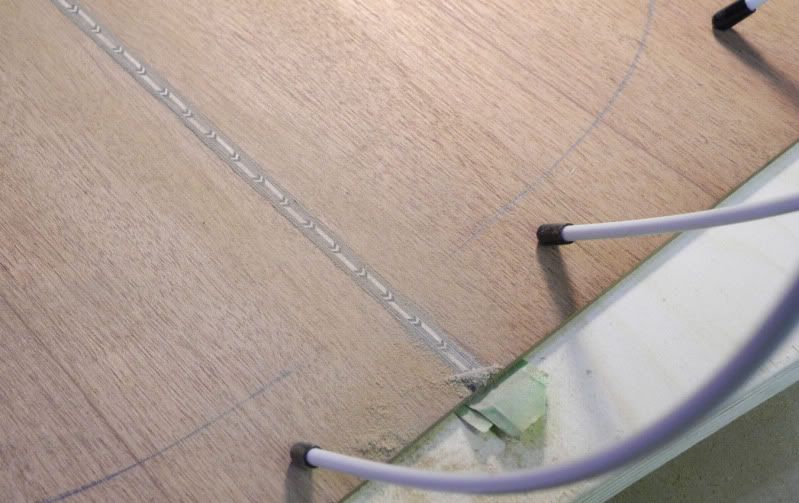 Careful not to rip it out. Then I cleaned it up with Naphtha in single sweeps to keep the whites white. Then a few coats of 1 lb shellac. 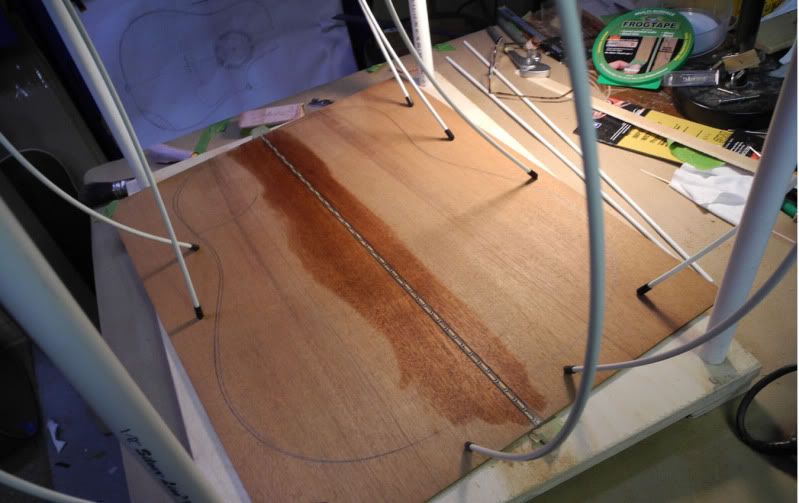 I discovered one of the Fishes sound secrets. The butt is 5" deep! Upper is 3 3/4". I Can only go 4 3/4" on this one I have to add to the block plate. No problem I have a plan.  I got the back Kerfing in. I figure I will shape in the cutaway after the Kerfing for strength.  I then cut down the back to rough shape. Flipped her over. Cleaned the Inner back surface. I ran the inner back-strip down 400 grit Sand paper 2 times just to beat the burrs. 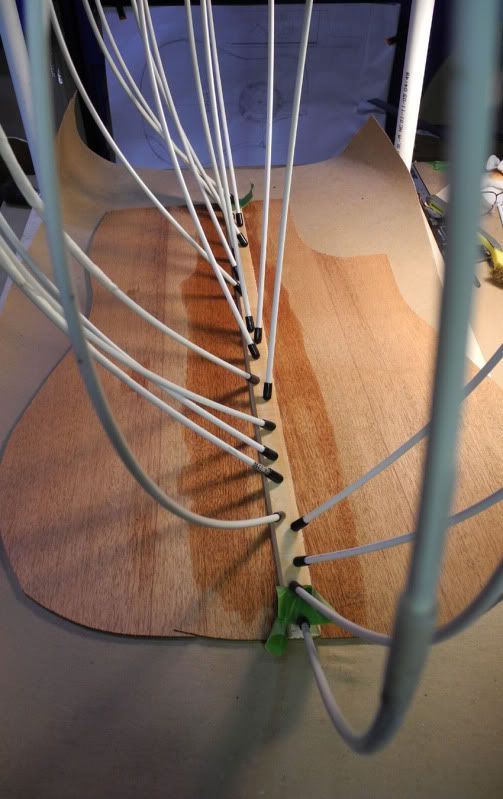 After clamping down I dealt with the squeeze out for 20 minutes. Thats great, it means fantastic contact. Not bad for before 9:30am! Last edited by Kitchen Guitars; 02-20-2011 at 08:05 AM. Reason: Added photo's
|
|
#12
02-20-2011, 11:46 AM
|
|||
|
|||
|
Great work. You're an inspiration! No blood on this one yet?
 BTW, IIRC I'm only using the spreader for your end blocks. The other 3 are mine.
__________________
(2006) Larrivee OM-03R, (2009) Martin D-16GT, (1998) Fender Am Std Ash Stratocaster, (2013) McKnight McUke, (1989) Kramer Striker ST600, a couple of DIY builds (2013, 2023)
|
|
#13
02-21-2011, 06:41 AM
|
||||
|
||||
|
My thumb has almost a regular finger nail again! It would be nice to build one without spilling DNA. I did glue my shoe to the floor once.
Last night both Neil and I got quite a bit done on our guitars. I got in the rest of the Kerfing. The backstrips ding easy- note to self; cover with a strip of wood prior to pressure. It sanded out fine. All of the back braces are radiused and in. Today I will put on the top braces. I keep finding things that need done prior to doing the cutaway, but today may be the day. Looks like I might start on the fretboard today also.
|
|
#14
02-22-2011, 05:19 AM
|
||||
|
||||
|
Nothing screws up a workshop more than plaining Braces! Man its fun though! I have the back braces in, shaved and sanded! I spent an hour putting away tools and cleaning up.
QUESTION; Do you guys radius sand your sides then put in the Kerfing or do you put in the Kerfing, then sand down? I did the later the last 2 builds. This one I had about 5" of 1/4" low Kerfing. I popped it out like bad teeth and put in a new row. I also knocked out the teeth in the Cutaway area. I'll make the top braces. But, I have to hold up putting them on. I am waiting for dots to ship so I can finish the Rosette theme. Also on my list today is to graft more wood onto my headplate to make room for the headplate art. The internet on my computer puked. So, images are forthcoming.
|
|
#15
02-22-2011, 10:03 AM
|
||||
|
||||
 The back braces being radiused; 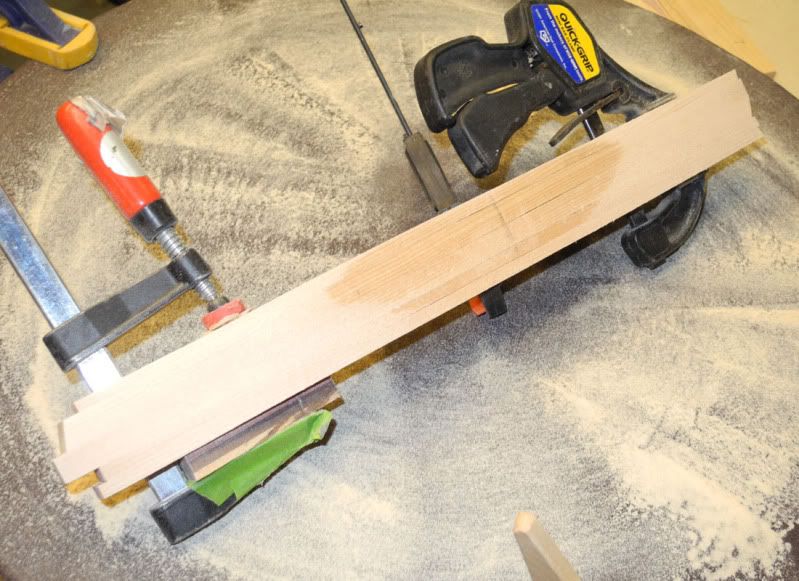 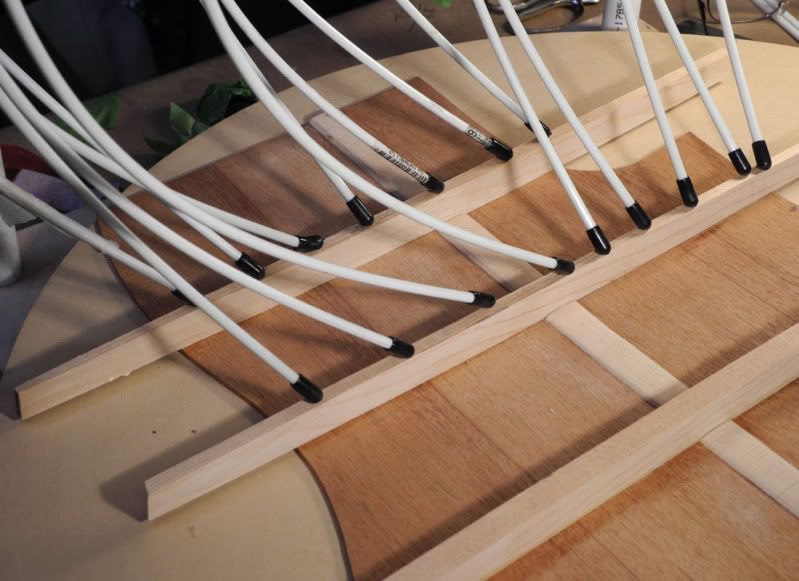 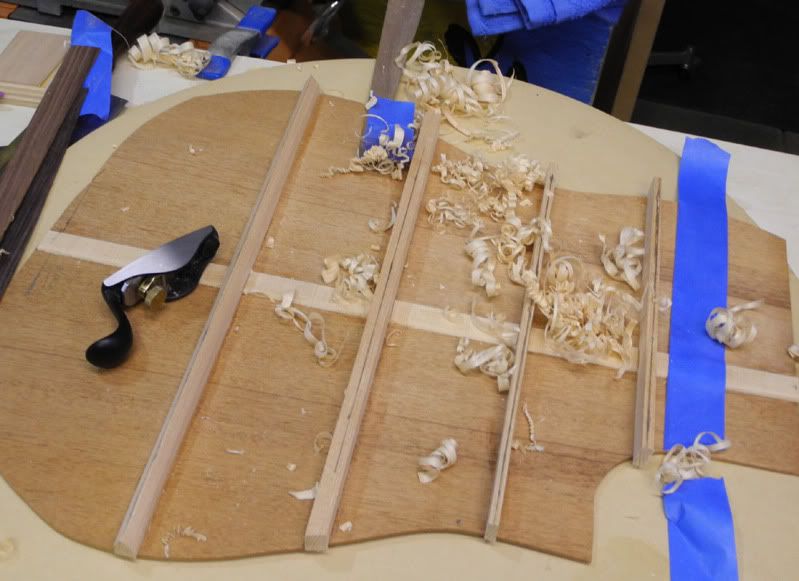 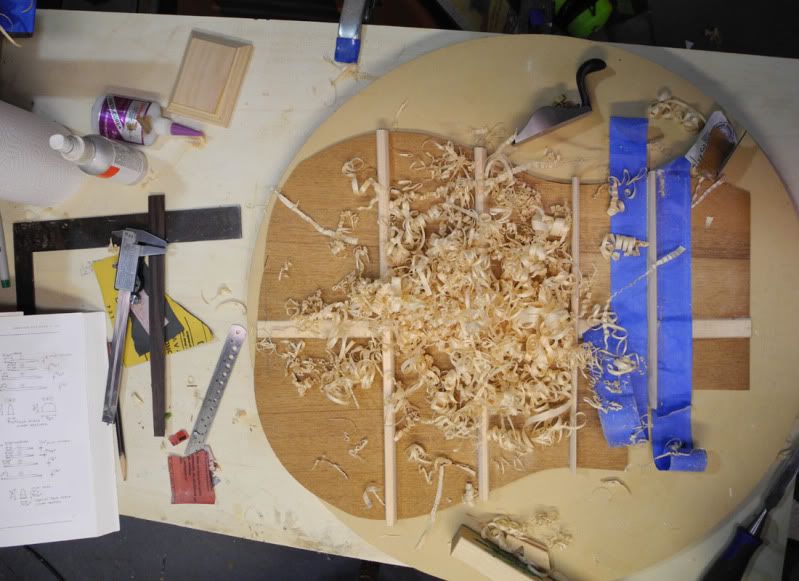 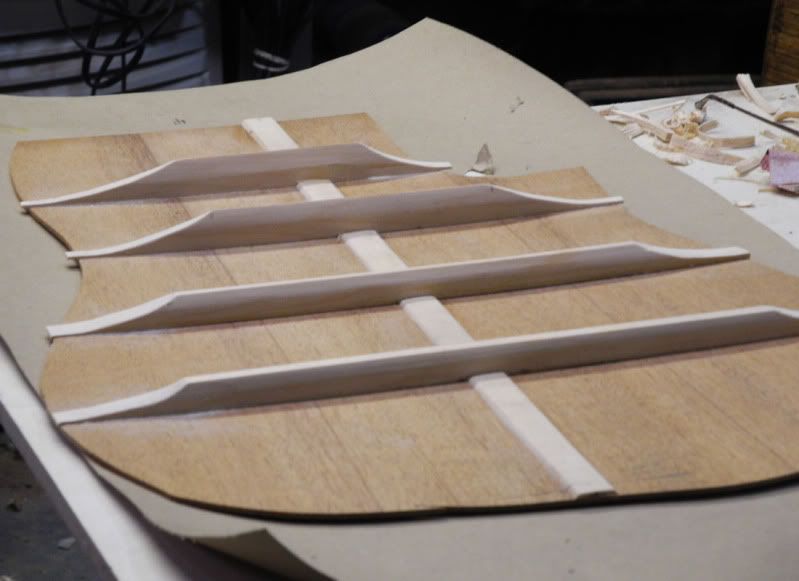 The Cutaway 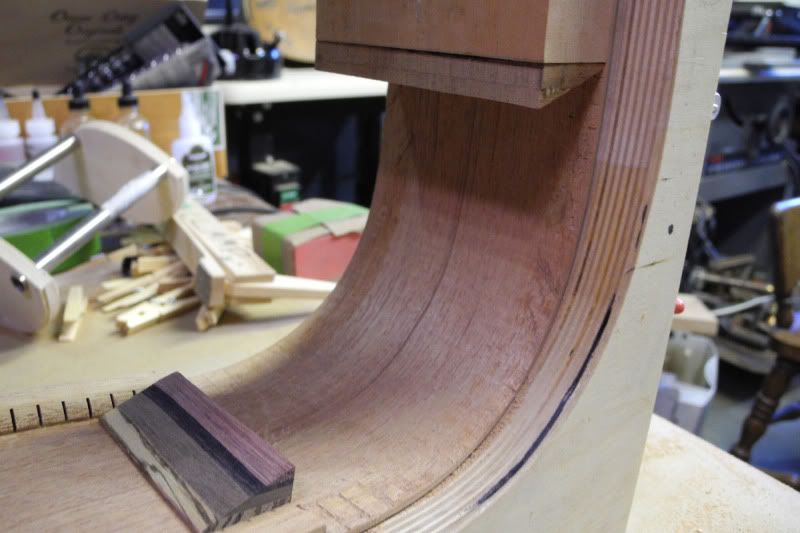 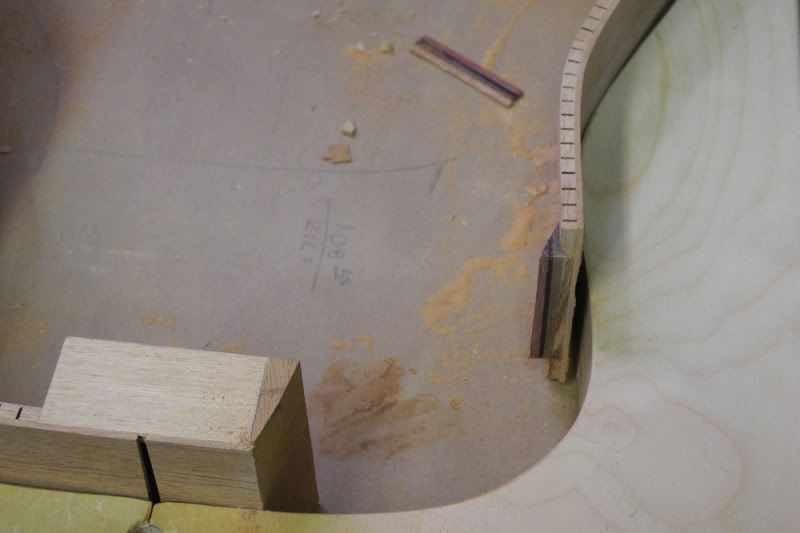 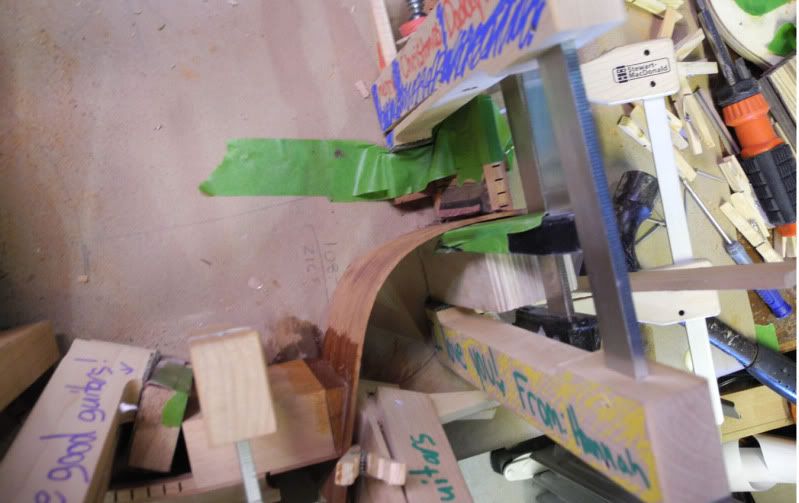 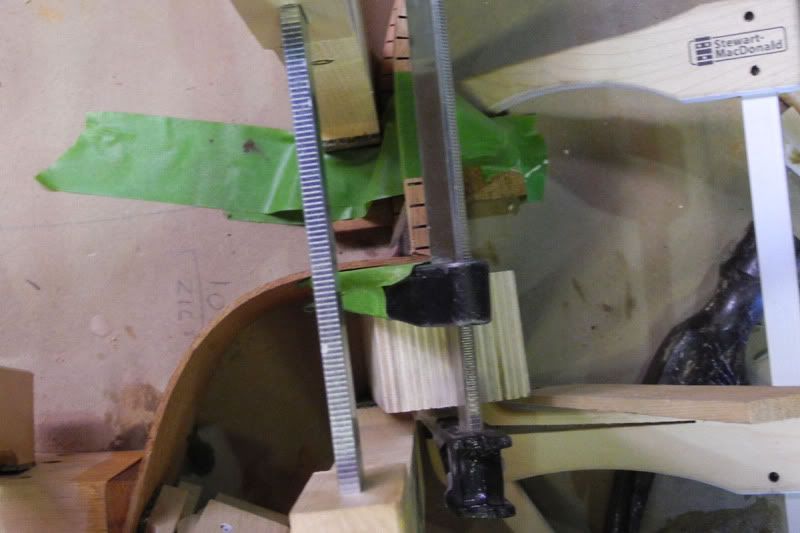
Last edited by Kitchen Guitars; 02-22-2011 at 10:08 AM.
|


