|
|
#16
 11-19-2014, 07:00 AM
|
|||
|
|||
|
Stuart,
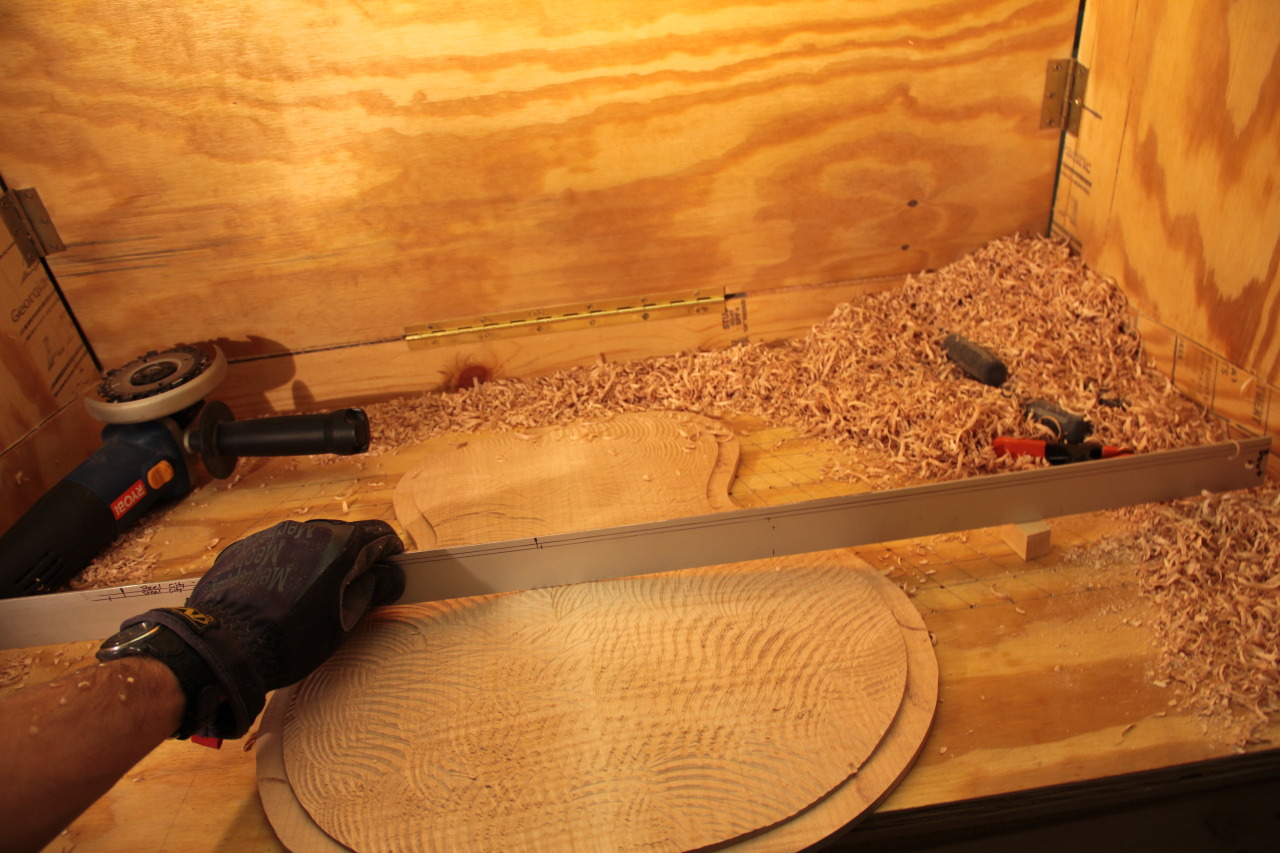
Looking good - can't wait to see these in Memphis! What's up with the trapezoidal 'grid' of holes in your workboard? Inquiring minds want to know... Cheers, Martin 
|
|
#17
11-19-2014, 08:26 AM
|
|||
|
|||
|
Awesome, Stu! Very excited to see you on the forum and this arch top build! Looking forward to seeing you again in Memphis, buddy!
Brad
__________________
Brad
|
|
#18
11-19-2014, 09:23 PM
|
|||
|
|||
|
Quote:
|
|
#19
11-19-2014, 09:25 PM
|
|||
|
|||
|
Quote:
Quote:
|
|
#20
11-26-2014, 05:56 PM
|
|||
|
|||
|
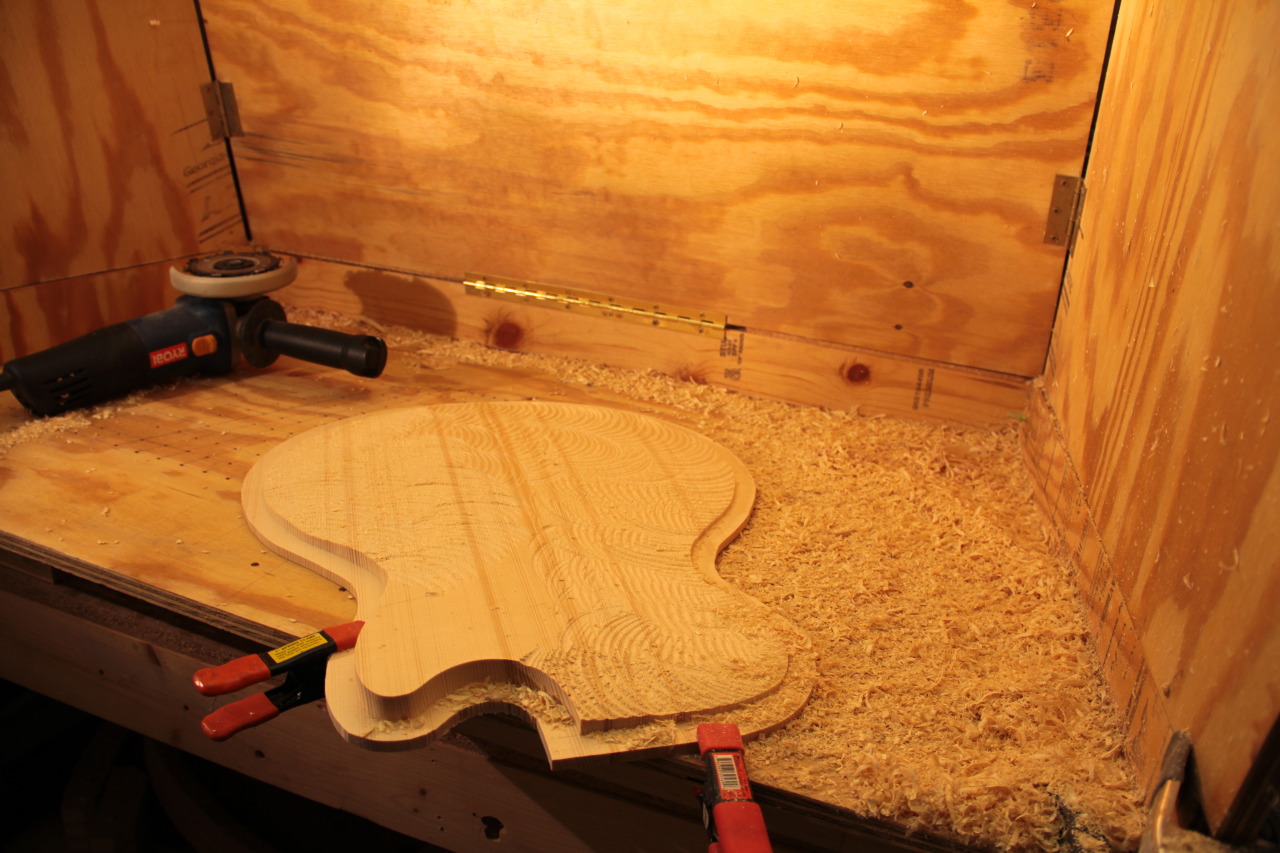
Must be fairly cathartic to go after your top with a chainsaw grinder, I should try it!
...on second thought, that might backfire for a flat-top  Really nice work man, looking forward to seeing it take shape!
__________________
Good, fast, cheap. Choose any two.
|
|
#21
11-28-2014, 12:07 PM
|
|||
|
|||
|
Quote:
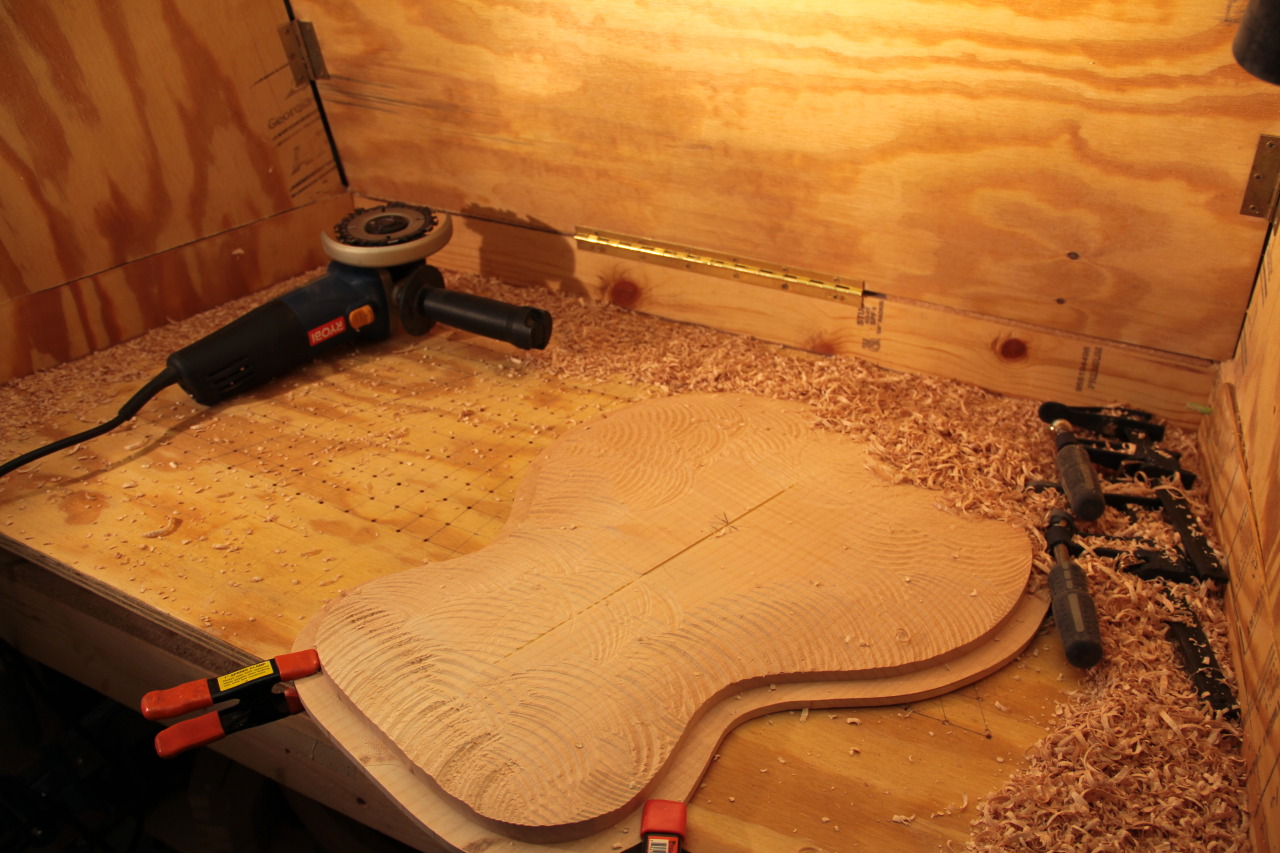
Stuart, I got reamed at the MIMF for using a modified circular saw blade on my angle grinder (which I also modified with speed control.) I do have a "Lancelot" wheel as well and they do great at hogging material. I do understand their view that there may be some youngsters out there that think this is a great idea. I'm a big fan of Sam Maloof, and the stuff he free-form cut on the band saw was ridiculous! I did develop a jig that works great with a router and is a little bit less scary to use: [IMG]  [/IMG] [/IMG][IMG]  [/IMG] [/IMG][IMG]  [/IMG] [/IMG]Trying to figure out what the hole configuration on the carving pics are for?!
|
|
#22
11-29-2014, 06:19 PM
|
|||
|
|||
|
absolutely gorgeous! love the headstock inlay. When is the memphis show?
Greg
__________________
G. F. Chastine Rhythm Guitarist Worship Leader Accumulator (have way too many) Master Mason I am idealist. I don't know where I'm going, but I'm on my way. Carl Sandburg, Incidentals (1907) "God- grant me the fortitude to keep from purchasing another guitar" -- Anon, 2015
|
|
#23
11-29-2014, 06:47 PM
|
||||
|
||||
|
Quote:
|
|
#24
12-08-2014, 05:21 PM
|
|||
|
|||
|
So, I know I promised to continue with the carving. But I got sidetracked with a neck injury. Wasn't feeling up to carving for the last 2 weeks. So I continued on the rims. Here are a few pictures of the rims together, kerfed and with side stiffeners.
I'll most likely get back to carving towards the end of this week. Cheers Here is the inner and outer layer of the cutaway side for the thinline guitar 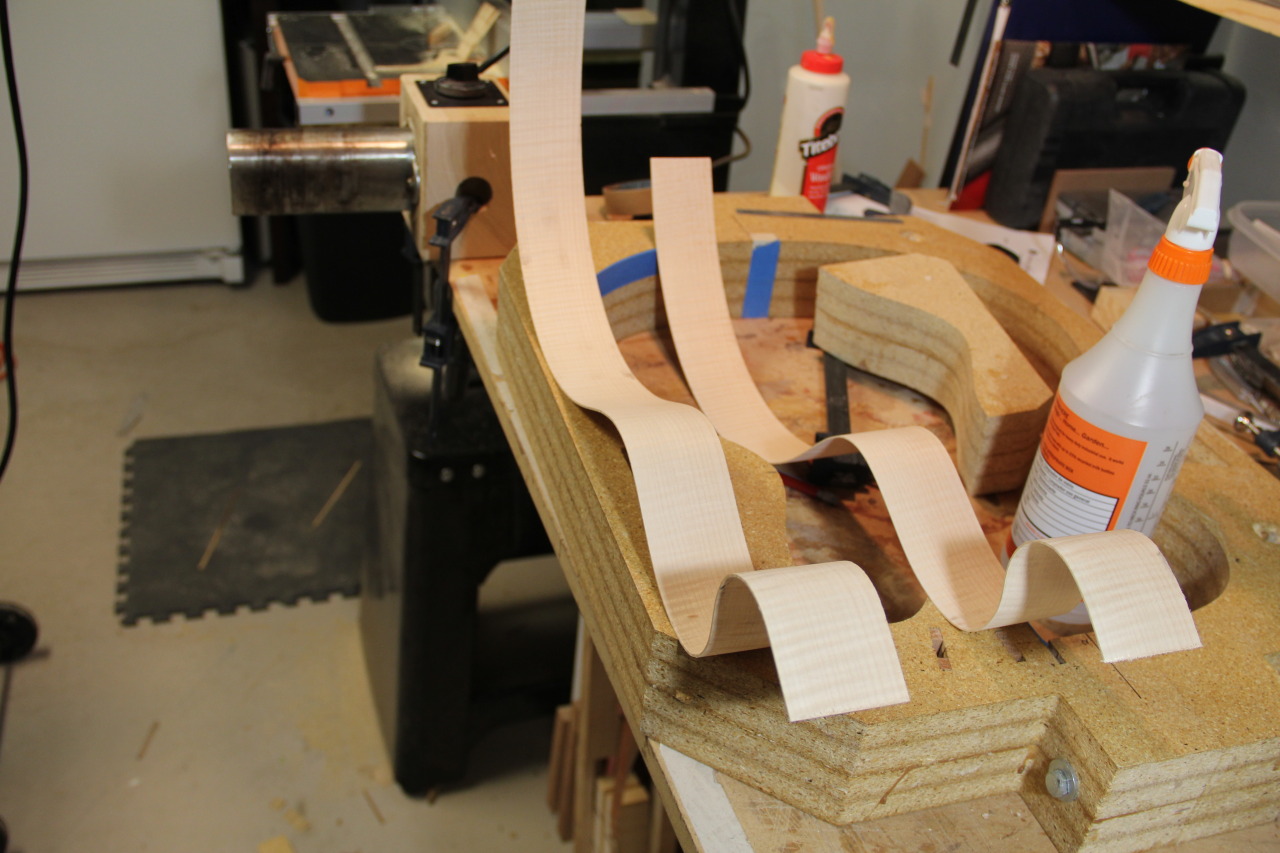 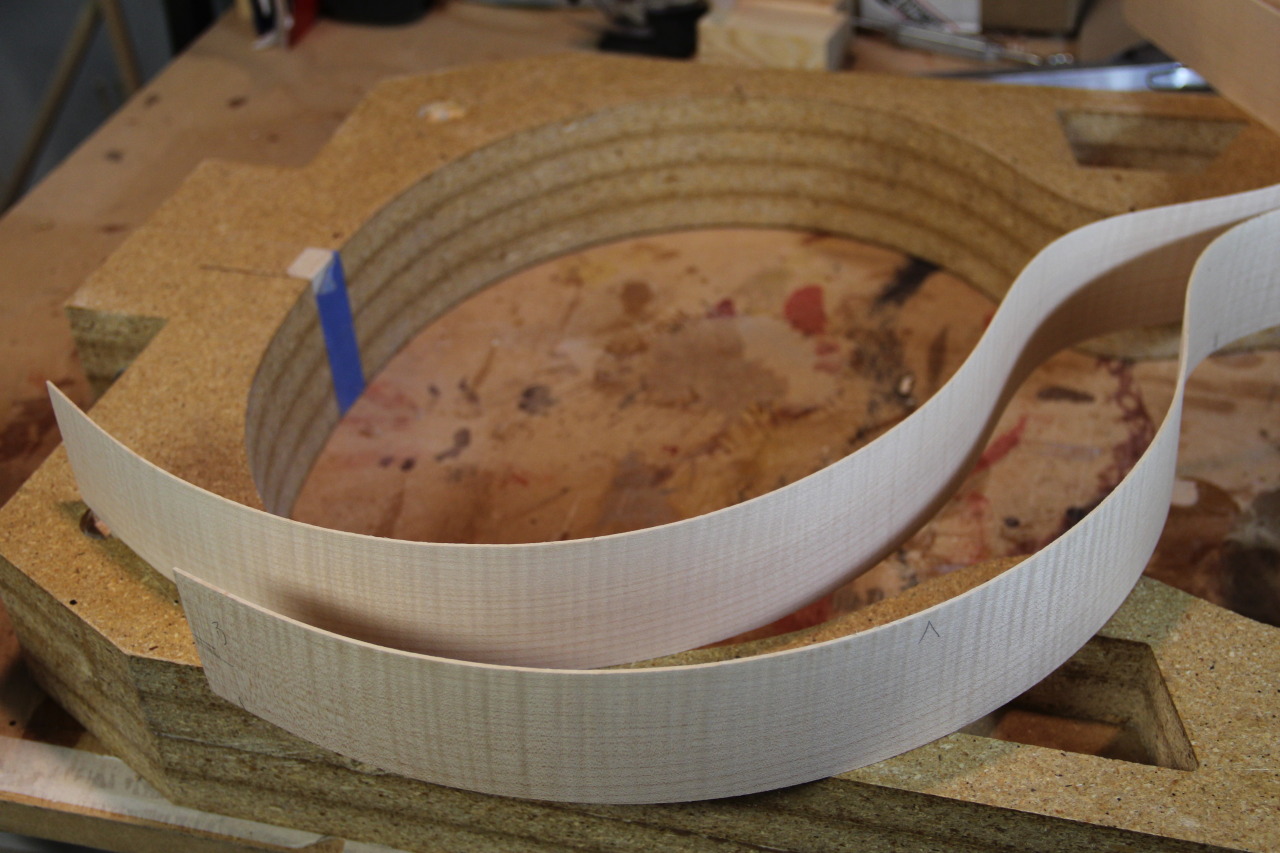 Thinline rim taking shape 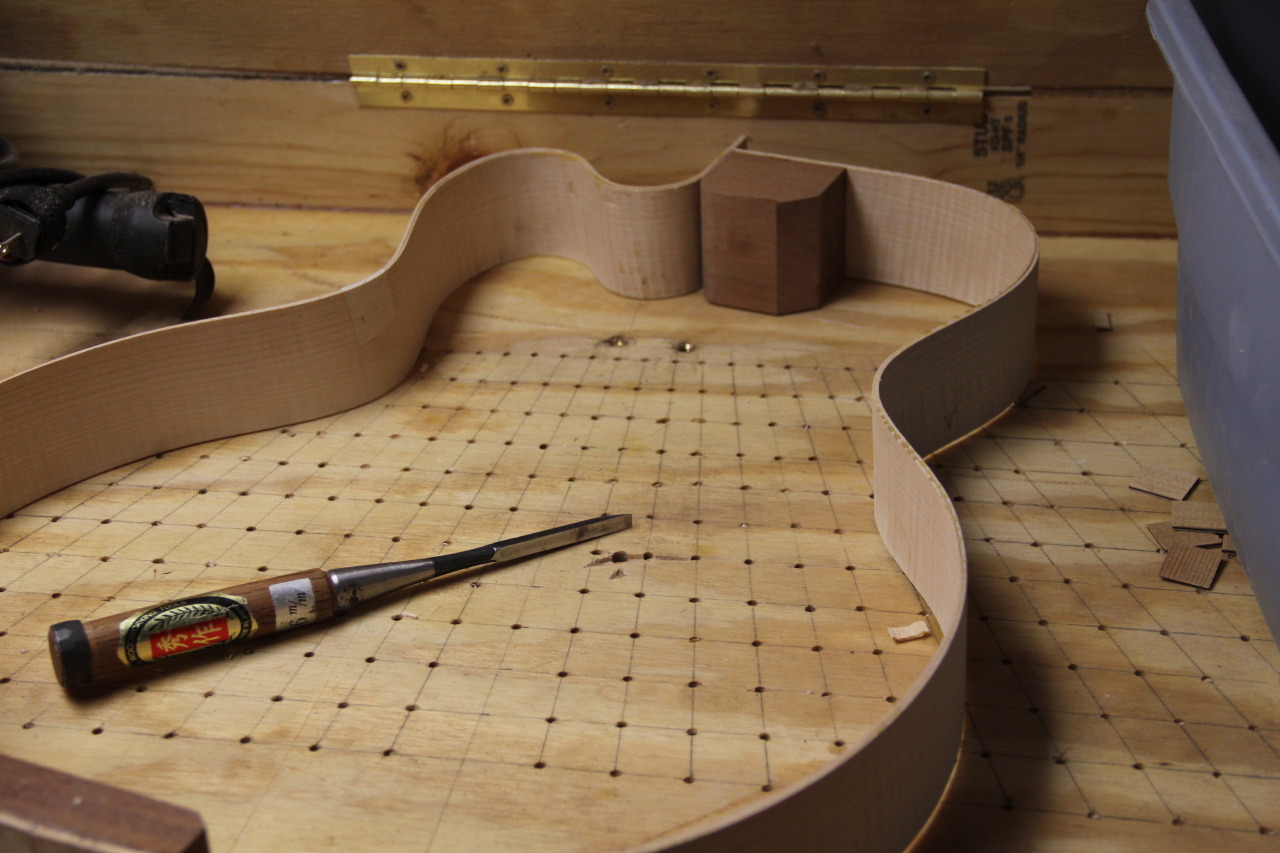 Kerfing in 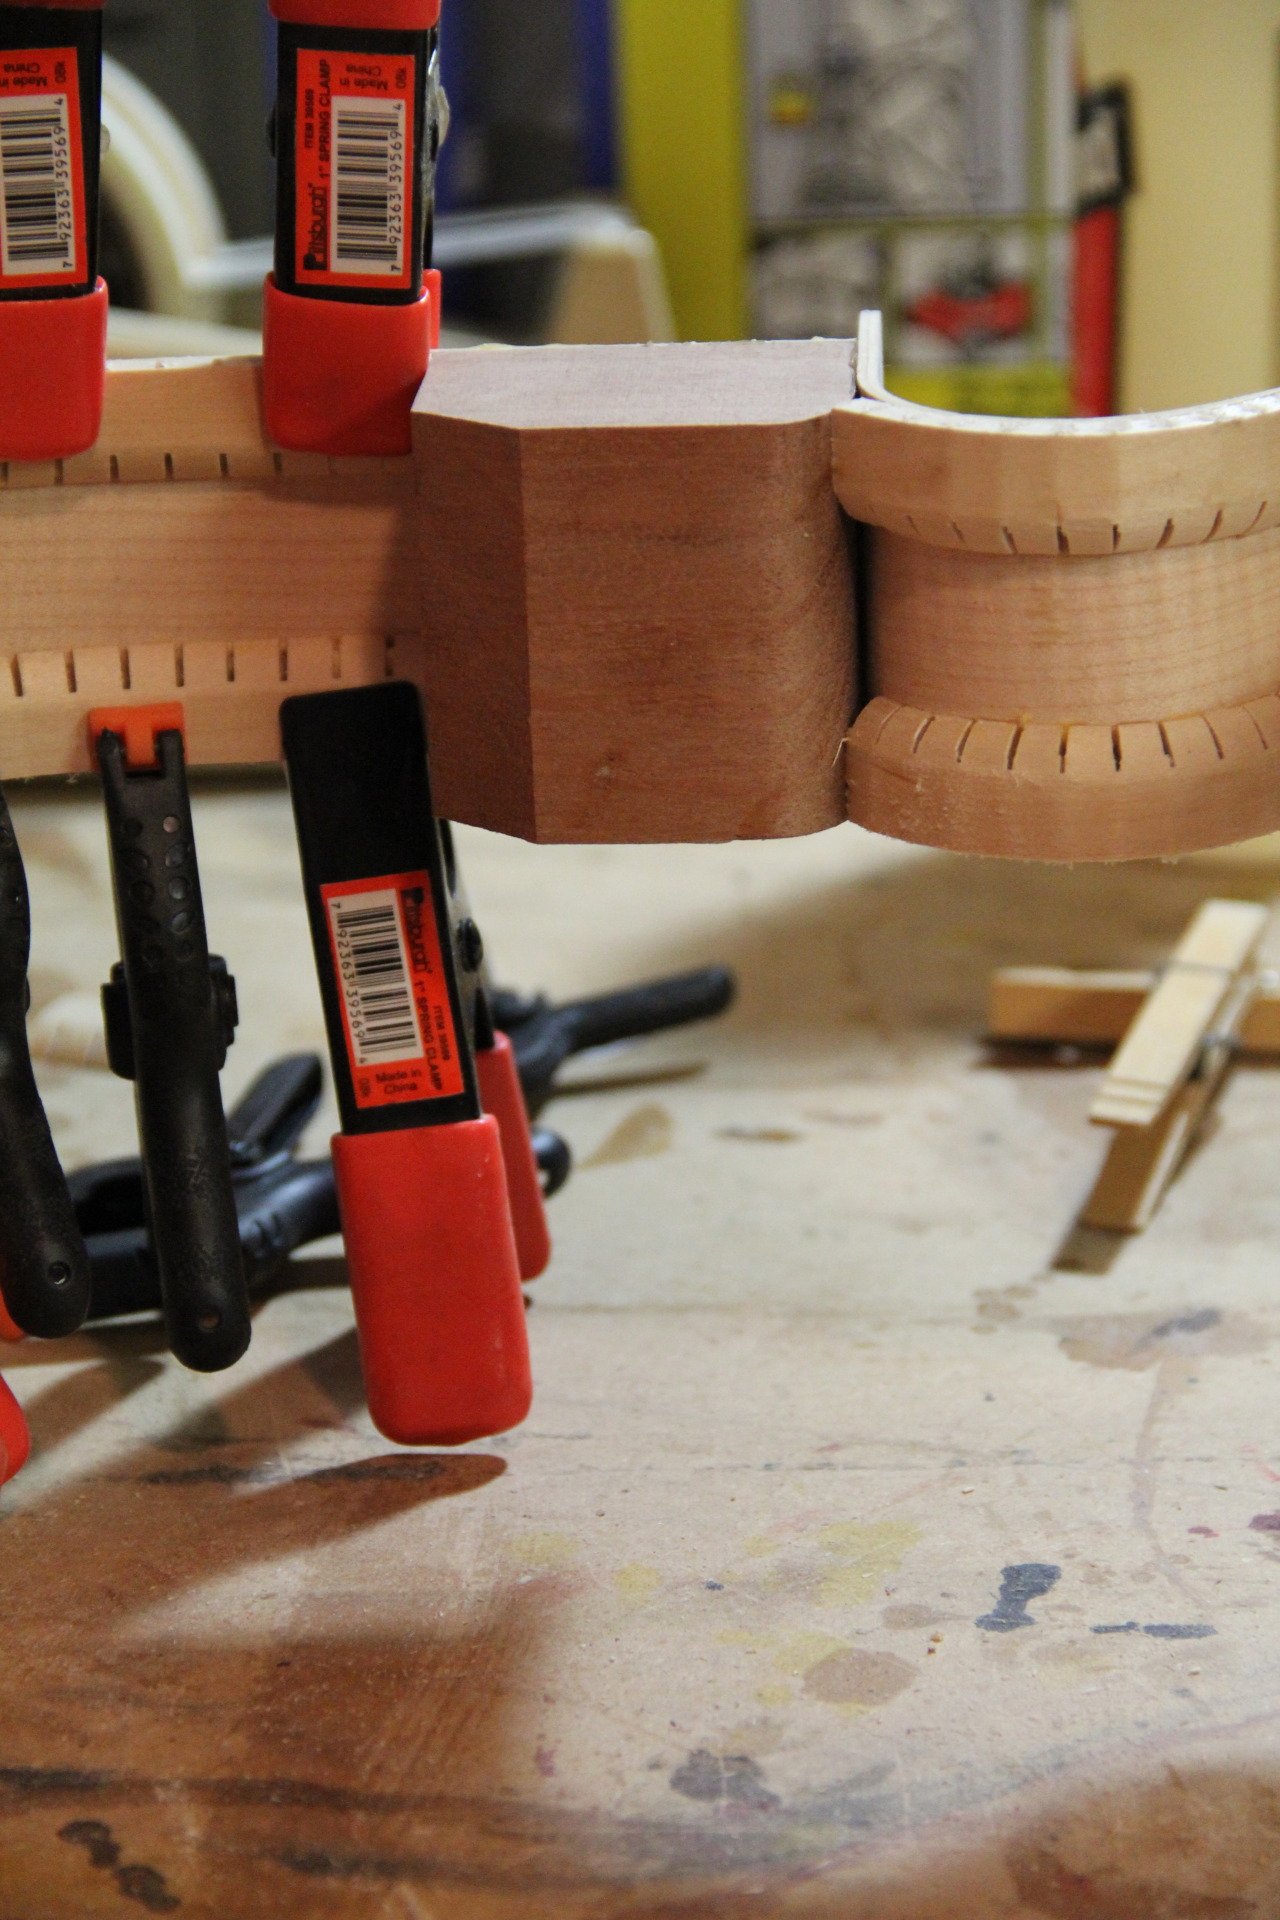 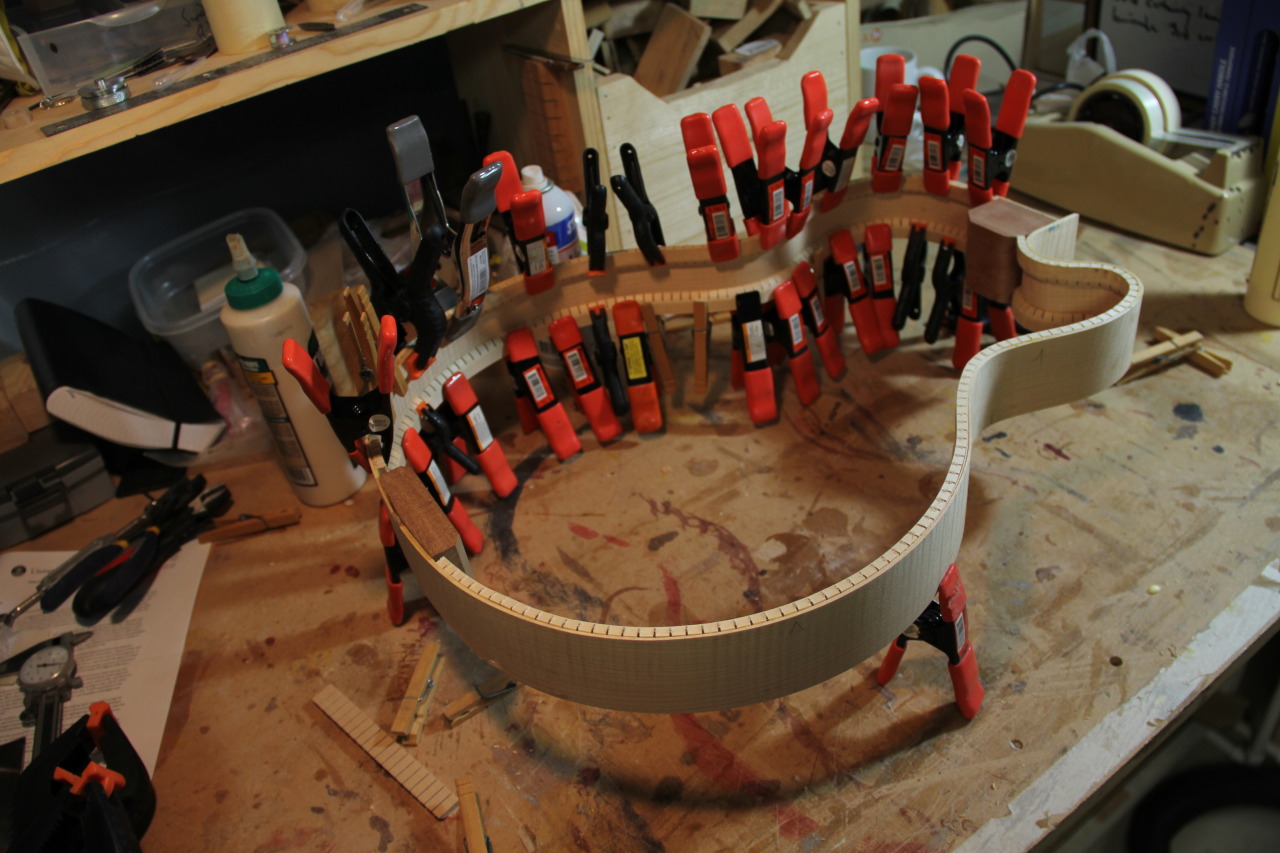 Typically I dont use end wedges, or as some of us call them "apology strips" on my archtops. This means I have to take a little extra time getting the butt joint cleaned up and fit but its well worth it. 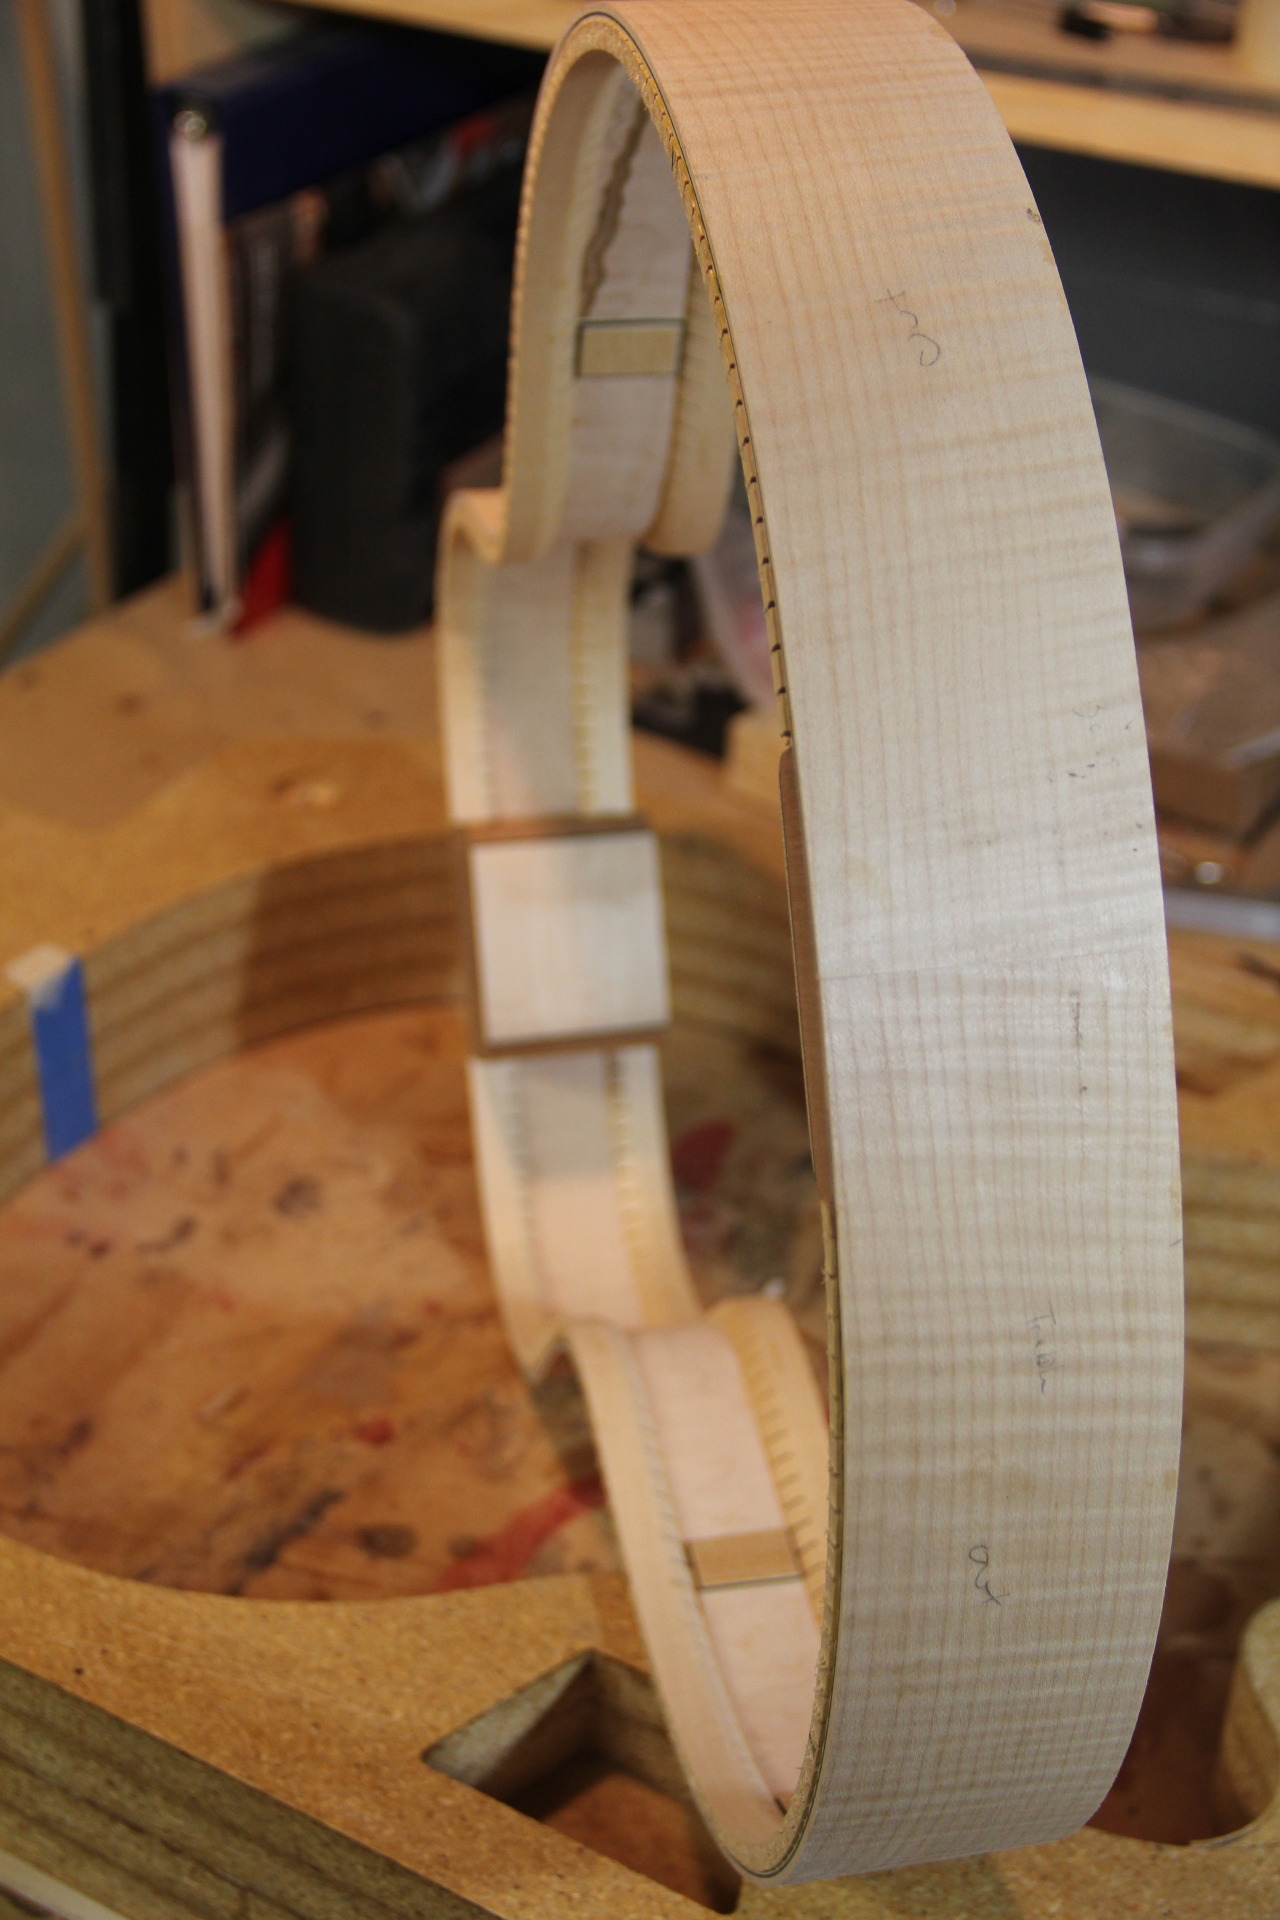 And heres the non-cutaway rim kerfed and with my new side stiffeners. I used to use solid ebony or wenge side stiffeners. But i'm really working very hard this year at evolving my designs to solve the current problems regarding wood sourcing, poorly managed forestry, and over consumption of some of the more exotic hardwoods . This is my solution for side stiffeners. Black maple veneer laminated between two sides of quartered Old growth Doug fir. Gives me the vertical strength I need reinforce the sides while staying horizontally neutral, gives more surface area while weighing less and I think looks nice. I'm sure I'm not the first to do this but I was excited about it. 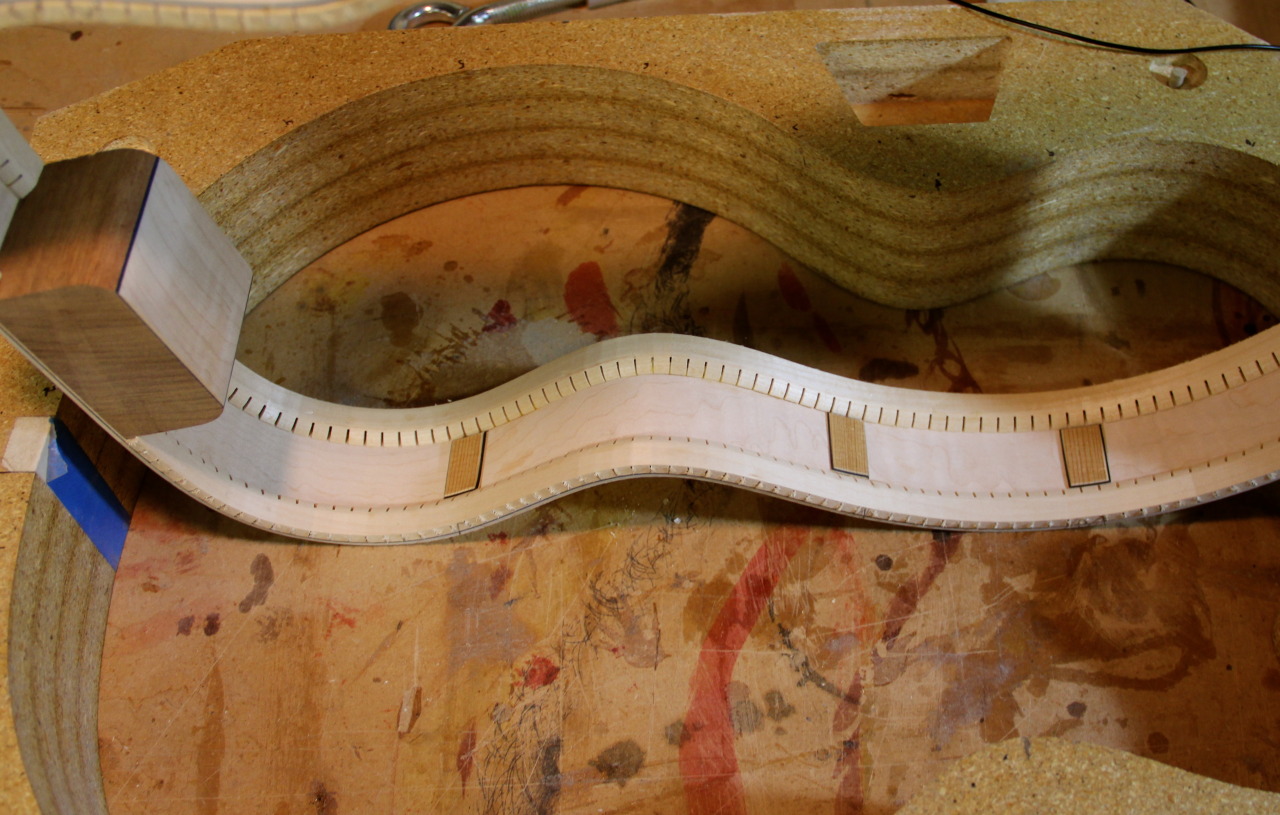 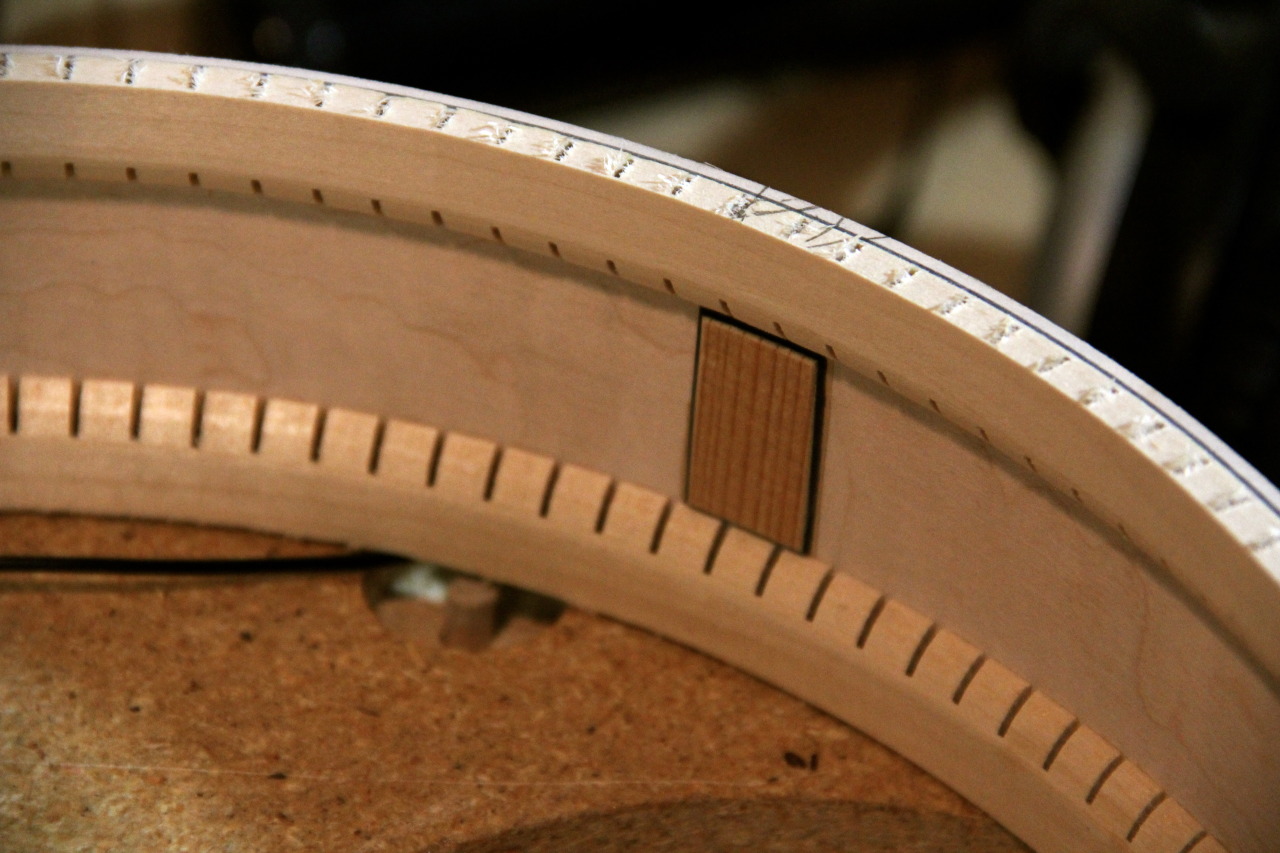 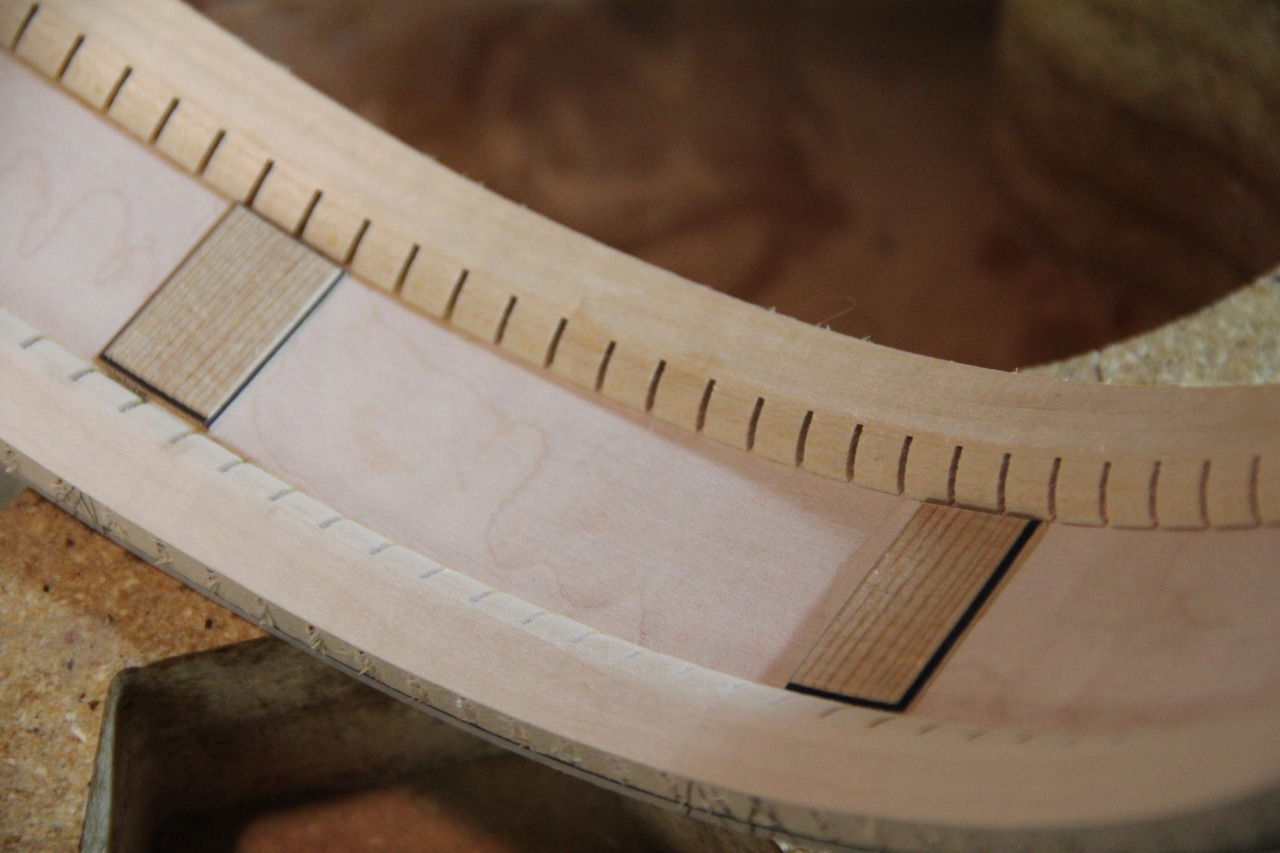
|
|
#25
12-16-2014, 08:03 PM
|
|||
|
|||
|
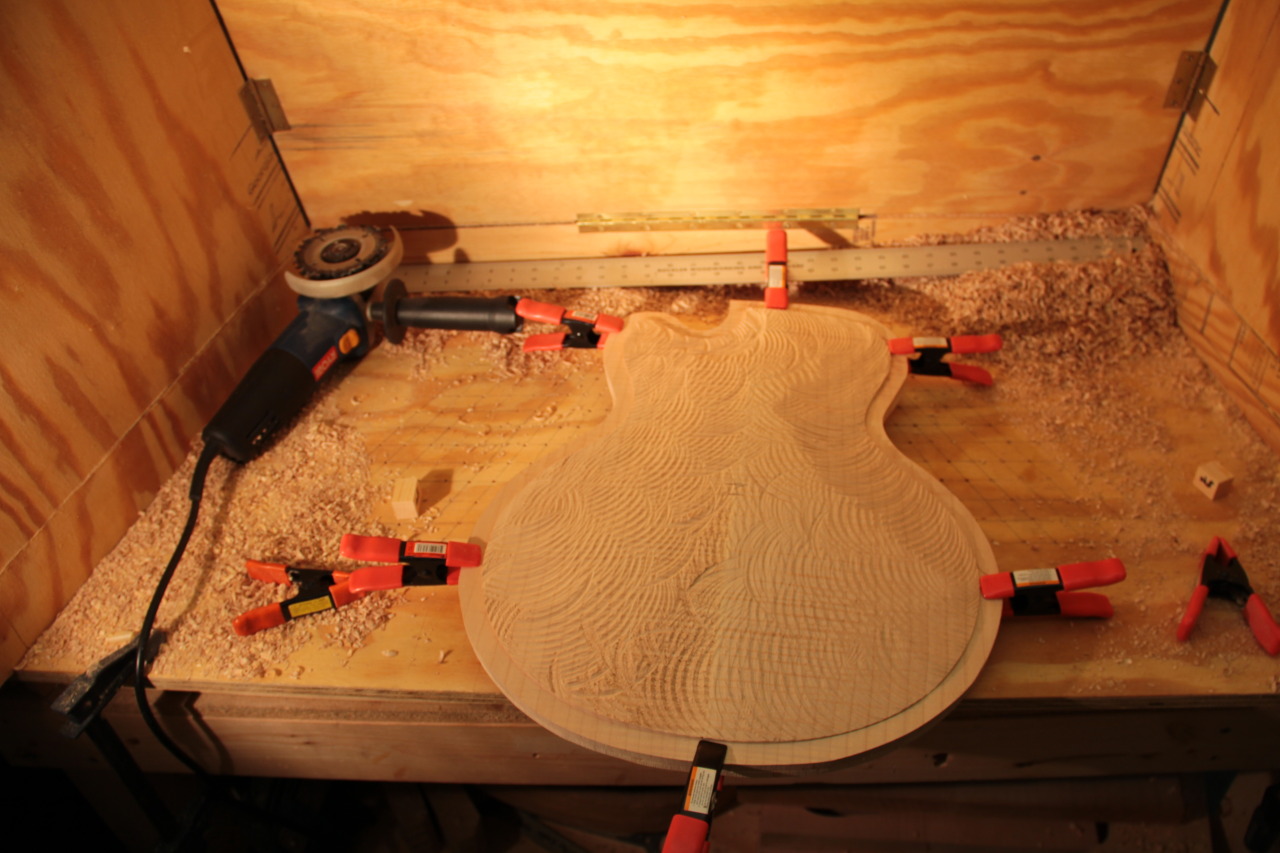
The exterior carving is now complete along with the hand cut F-holes.
This new model is inspired heavily on classic archtops and so I thought a classically inspired F-hole design would be fitting. Downside is these can't be bound, so in the future I'll have a more contemporary F-hole design to choose from if binding is requested, but I think this take on a classic will work nicely, unbound, as a standard feature. Plus it was fun leaving the router on the shelf and hand cutting these. Haven't hand cut a set of F-holes in years. Tomorrow I start on the interior carving in-between finishing up some repair work. 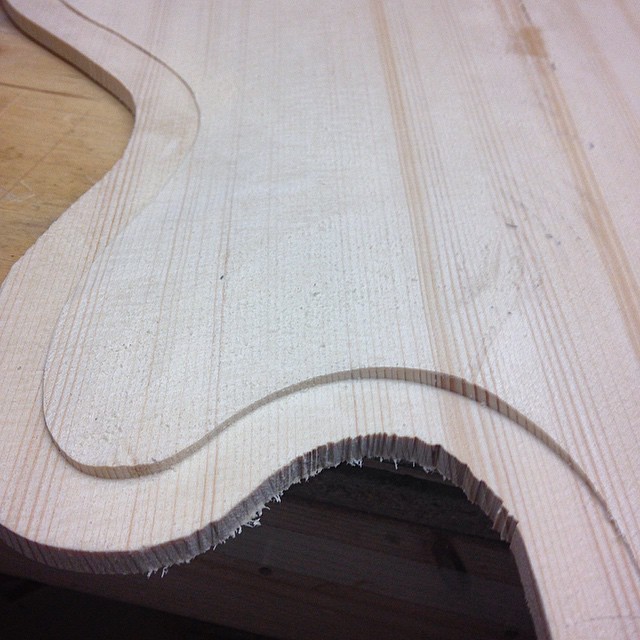 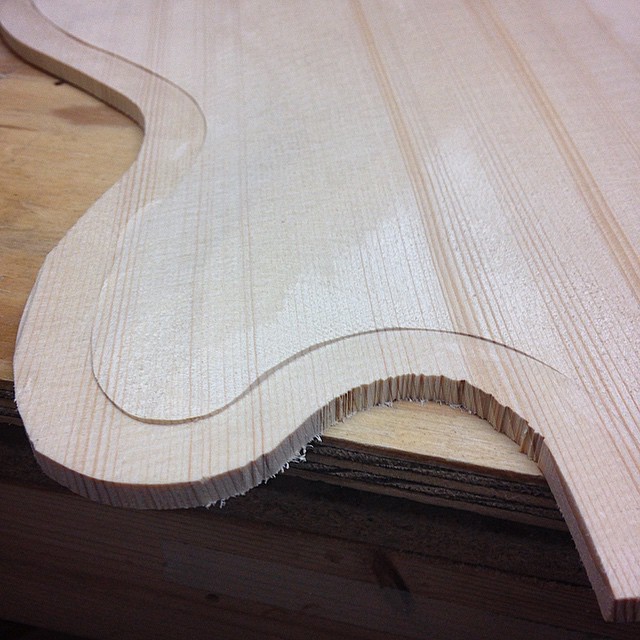 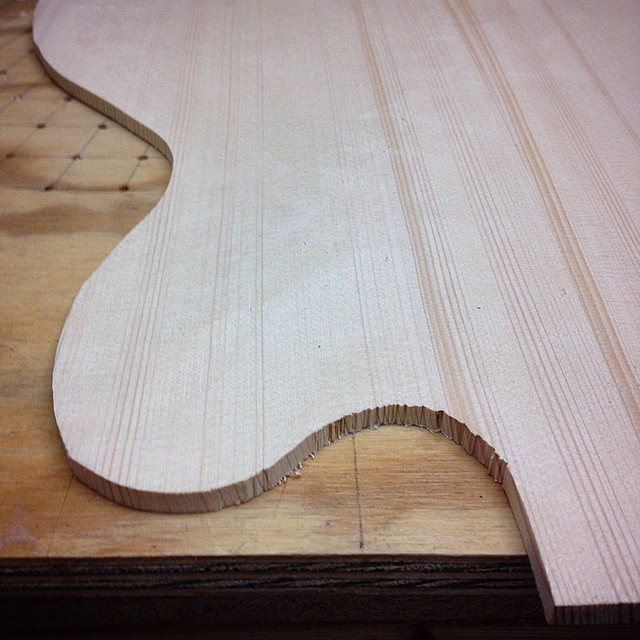 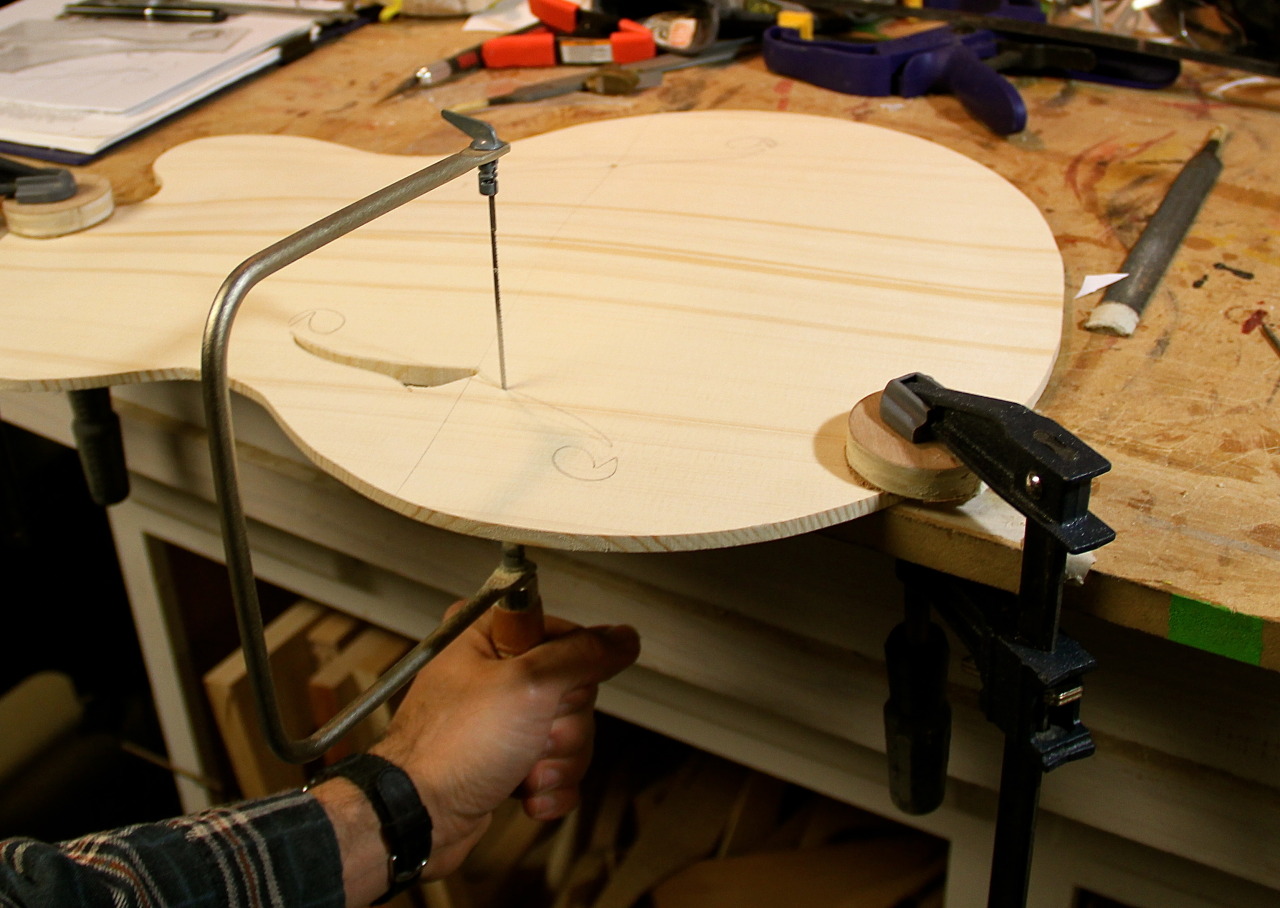 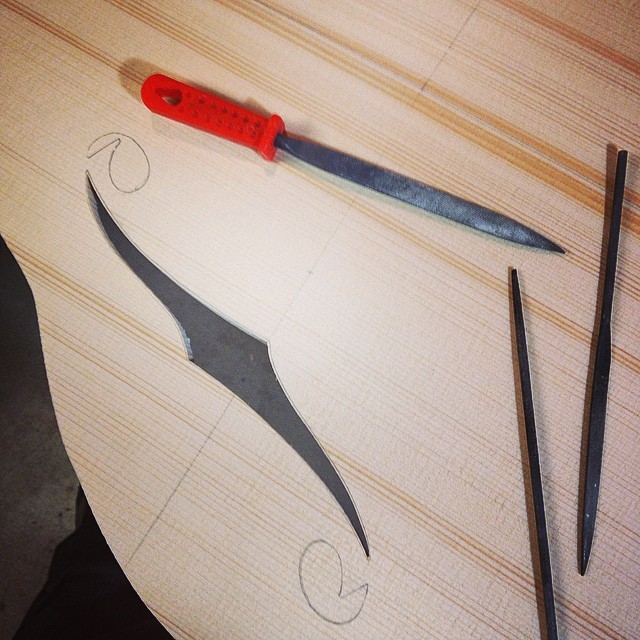 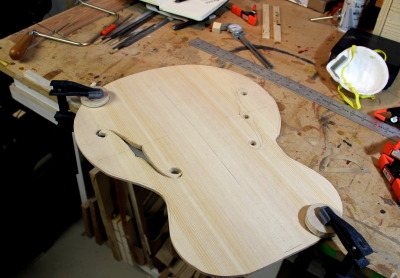 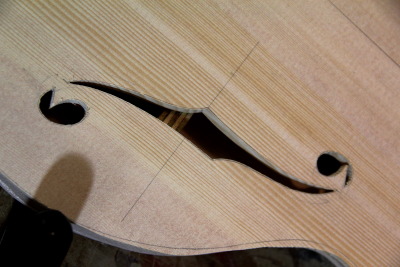 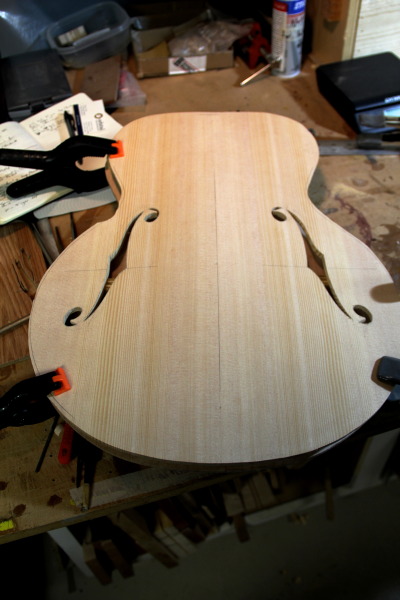 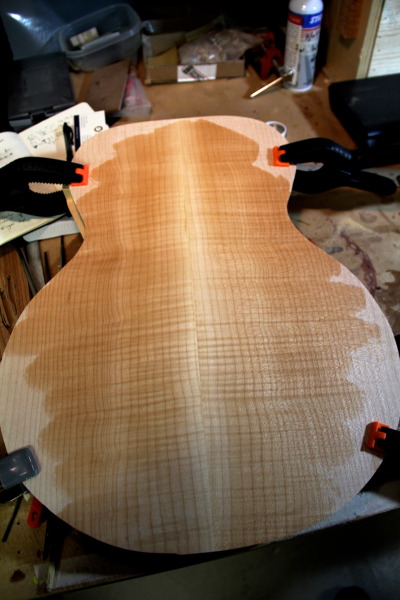 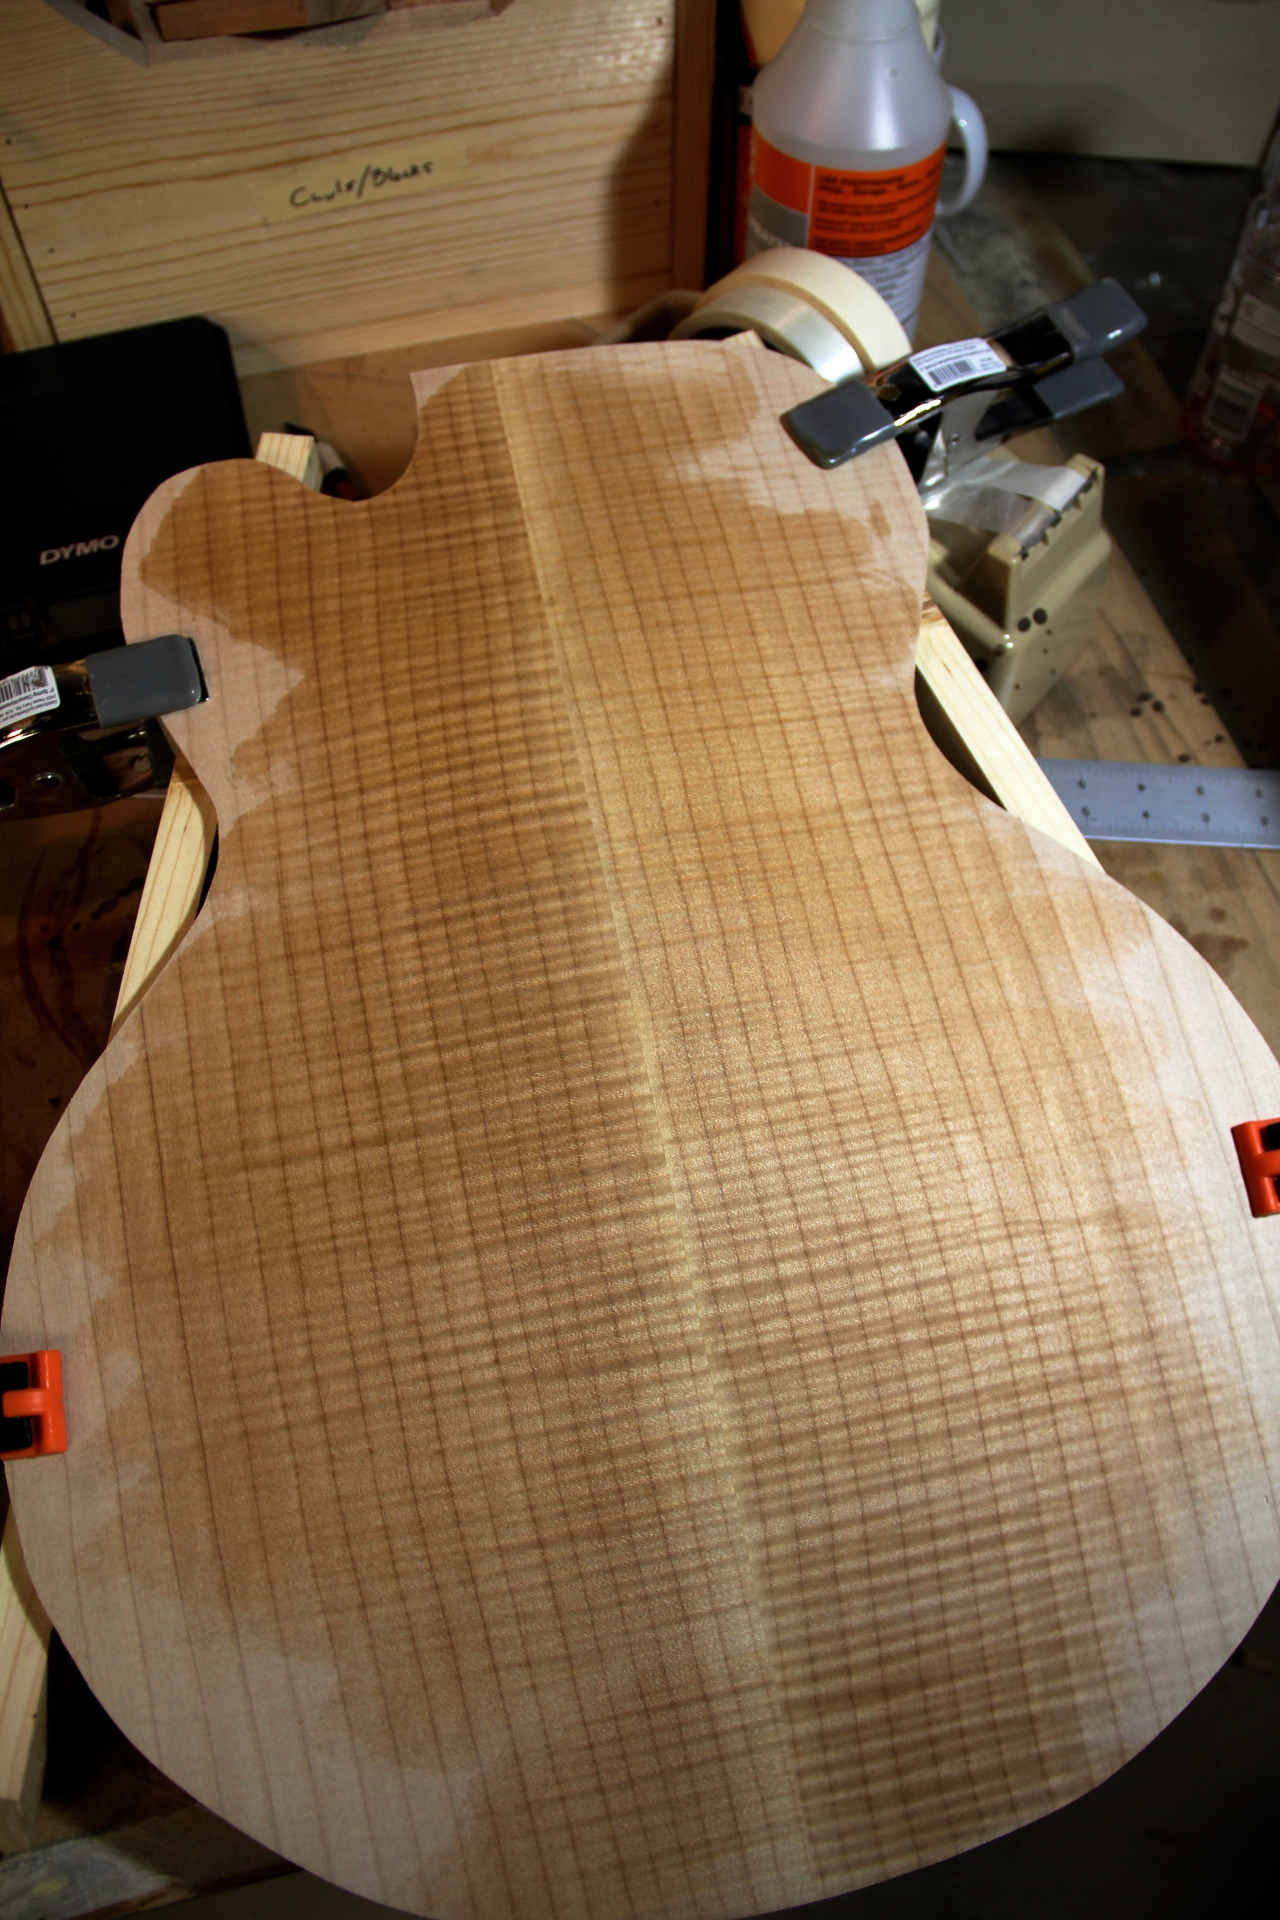
|
|
#27
12-17-2014, 09:50 PM
|
|||
|
|||
|
Hey Stuart, really enjoying watching this from start to (anticipated) finish. Can't wait to see it in Memphis!!
|
|
#28
12-24-2014, 08:55 AM
|
|||
|
|||
|
You know Mr. Day, I have never even played an archtop, but this thread has me wanting one.
Fascinating build. Anxious for the next progress report.
|
|
#29
12-24-2014, 11:27 AM
|
|||
|
|||
|
Quote:
|
|
#30
12-25-2014, 08:47 PM
|
|||
|
|||
|
Ok, the carving process can get a little dusty. So I haven't been keeping my camera in the shop. The next updates are off my iphone and so the quality of the shots are down. I also slacked a bit in keeping you guys up with every process. But what I can say, building three archtops by memphis (yes, there is a third in the works that is not part of this build thread) has got me pretty busy.
So in any case, here's some new shots. Enjoy. Here is the first of the tail pieces roughed out. starting to look like a guitar here! 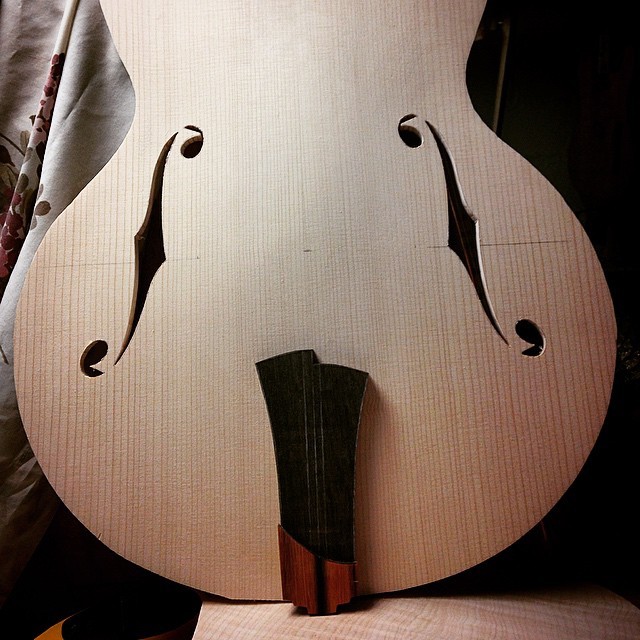 And binding pickguards 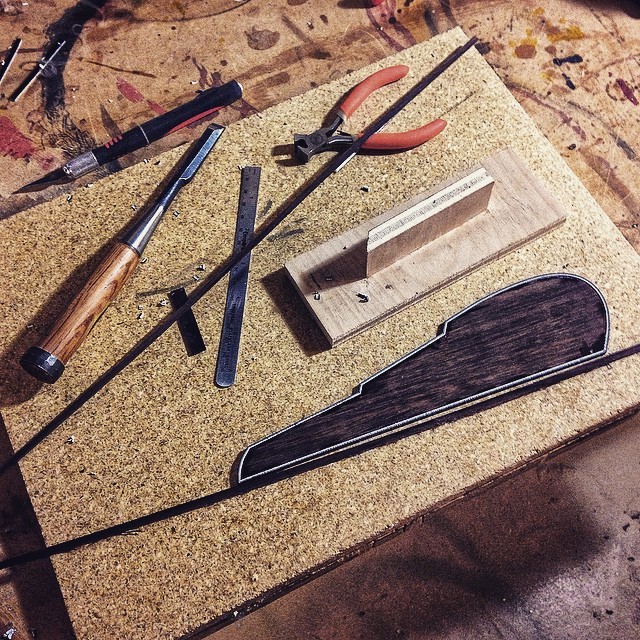 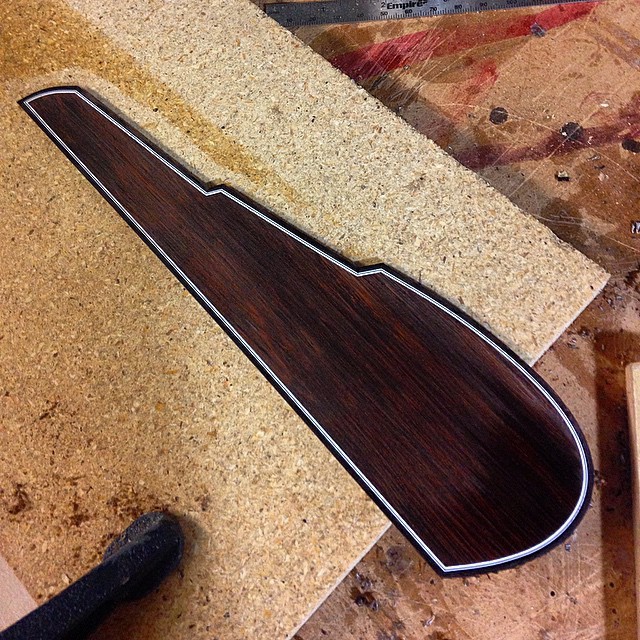 I got tired of bending my frets by hand so I whipped up this fret bender in 10 minutes with about $4 worth of parts I had laying around. Probably not a permanent fixture but it will get me through this round of guitars for sure. 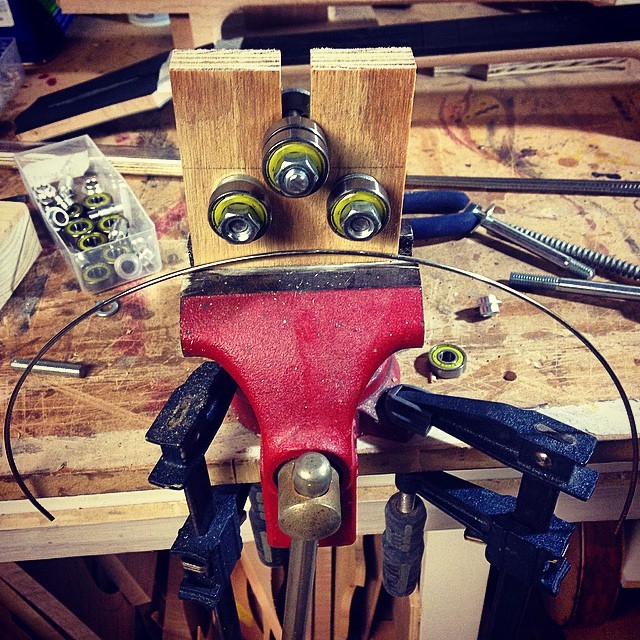 Graduating the interior starts with depth holes. These are drilled, using the exterior curvature as a reference, at a depth that is slightly thicker than the widest point of my graduations. Just helps start the graduation process evenly. 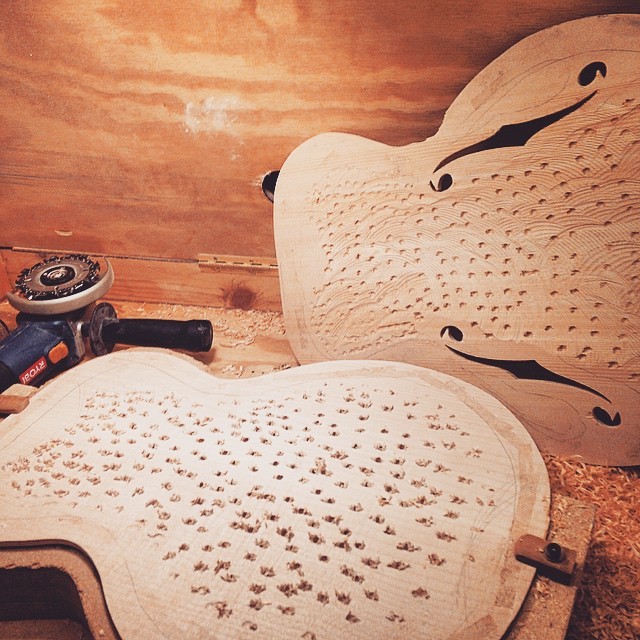 Graduation pretty much done here sorry, the lighting isn't great, its difficult to see whats going on but you are looking at the interior. I'm done with the bulkier tools and have moved onto voicing the top with scraper and sander. 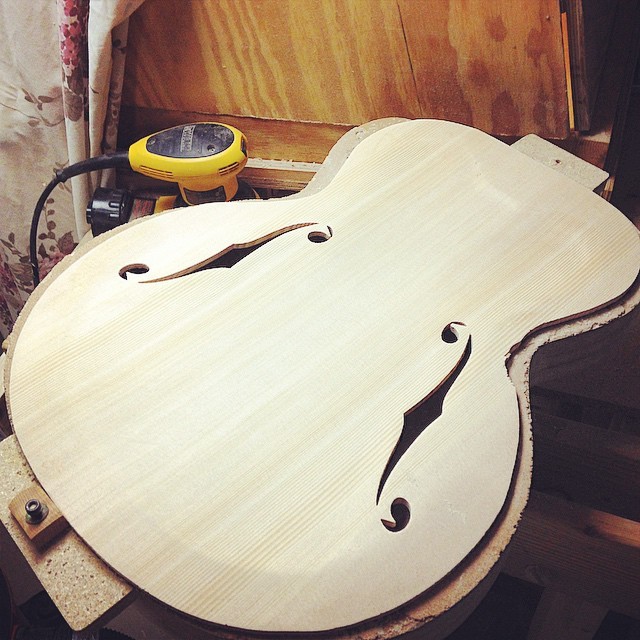  Here is the thin-line with the back on and the interior all shellacked. This guitar is gonna be killer. That back is really going to pop under a hand rubbed tobacco burst. 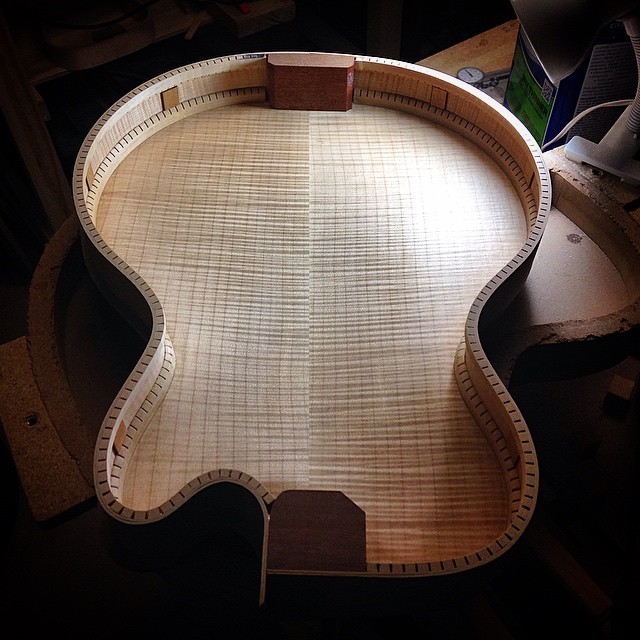
|