
|
|
#1
 12-17-2011, 09:08 AM
|
|||
|
|||
|
I posted this thread originally on the Gibson Forum and thought that members here might find it interesting. My boss, Bob Rigaud bought this old girl as a basket case some 20 years ago and one day decided to put it back together, suggesting that I do some of the work as a way of introducing me to careful repair techniques. My field of expertise is the laser and I admit that Bob has forgotten more about repairs and restoration than I could hope to learn if I had five lifetimes, so my role has been limited. But, it has been a fascinating job to be included in and should result in another one destined for the cities of dust returning to life in the hands of some talented musician.
First, what we were working with: the top was obviously FUBAR'd so was removed from the body). Neck block was completely detached and part of the sides were detached at the upper bout. 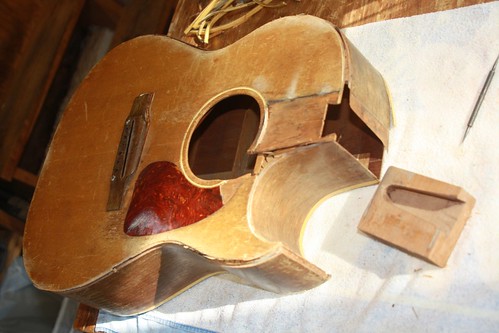 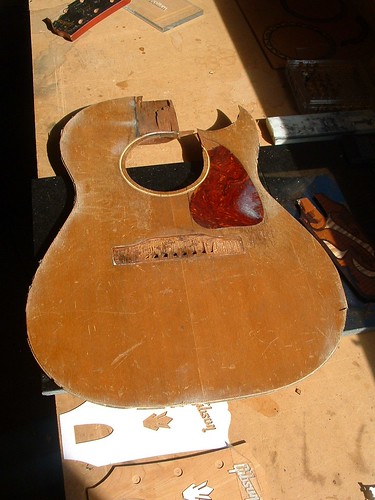 Even a quick look reveals some other ills - Bridgeplate mispositioned? string holes near missed it! Braces shaved to non-existence at the end which promotes brace loosening over time 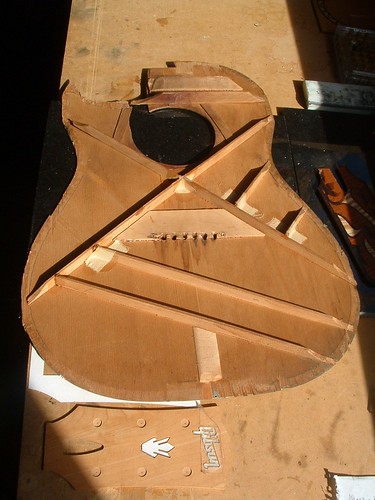 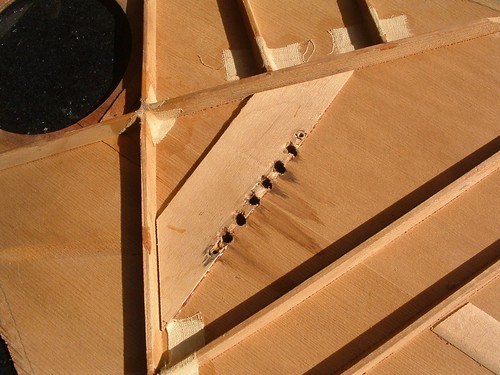 Some craftsman had done some sanding on the back and sides of the headstock (for whatever reason) and this resulted in the loss of the original "Open Book" profile so recognizeable as Gibson's work Please notice the clearly visible wings glued on either side of the headstock. This has been a standard practice of Gibson for a longtime and is done so the grain will appear correct when finished. 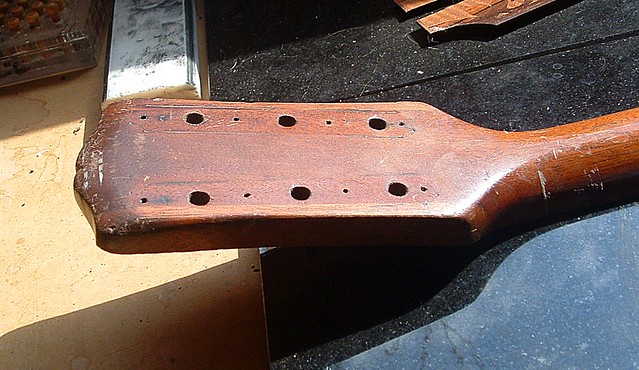 To repair the headstock we first made a quick jig to sand the damaged area flat and removed the affected portion. A piece of Mahogany of similar shade and grain was cut and attached to the sanded area of the headstock. 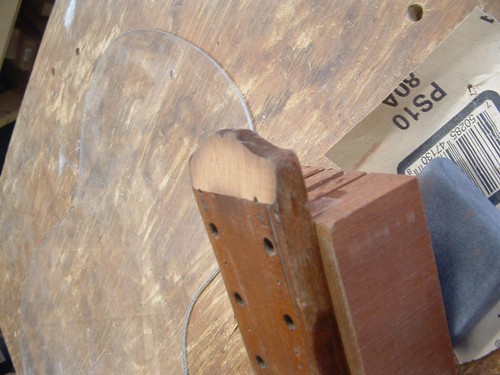 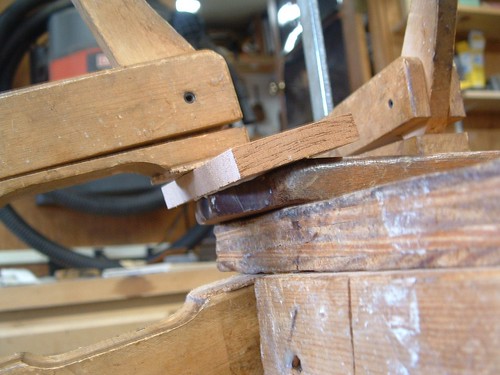 Then the repair piece was rough sanded, and the old wings carefully sawed off and sanded. 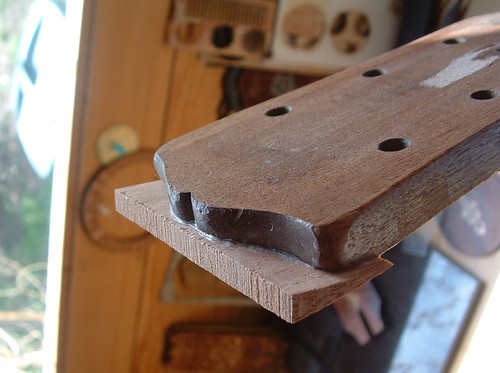  Next the new wings and repair piece are glued and clamped to the old headstock. 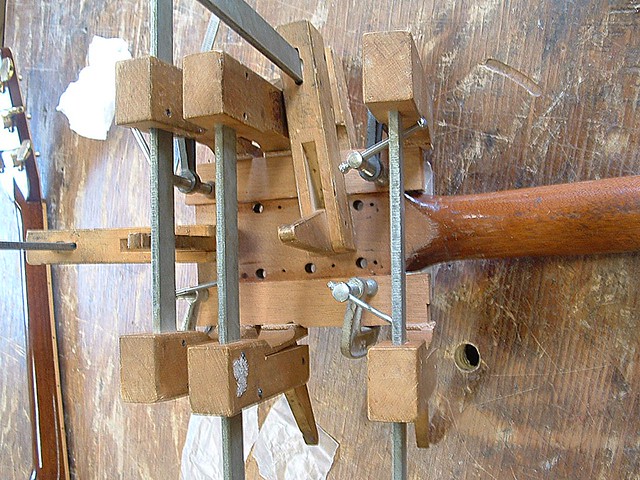 I've reached the limit for images, so...as the movie serials would say "to be continued!" Hope you enjoy! Bob 
|
|
#2
12-17-2011, 09:37 AM
|
||||
|
||||
|
Great stuff! Man that was some Monday Morning Hangover Building at the Gibson plant that day!
Similar depth to the project in an Oak Parlor I just started. She was in a flooded basement for a few weeks. Oh' 40 years ago.... Keep the pictures rolling! BTW The photo limit is per post, not per day.
|
|
#3
12-17-2011, 09:58 AM
|
|||
|
|||
|
Quote:
Thanks for posting the project. Last edited by charles Tauber; 12-17-2011 at 10:07 AM.
|
|
#4
12-17-2011, 10:08 AM
|
||||
|
||||
|
Lack of structure under that much of the bridge would encourage bellying wouldn't it?
|
|
#5
12-17-2011, 10:51 AM
|
|||
|
|||
|
Interesting point Charles and well worth considering. I'm more used to seeing them the way my boss does them, which is to leave a bit more meat on them and then gently notch the sides and kerfing to receive them. Subsequently the visible ends of the braces are hidden when the binding is routed and applied. According to anyone's school of thought this might be "Over-engineering" but I find it a rather elegant solution to that particular procedure.
I totally agree that the glue soaked rags are both homely and cheap - braces should fit together properly and be adhered properly without such afterthoughts. As to the top bellying for lack of support - That's logical but in this case the top was so shot when we got to it that it made it impossible to assess that condition. More photos to follow - Thanks for the interest! B
|
|
#6
12-17-2011, 10:52 AM
|
||||
|
||||
|
Thanks for sharing, Bob. The more we learn, the better we are in the long run.
__________________
VintageParlorGuitars.com Fresh inventory just added, click link at left to view
|
|
#7
12-17-2011, 11:51 AM
|
|||
|
|||
|
Quote:
Classical guitars, for example, have fan braces that start and end nowhere near the sides or kerfing. These traditionally use a taper-to-nothing construction, often with a small drop of glue on the very ends as added security.
|
|
#8
12-17-2011, 12:17 PM
|
|||
|
|||
|
To continue - next I used a stock Gibson headplate blank ( obtained when Bob R was a level A Gibson repair depot) to draw a template in CorelDraw. This headplate couldn't be used because the tuning post spacing and trussrod opening didn't match the CF-100. And, it's the only OEM plate Bob has, so we wanted to preserve it. Gibson script and Crown were also redraw and kept on file. We had an OEM Gibson script MOP inlay and used it but I had to cut the Crown out of matching MOP. After engraving the pockets for the inlays into an ebony blank the overlay was cut out and the inlays installed. I should add that since this was an EXTENSIVE restoration we opted to make it a bit nicer than stock, hence the ebony overlay as opposed to a painted headstock.
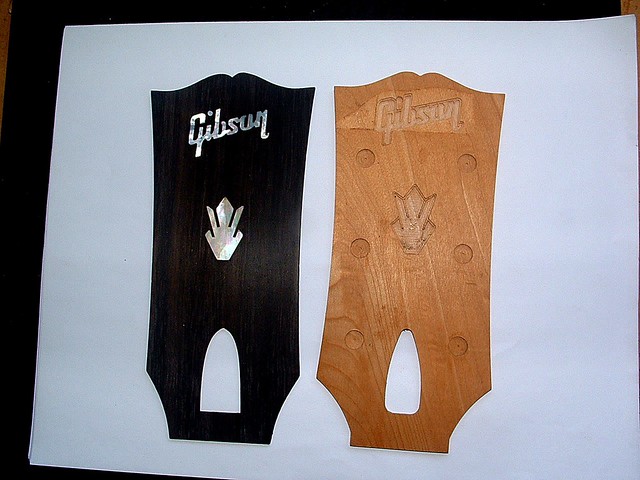 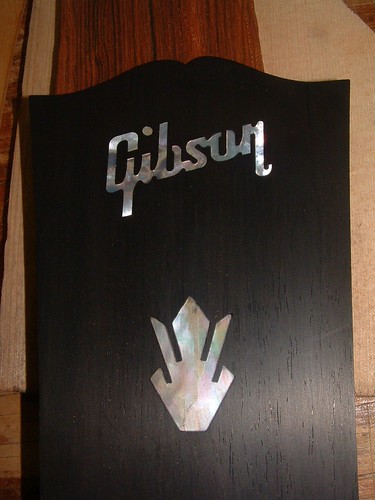 Next, the headplate overlay was positioned on the headstock , glued and clamped. 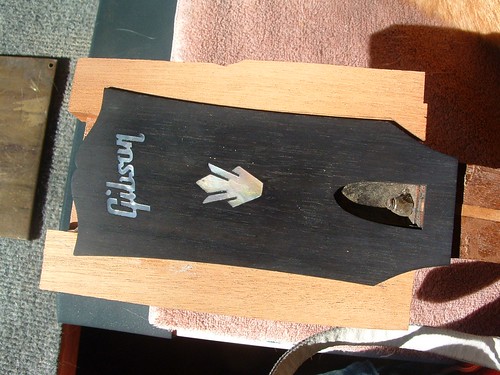 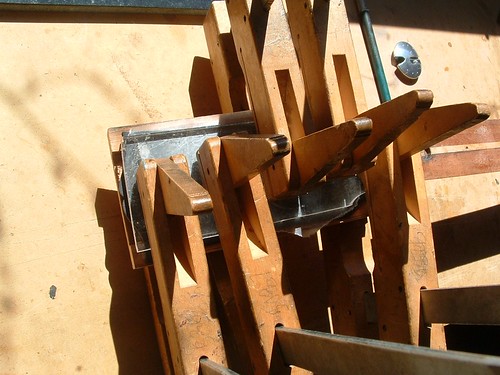 After the glue cured the headstock and overlay were shaped on a bandsaw and sander, Tuning post holes drilled and final shaping done. You can see in the last photo how radical the repair wasto return the headstock to the correct profile. 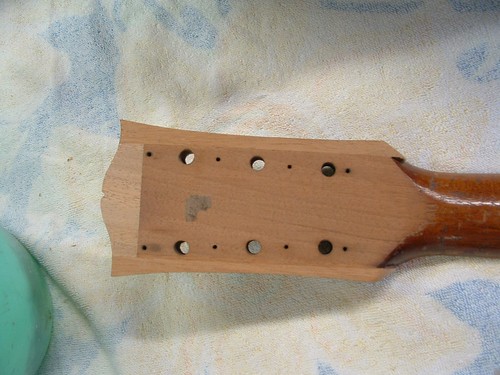 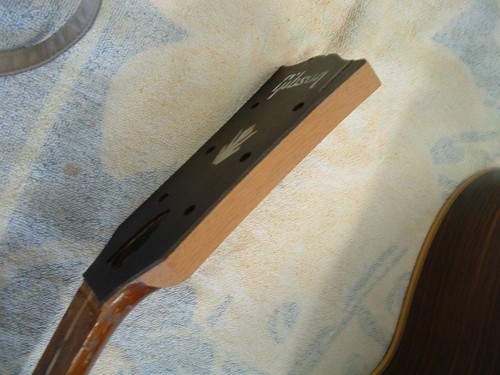 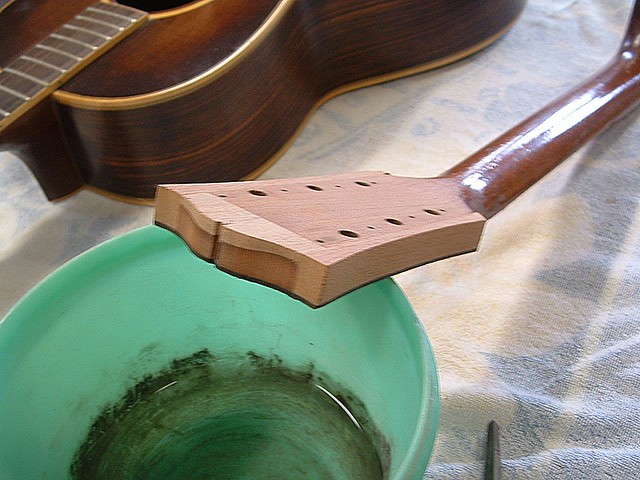 Bob selected a nice Brazillian blank and roughed it out, radiused it and cut the fret slots. I then engraved the inlay pockets and cut the MOP markers. The markers were finish sanded and installed in the FB. After radius sanding the inlays the board is ready for final sizing (to account for binding)  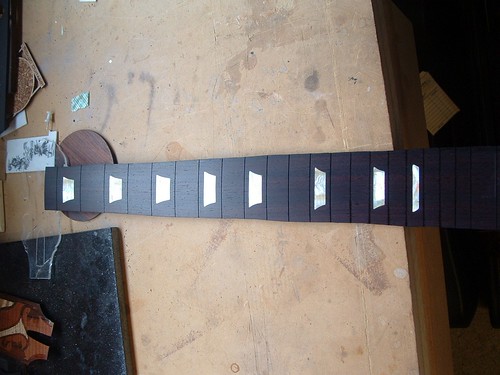 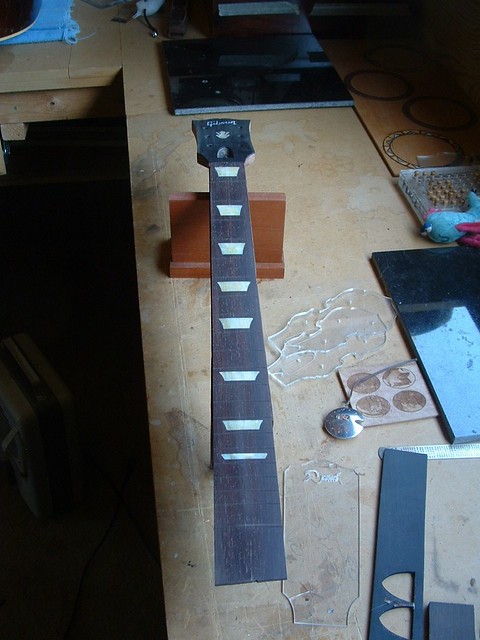 More to follow - Next - completed bound fingerboard, new top and body construction.
|
|
#9
12-18-2011, 11:47 AM
|
|||
|
|||
|
On to the binding of the fingerboard. First a centerline is drawn on the unsized board.Equal distances are measured and marked from the centerline to give a total width minus the binding thickness. This was a bit dicey as the former Craftsman had sanded the neck and it wasn't exactly regular. After the board is sanded to the correct width a piece of plastic binding is ripped to the correct height.
  Although hard to see, a piece of plywood, cut to a bit wider than the fingerboard is taped to the back of the FB to act as a ledge for the binding - this holds the binding at a consistent level all along the length of the fingerboard. The binding is glued and taped to the sides of the fingerboard and set aside to cure. 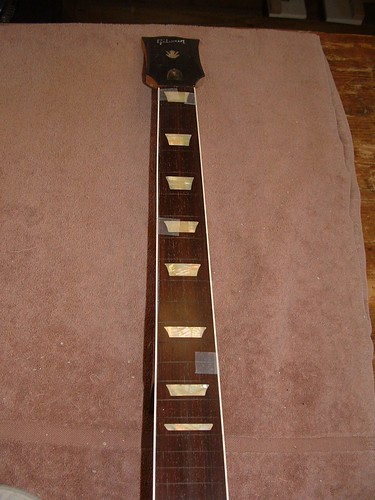 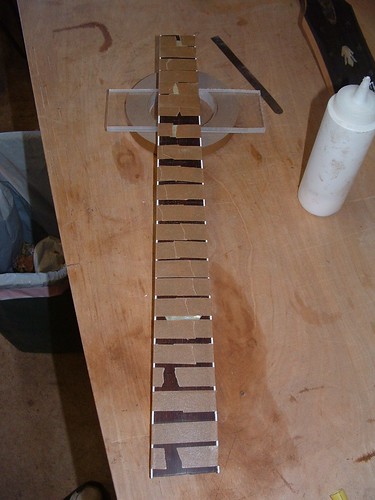 Next Bob R. turned his attention to the new spruce top and bracing. We discussed several issues concerning the top and bracing. One issue was the misplaced bridge plate. We couldn't decide whether the main X brace was placed at a bit too open an angle (Which would result in the correct plate being moved up a bit too much) or whether an incorrectly sized bridgeplate was originally used. The other issue concerned the top brace, appearing above the soundhole) - it had come loose and failed over the years because (In our opinion) it ended just past the soundhole and was secured by nothing other than the glue. After rolling it around a while we decided to make a brace that would traverse the entire top, including the cutaway and secure itself under the top as is the case with the other braces. To do this Bob determined that the brace would havce to be thinner than usual, so he constructed the brace by sandwiching a .020" strip of carbon fiber between two strips of red spruce - this allowed the brace to be substantially thinner than it would normally be yet as rigid and strong as the others - this cleared the kerfing neatly and provided support for the top at the cutaway. The remaining braces differed substantially from the original braces but in a good way. The carefully scalloped braces along with the graduation of the new top that was to follow should provide a nicely active soundboard that will be at least as good, and probably better than the original top. 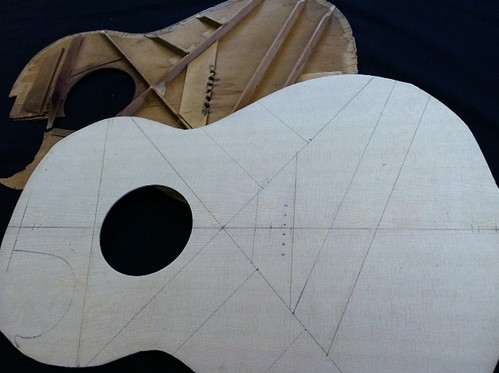 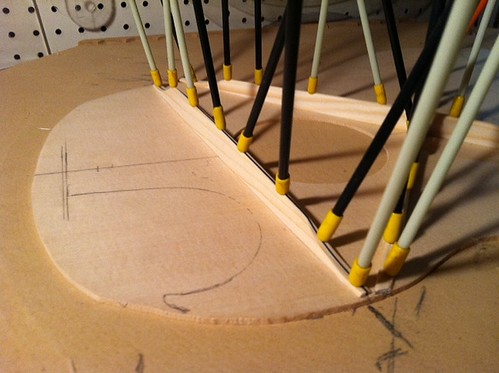 The finished top is quite lovely and ready for installation onto the repaired body 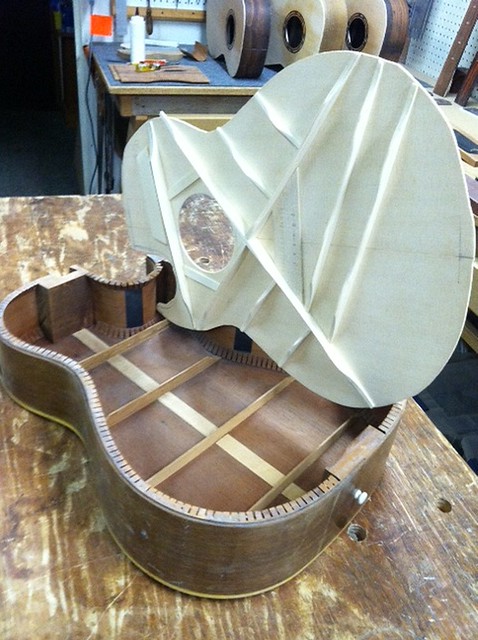 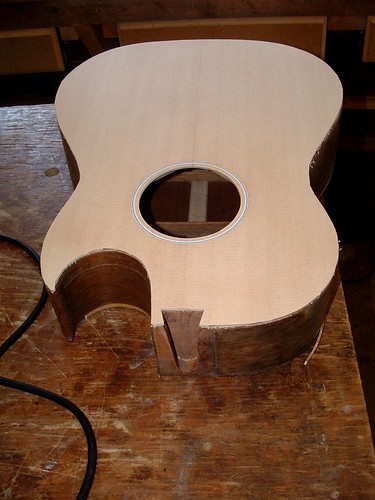 Here's a shot of the rosette that Bob Mimicked from the original top  As soon as I upload photos of the bound body I'll continue my rant! Cheers! Bob
|


