
|
|
#16
 07-03-2016, 06:05 AM
|
|||
|
|||
|
As to the neck woods, you could just take the clear board, and build a neck with a scarf joined headstock and stacked heel. You'll find use for the clear portions of the knotted piece.
As to your top, you'll be fine. It's not like strings are pulling across the grain. Also, the configuration of the X brace, tone bars, finger braces, transverse brace is such that they support the soundboard cross-grain and do not leave any long lengths of unsupported long grain. I've seen tops of finished guitars with even more cracks, repaired and doing well. ------------------------------------------------------ On a side note, My thoughts on woods for beginners are in opposition to some. Maybe I can see practicing some new technique on a piece of scrap or cheap wood, but not on the actual guitar. Unless you split and resaw the wood yourself, cheap wood usually will have problems that you'll will have to deal with at some point and time. I also think that for the most part, the cheaper the wood, the less worried you are about ruining it, therefore the less careful you are with your work. A big argument I hear in favor of it is that "the guitar sounds fine" or "the guitar sounds like a guitar." Which is fine if one's attitude is the same as building, say, a scale model car. Maybe the lure of building a guitar is part the curiosity of the processes involved, but I'd hope that one seeks a guitar that maybe sounds better than "fine" or even a cheap guitar - otherwise just buy a cheap guitar! The other argument is that "Taylor and Benedetto made pallet guitars that sound great!" Well, they can do that because of their experience. Making a guitar out of pallet wood won't guarantee your guitar will sound like Benedetto's just as much as using the finest tonewoods. 
|
|
#17
07-03-2016, 09:29 AM
|
|||
|
|||
|
Thanks Louie, i've actually already glued the 3 piece neck laminate together so a scarf joint/stacked heel option isn't there now.
Still not sure what i'll do with the soundboard, i've tried to repair this latest crack if only to make it easier to make the board useful, even if it (as is most likely) ends up as a sacrificial board/soundhole reinforcement wood etc
|
|
#18
07-03-2016, 07:32 PM
|
|||
|
|||
|
I'm watching this thread with great interest as I hope to one day take the plunge and would have the same concern about the results of my efforts sounding like a cardboard box.
Not to be too free with your money, but if it were me, I think I'd be inclined to buy a new top and save the old one for another project. What if your guitar turns out to be the opposite of a cardboard box and sounds and looks awesome, but all you can ever see is that repaired crack?
|
|
#19
07-13-2016, 01:52 PM
|
|||
|
|||
|
So I finally got a chance to do some more work on the guitar today. I had a bash at bending the sides, i think i did a reasonable job, no burn marks and close enough to the mould shape that spreaders and clamps tweak it to the "right" shape. Because I used particle board for the mould, that even after sanding isn't exactly smooth, i wedged some cloth between the mould and the guitar sides to prevent scratching, and/or more likely, pressure dents.
I also cut 2 neck blanks out of the neck block, they still need tidying up and sanding to the lines but thats for tomorrow. Tomorrows plan also includes thicknessing the soundboard, installing the rosette, gluing in the end block and neck block and an attempt to make kerfed linings, i might go for the double sided cut ones, i like that idea. Here are some pictures of the latest steps 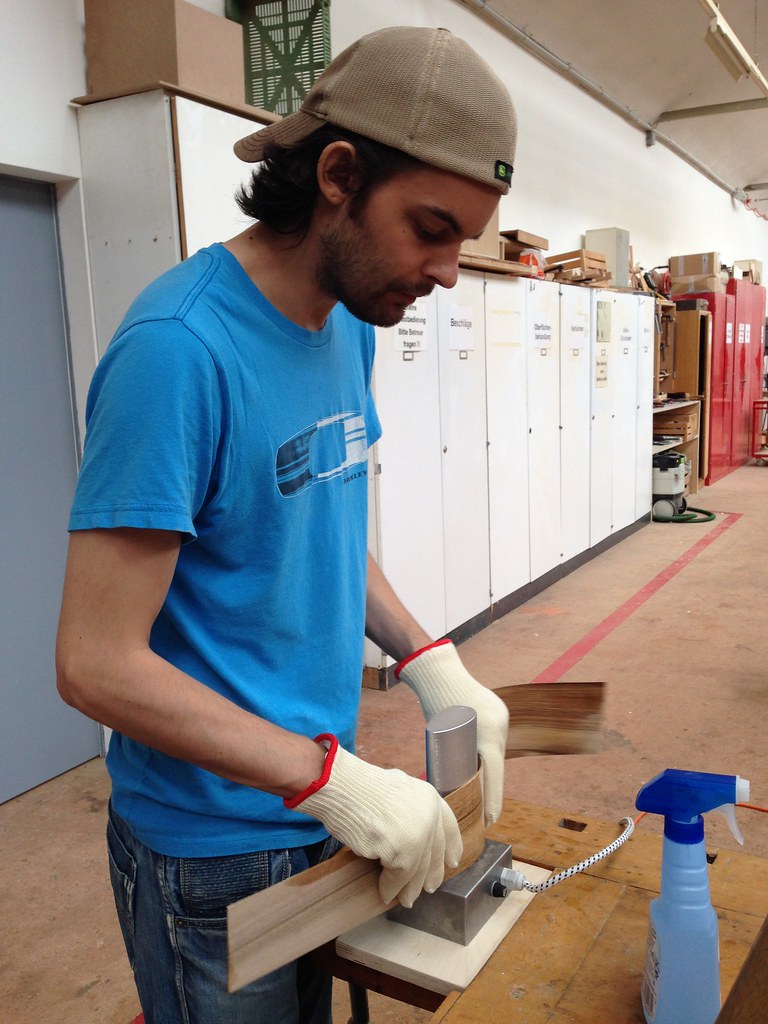 Untitled by David Emm, on Flickr Untitled by David Emm, on FlickrHandy use of Heat-proof oven gloves! 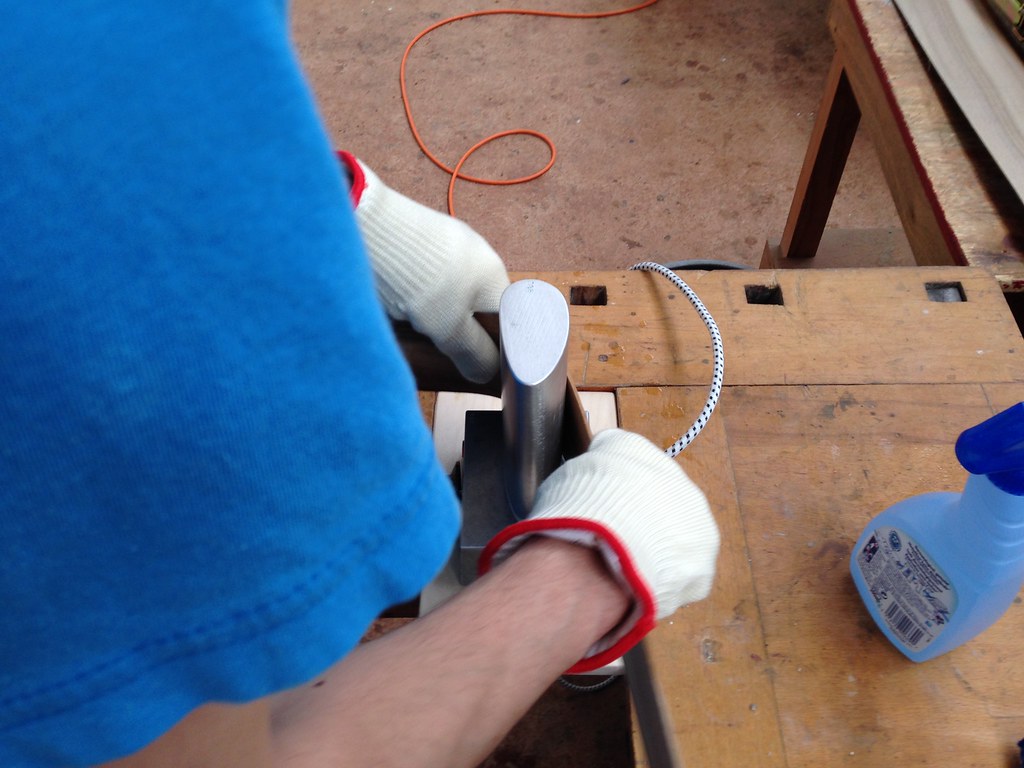 Untitled by David Emm, on Flickr Untitled by David Emm, on Flickrfirst placing of the sides into the mould  Untitled by David Emm, on Flickr Untitled by David Emm, on FlickrSides in the mould with spreaders and clamps in place 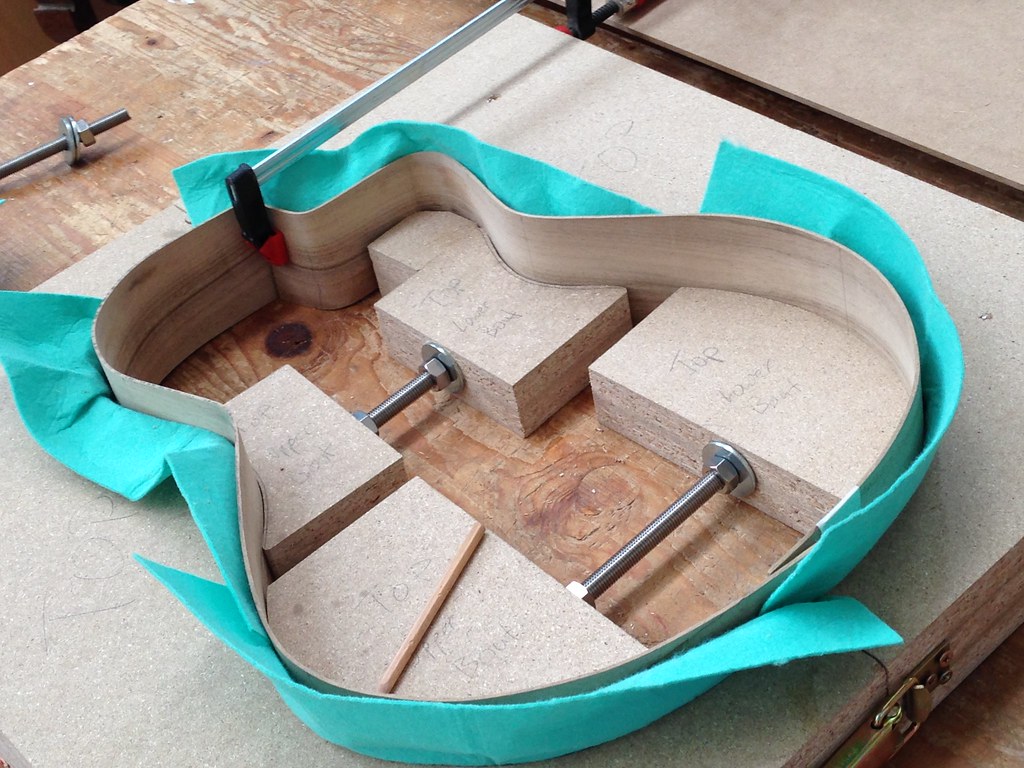 Untitled by David Emm, on Flickr Untitled by David Emm, on FlickrNeck blanks cut out of the big block  Untitled by David Emm, on Flickr Untitled by David Emm, on Flickr
|
|
#20
07-13-2016, 01:55 PM
|
|||
|
|||
|
David that looks great! Keep on!
|
|
#22
07-13-2016, 06:44 PM
|
|||
|
|||
|
Wow, that's really impressive. Are you sure this is really you're first go?
|
|
#23
07-13-2016, 09:00 PM
|
|||
|
|||
|
Quote:
|
|
#24
07-14-2016, 01:23 PM
|
|||
|
|||
|
So i did a bit more work on the guitar today, I glued the neck and tail blocks in, made what turned out to be about 5 guitars worth of double sided kerfed linings, thickness sanded the soundboard down to 2.9mm and was about to rout out the channel to glue in the rosette until I discovered my brand new (arrived in the post this morning) Dremel router base and circle cutter is utter rubbish as the SMALLEST circle it will cut is about 120mm i.e about the same as the outside edge of the rosette! useless. Didn't want to get the Stew mac one because a) its expensive and b) would take 7-10 days to get here to Switzerland, looks like i made the wrong decision. Will likely have to bodge something now. Argh.
Tail block 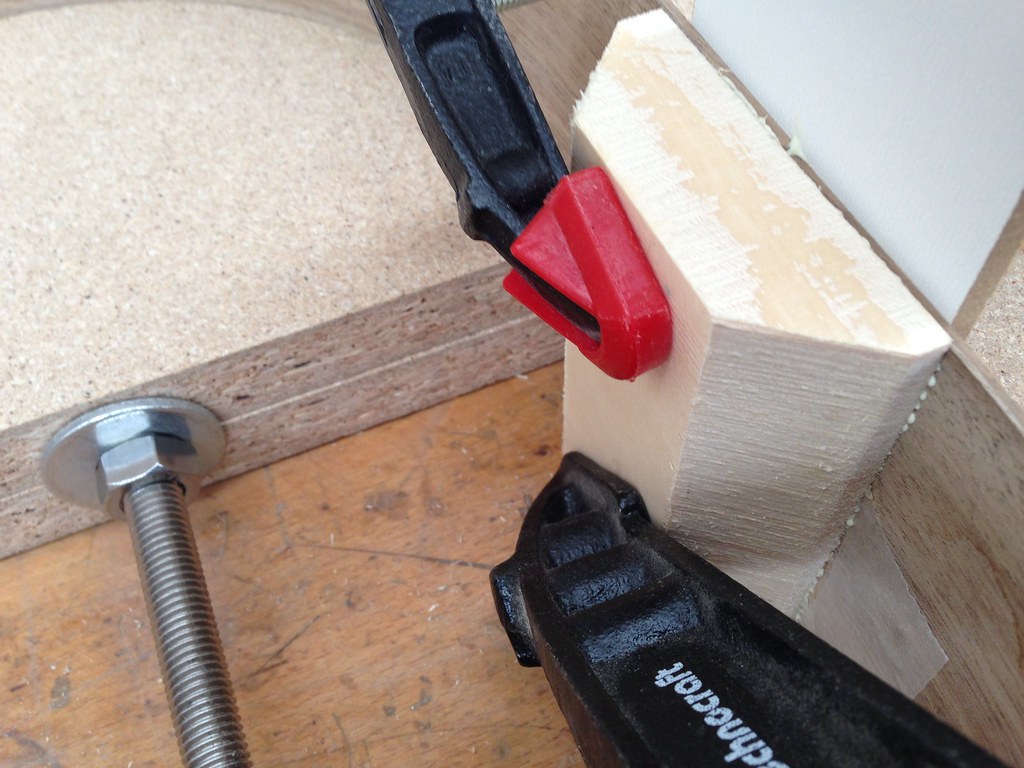 Untitled by David Emm, on Flickr Untitled by David Emm, on FlickrNeck block 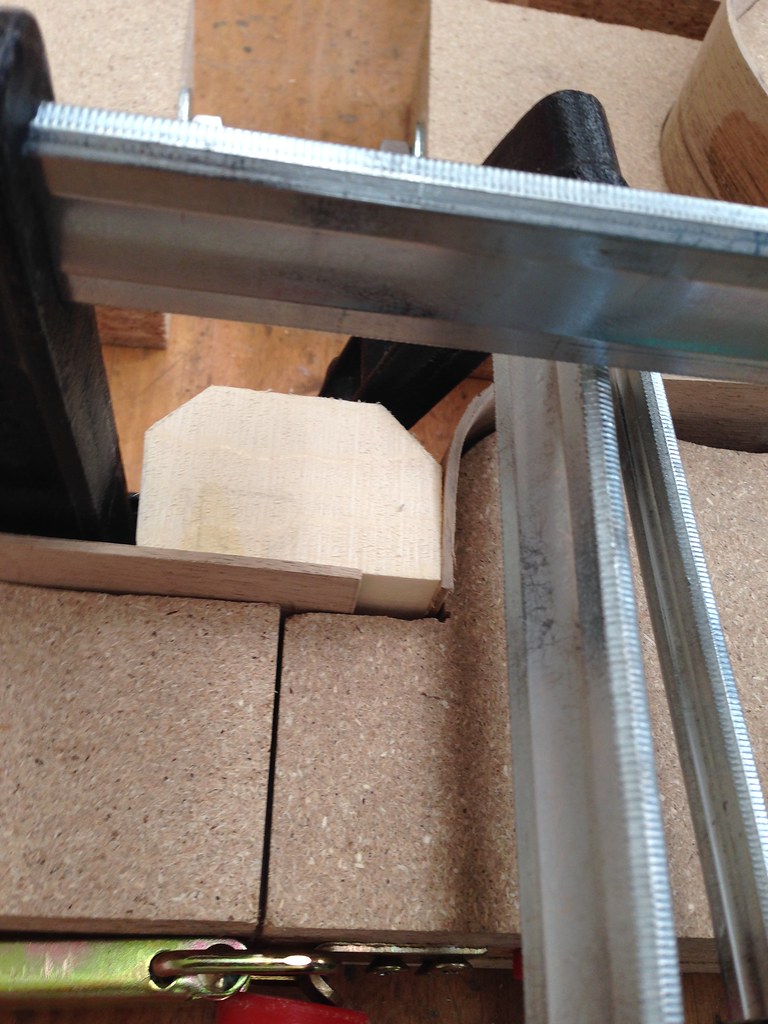 Untitled by David Emm, on Flickr Untitled by David Emm, on Flickrkerfed lining creation on the bandsaw and "jig" used to make it 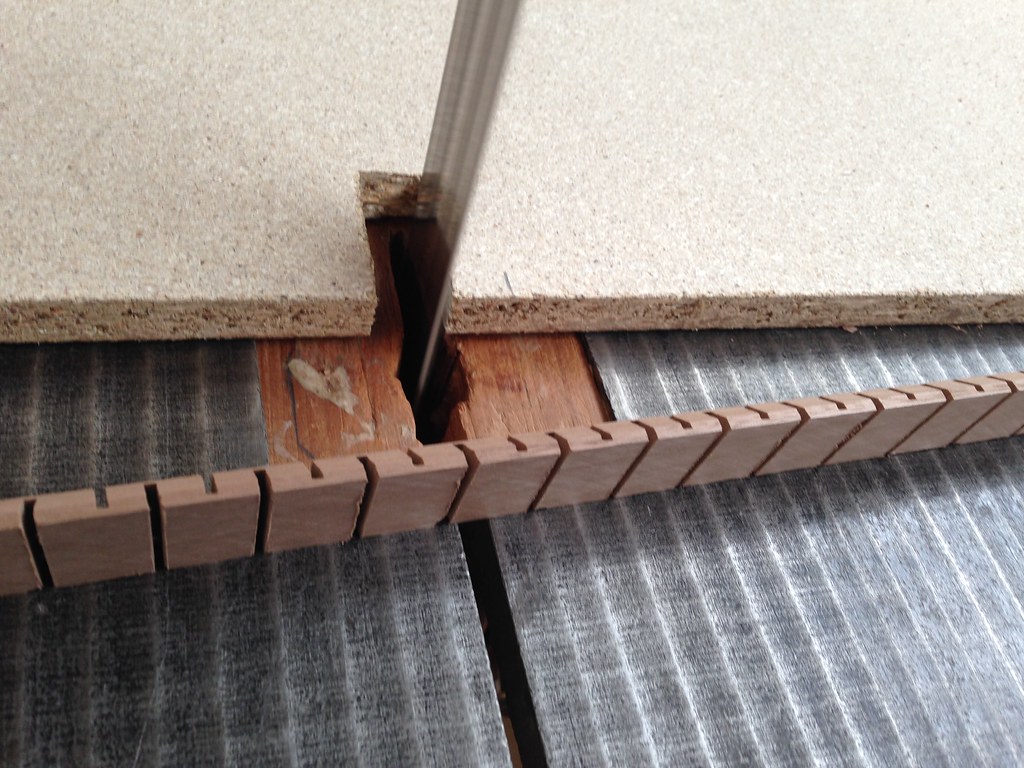 Untitled by David Emm, on Flickr Untitled by David Emm, on FlickrA somewhat overly large pile of kerfed linings 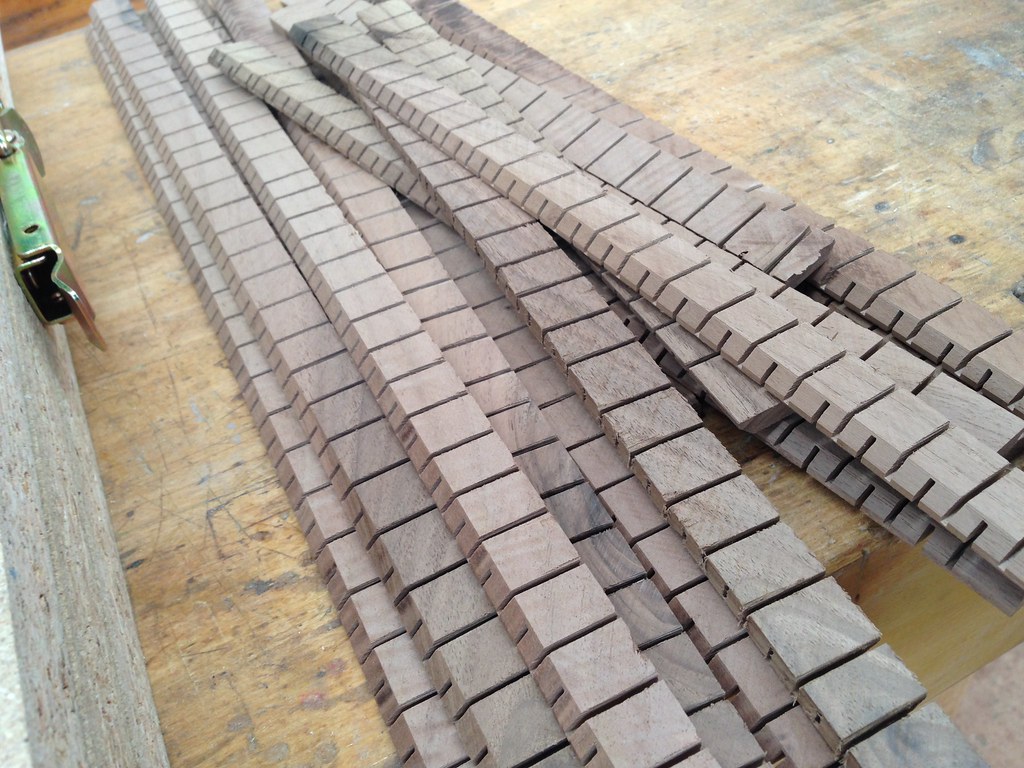 Untitled by David Emm, on Flickr Untitled by David Emm, on FlickrNot glued, just demonstrating how the kerfed linings look when in place 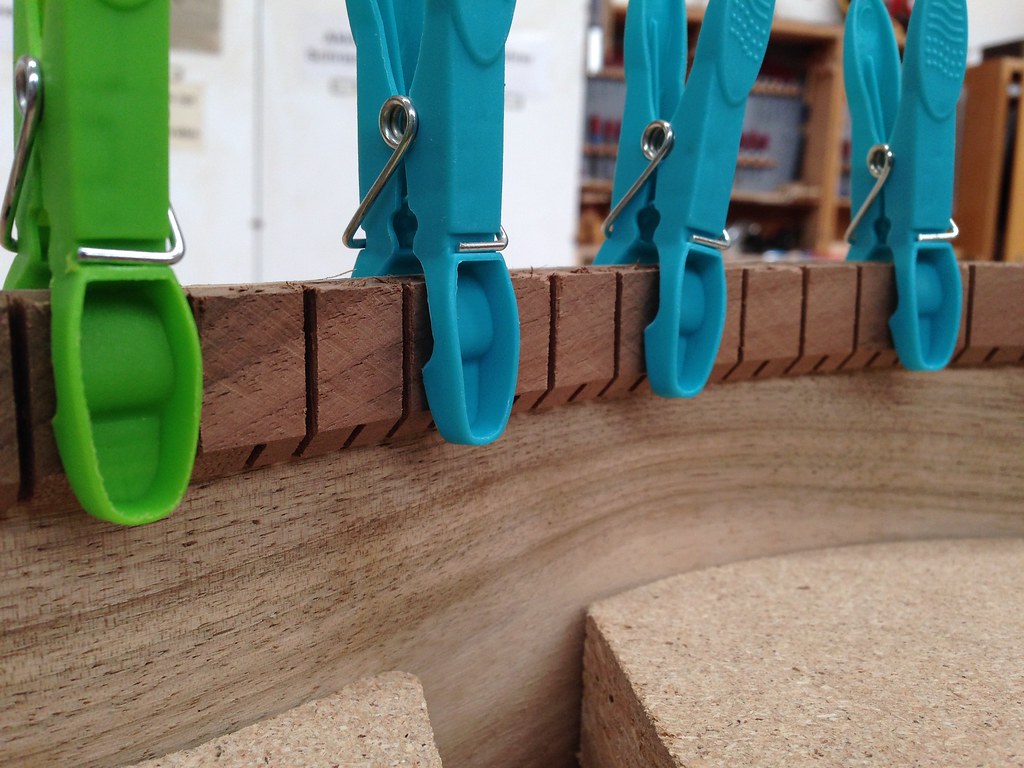 Untitled by David Emm, on Flickr Untitled by David Emm, on FlickrThickness sander thicknessing the soundboard 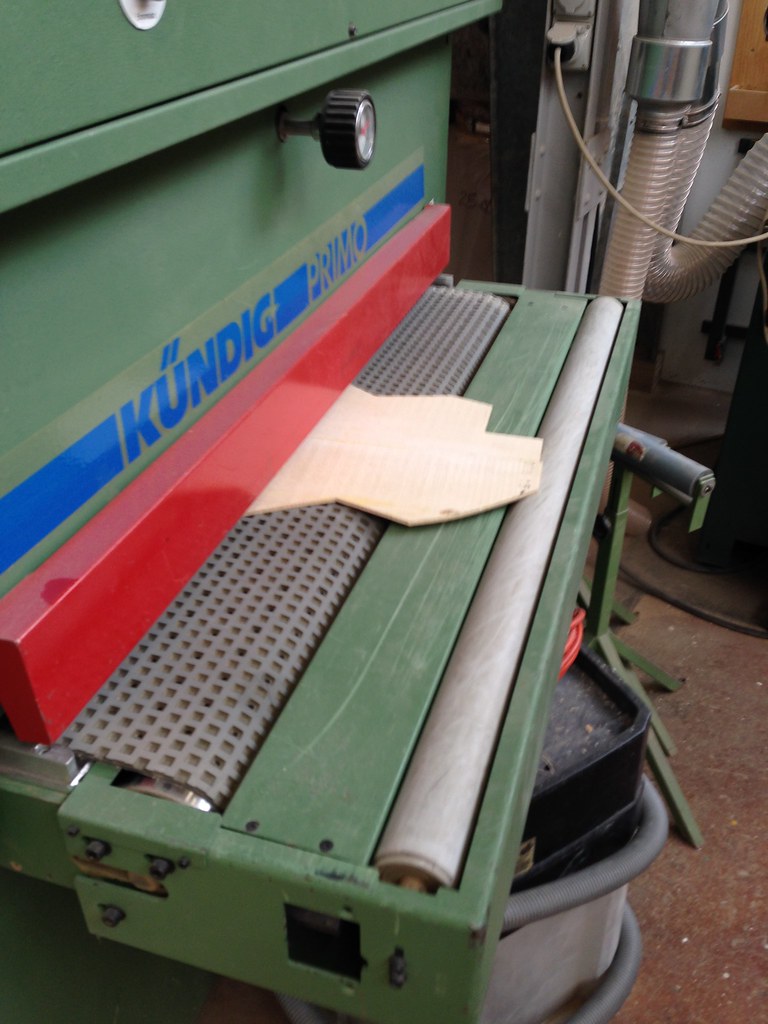 Untitled by David Emm, on Flickr Untitled by David Emm, on FlickrNice clean freshly sanded soundboard  Untitled by David Emm, on Flickr Untitled by David Emm, on FlickrNice clean sanded soundboard with walnut rosette sitting on it for illustrative purposes 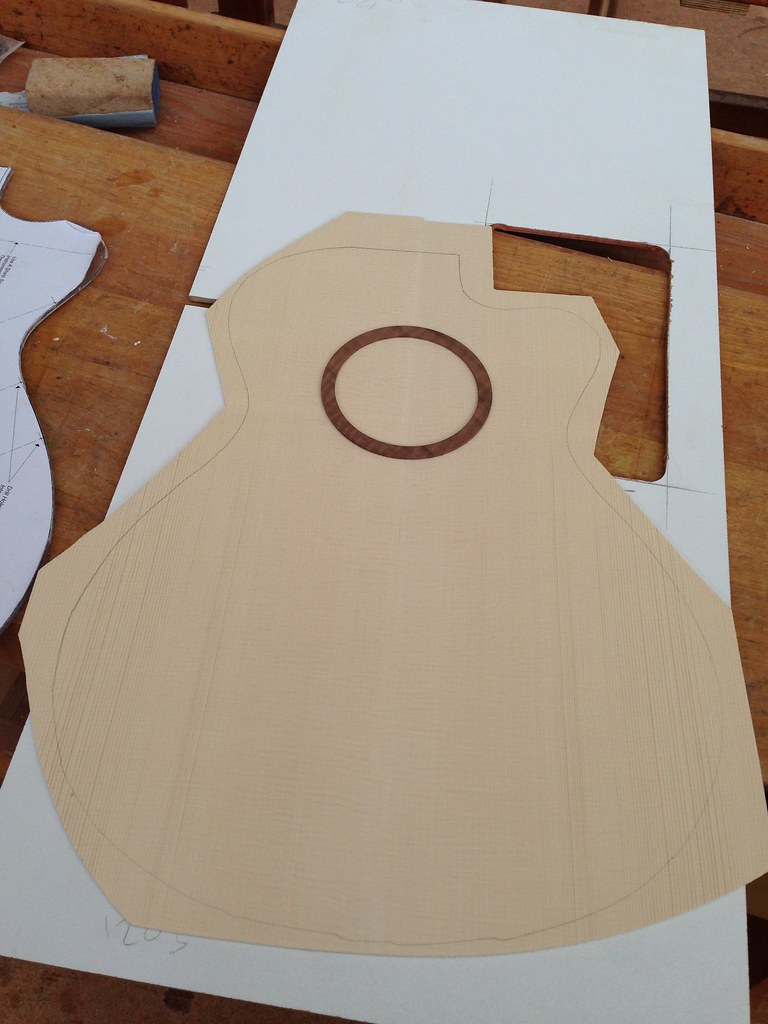 Untitled by David Emm, on Flickr Untitled by David Emm, on FlickrStupid dremel router base set to "minimum" circle cutting distance, about 20mm too big to cut the soundhole 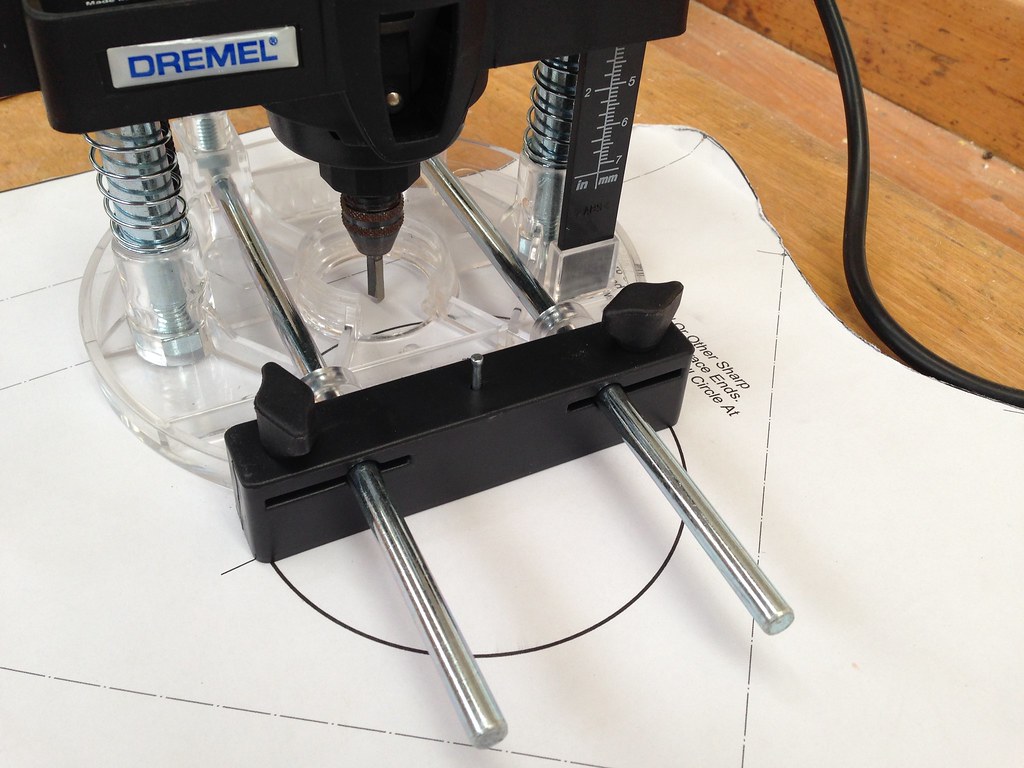 Untitled by David Emm, on Flickr Untitled by David Emm, on FlickrThe ridiculously stupid and useless dremel router base set to "minimum" circle cutting distance barely reaches the outside edge of the rosette 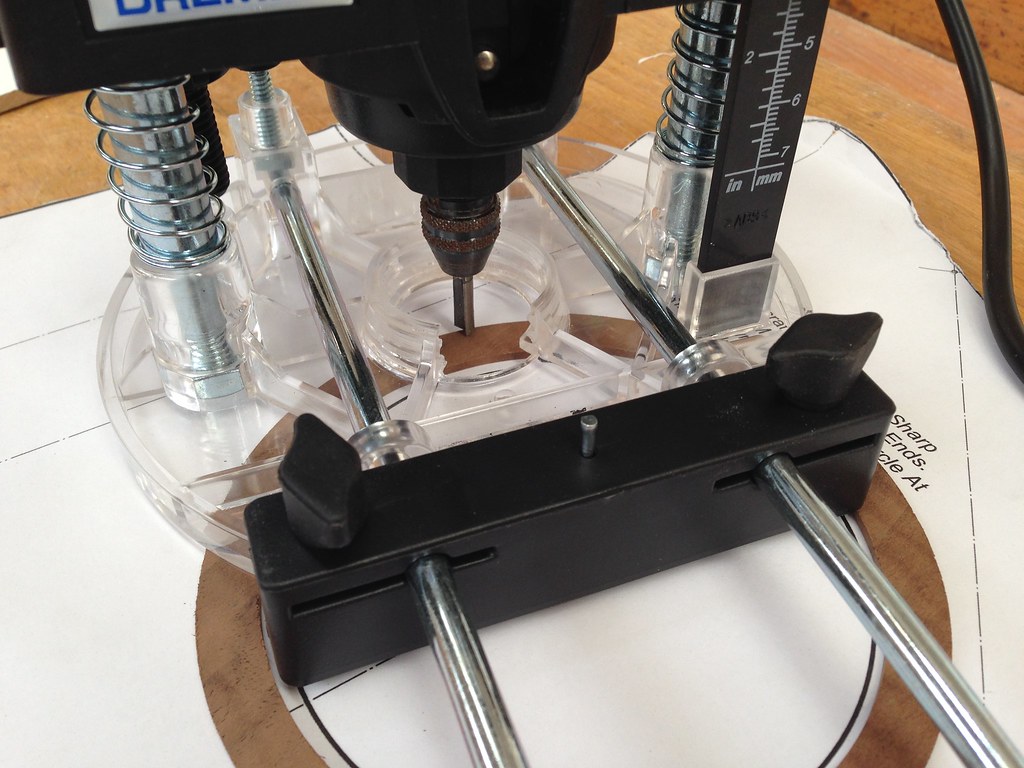 Untitled by David Emm, on Flickr Untitled by David Emm, on Flickr
|
|
#25
07-14-2016, 02:20 PM
|
|||
|
|||
|
Quote:
Quote:
I was thinking about doing a bolt-on, but i don't like the way simple bolt-on ideas work and my own theory of the bolt-on idea is going to be a mission to try on a first attempt, so i'll maybe do a test just of the join one day and if it works, maybe implement that in future builds.
|
|
#26
07-14-2016, 02:41 PM
|
|||
|
|||
|
Three suggestions.
First, if you want more clamping pressure out of your clothespins - you may not need it - wrap a rubber band around the clamping end of each one. The more and tighter the wraps, the more clamping pressure. Second, looks like you could simply cut off some of the base of the Dremel attachment, where the base interferes with the cross bar. That would allow it to cut a smaller diameter. Third, where possible, avoid sharp corners, such as on your end and neck blocks. They create stress concentrations.
|
|
#27
07-15-2016, 01:14 PM
|
|||
|
|||
|
Quote:
1. I have a box of rubber bands sitting there to do just that if required, I haven't actually glued the linings yet, the picture was just showing what mine looked like. 2. I was thinking of chopping into it/drilling holes in it, but who knows how sturdy it will be after i've done that, its all plastic after all (and surprisingly not cheap). I'll see what i end up doing depending on how much other bits i end up doing on monday. 3. Good to know, i just copied the design of the neck and end block shapes from the build-a-guitar book thats been semi-helping me along. i'll look into tweaking them next week.
|
|
#28
07-18-2016, 02:34 PM
|
|||
|
|||
|
Hi all, i'm hoping i'll be able to start gluing braces to the back and top this week but i'm missing some "vital" components, so need some advice how to go about this without them.
1. Is gluing braces to the soundboard using weights a completely terrible idea? i'm not sure how i'd do it with clamps to clamp the centre area, also i have no access to a go bar deck or vacuum bag. 2. I also have no radius dish, and am struggling to find a way to buy one, postage is ridiculous, even within Europe. I thought about building one, but that seems like it might be a week long process (or more) and that might still ending up costing a lot. Is there a way to glue the "curved" bracing from my plans into the back without a radius dish to hold the shape while its being glued? maybe glue it upside down with the braces underneath on the table with the back sitting and clamped/weighted on top of them creating a dome, not a dish?
|
|
#29
07-18-2016, 02:53 PM
|
|||
|
|||
|
1. You need long-reach clamps to clamp the bridge, so make some cam clamps now. (I bought 1 and made 5 using same design.)
2. You can achieve most desired radius from clamping radiused braces to the top and back. See p8 of [URL="http://www.stewmac.com/How-To/Online_Resources/Kit_Building/Triple-O_Guitar_Kit_Instructions.html"] for discussion. I made a radiused clamping caul for the opposite side to clamp against.
|
|
#30
07-18-2016, 03:31 PM
|
|||
|
|||
|
I use cam clamps and a thin flexible caul to clamp the plate onto arched braces one at a time. It takes 7 clamps (two 8 inch, three 6 inch, and two 4 inch) to do X braces. Pretty expensive, but depending on your work style they can be useful for all sorts of other things too. But it's also slow, so I wouldn't necessarily recommend it as a long-term solution.
Go-bars are one of the oldest and simplest clamping methods known to man. No need to buy fancy fiber glass rods or anything. Wood will do. Look around the shop and your house for good go-bar decks. Anywhere with a low ceiling, like underneath a table or shelf  If it's a flimsy shelf, put some weight on top of it to counterbalance the upward force from the bars underneath. If it's a flimsy shelf, put some weight on top of it to counterbalance the upward force from the bars underneath.As Jon says, you can make a radiused caul to do one brace at a time. Or you could do a cylindrical arch (curved across the grain, but flat along the grain), which is easier to make a dish for, and IMO structurally superior for the back. I can't give specific instructions since I've never made one myself, but the goal is to take piece of plywood or whatever and flex it into a curved shape. Doesn't necessarily have to be true cylindrical. Spline curve works too. Or even a recurve shape like Howe Orme guitars But make sure the dish is stiff enough and/or well supported underneath not to flex significantly out of shape under the pressure of go-bars.
|


