
|
|
#1
 08-14-2015, 08:58 AM
|
|||
|
|||
|
It has been a while since I have posted on the forum. After memphis, life has been pretty hectic. We are doing some construction on our home and life just seems to be pretty busy around here. But I am still making plenty of dust.
I am currently working on a new build- a honduras rosewood and englemann spruce parlor. Since this is a non-commissioned build, I am trying some new things that I have been planning for a while; these include some new techniques (for me), new aesthetics, technical changes, etc. That's the joy of a "spec" build. It allows the luthier to experiment a bit- which is how big things start. So to kick things off, I dug out the set of honduras rosewood from my stash. I had some concerns about this set as the person I got it from had done a pretty rough resaw job on it. Let's just say I had to work very carefully to make sure I could salvage the set- and I did. I am a sucker for sapwood and spalting, and since this set has both on its back, I am very pleased to be able to use it. It is also almost perfectly quartered. 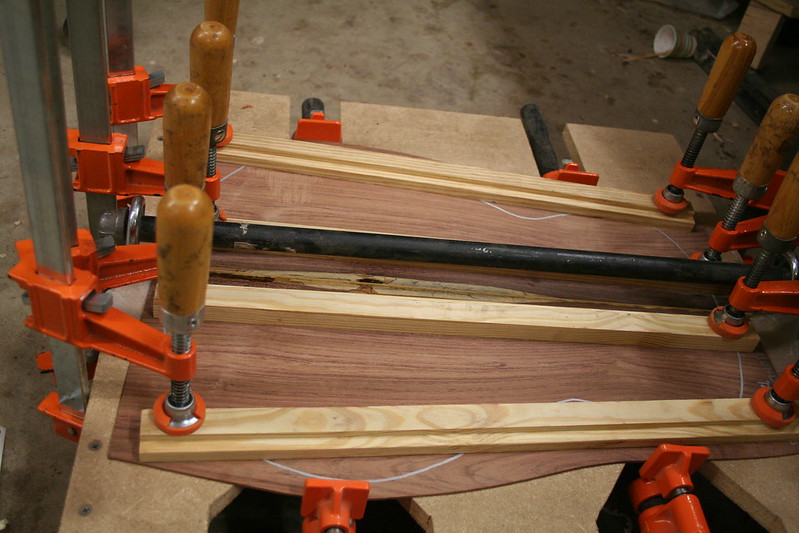  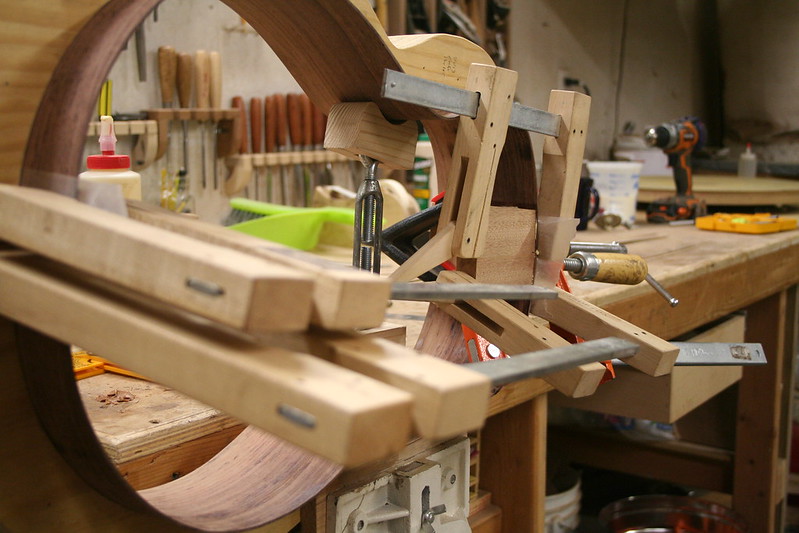 The top for this guitar has some nice color in it that compliments the color in the HRW very well. It is exceptionally stiff along the grain and very light weight. I expect this to be a very responsive little guitar. For the rosette, I am doing a thin radial HRW ring with b/m/b purfling. This is the style that I have been leaning towards lately and what I am thinking about making my "standard". On this guitar, I am playing a bit more with different line weights. I like the look and think it gives just a bit more class to the guitar. 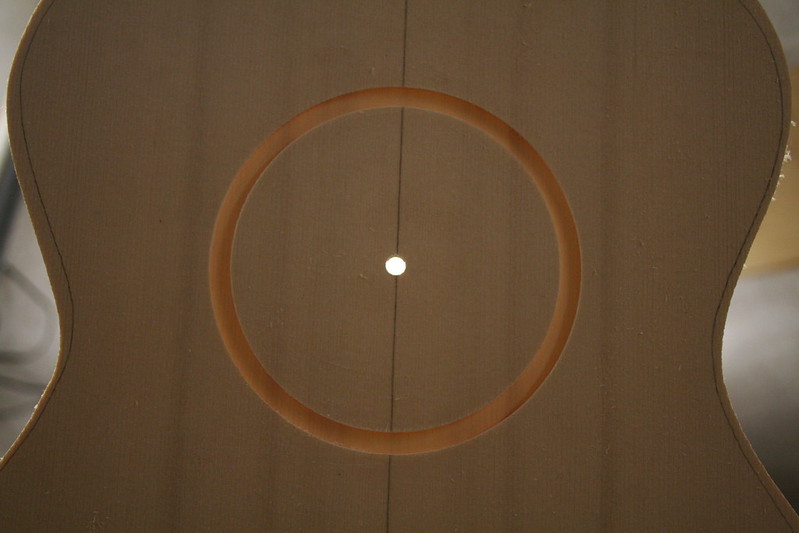 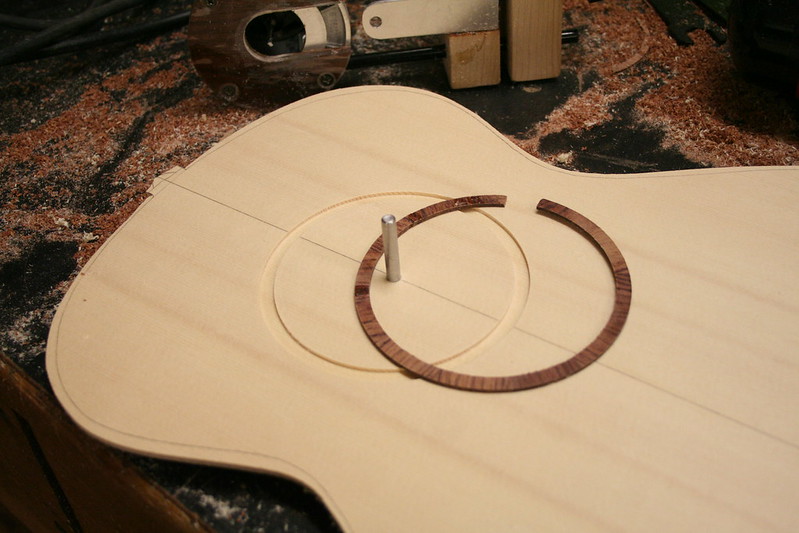  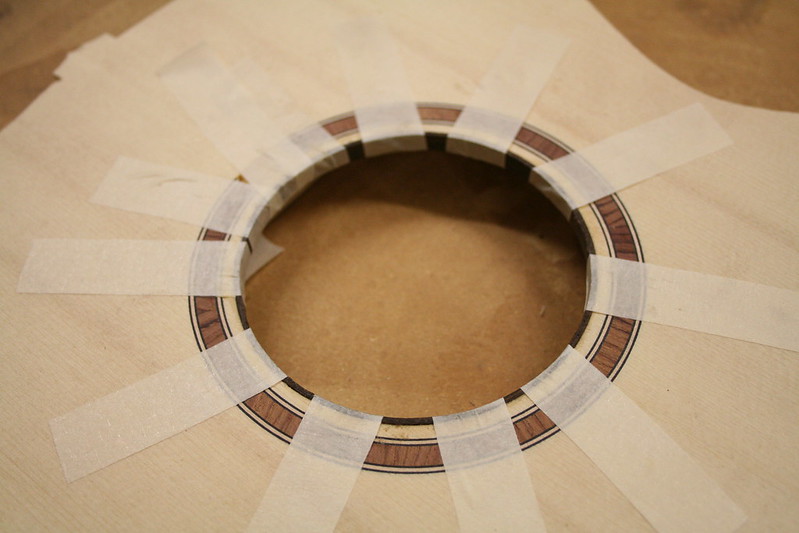 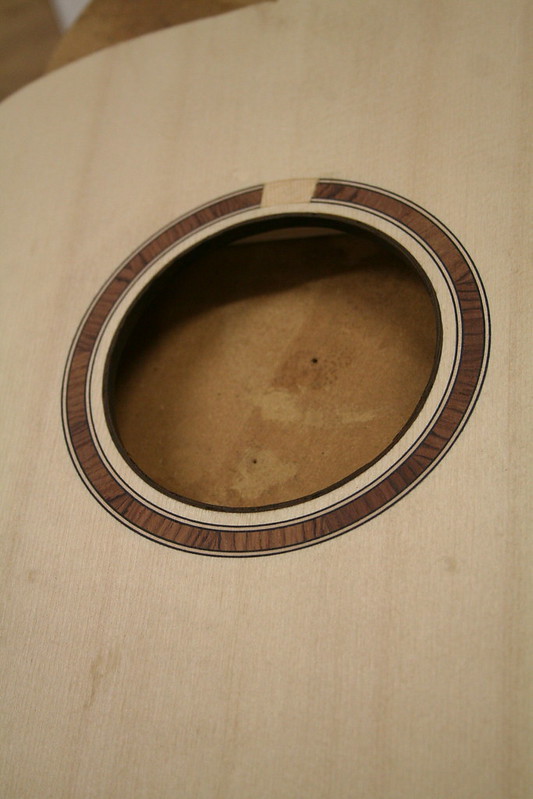 That's all for now. More to come soon.
__________________
Chris Ensor 
|
|
#2
08-14-2015, 12:00 PM
|
|||
|
|||
|
Chris, Look forward to the build. Like the Rosette, just curious about the Ebony ring inside. Does it serve a purpose besides adding to the look of the top?
|
|
#3
08-14-2015, 12:28 PM
|
|||
|
|||
|
Great start and a great looking set of woods for this build. Looking forward to following along!
__________________
2013 Stehr Auditorium (Carpathian/Myrtle) 2015 Stehr Auditorium (Adi/BRW) 2020 Baranik Meridian (Blue Spruce/Manchinga) 2020 Wilborn Arum (Tunnel 14/Coco) 2021 Kinnaird Graybeard (BC Cedar/Bog Oak) 2022 Kinnaird CS Student Build (Adi/Padauk) 2023 Kinnaird FS (Italian/Koa)
|
|
#4
08-14-2015, 01:38 PM
|
|||
|
|||
|
Looking good Chris.
That back is gorgeous. Can't wait to see the new stuff you'll be trying out.
__________________
___________________ Colin Ensor ES (Sycamore/Lutz) Halcyon (Flamed walnut/Engelmann) Taylor 324ce Taylor Baritone 6 Warwick Streamer Eastman MD505 "I only drink coffee on days ending in 'y' "
|
|
#5
08-14-2015, 08:41 PM
|
|||
|
|||
|
Quote:
Quote:
Quote:
__________________
Chris Ensor
|
|
#6
08-15-2015, 06:53 AM
|
||||
|
||||
|
Thanks for posting Chris, I really look forward to following this thread!
__________________
Wayne Irvin Johnson www.irvinguitars.com my current guitars; 2014 personal build eir/cedar 25.4 2020 Irvin SJ eir/tunnel 13 redwood top 25.5 guitars I have owned; 1977 Martin D-28 2006 Tom Doerr Legacy Select 1956 Gretsch White Falcon 2011 Taylor GA3e 1967 Silvertone 1969 Stella Harmony
|
|
#7
08-16-2015, 08:09 PM
|
|||
|
|||
|
As I approach carving the braces on the top of this guitar, I begin getting into some new techniques that I had been considering for a while. The first is deflection testing. This allows you to control some consistency between one top plate to another. It is amazing how a little change in the thickness can make a huge change in the deflection. If you want to know more about this, research the cube rule as it applies to lutherie.
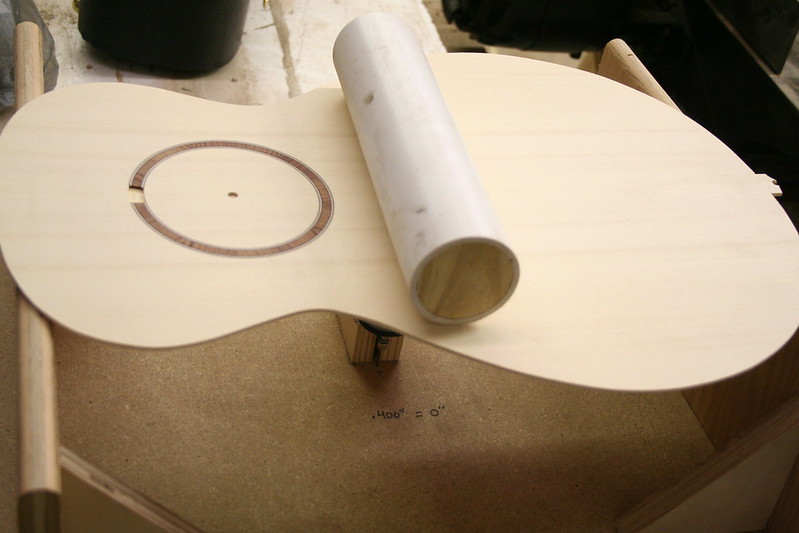 Once the braces were on, the next new approach is using free plate tuning (chandli) to shape the braces. I have been doing a bit of research on this method including Alan Carruth's very imformative DVD. Thanks Alan. This is a very interesting approach and it is kind of crazy to see how the glitter moves around on the top as you sweep through frequencies. 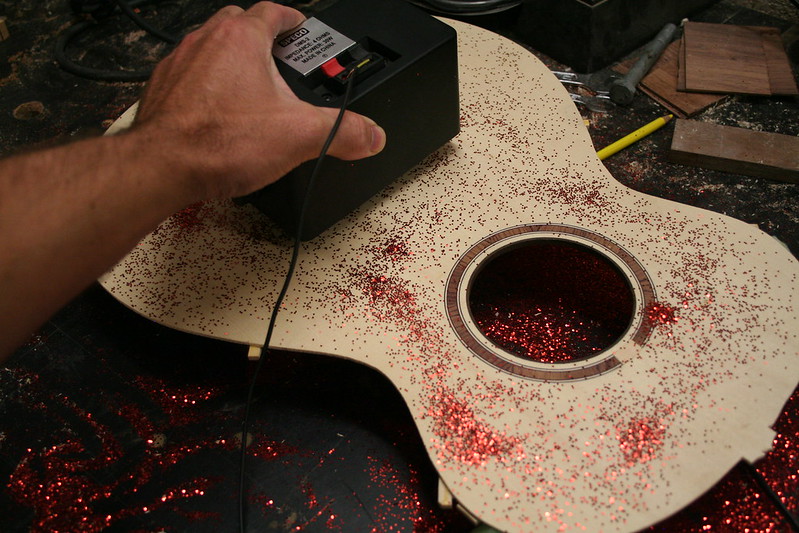 I also decided I wanted to give solid liners a try. I have always liked the look and what better time than now? I am using the same wood for these solid liners that I normally use for my kerfed liners: spanish cedar. 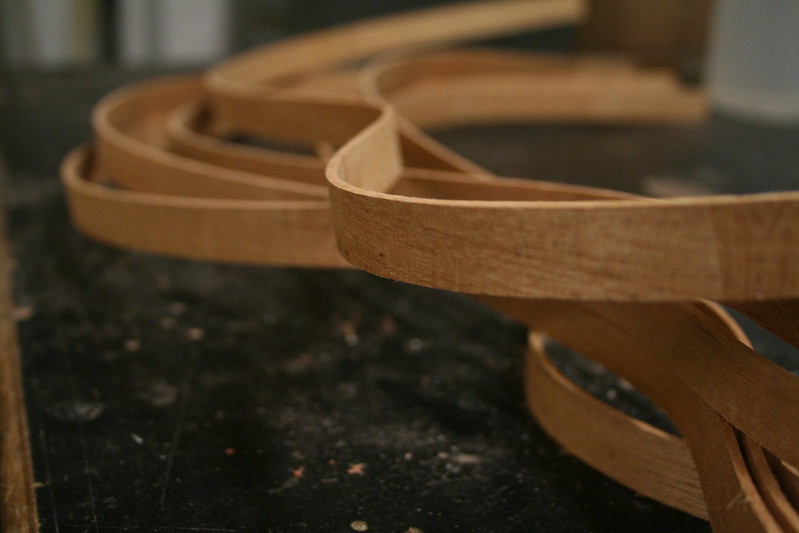  With the rims set for the top and the top braced and carved, the top was glued on. Then the liners went in on the rims for the back side and the braces went on the back. 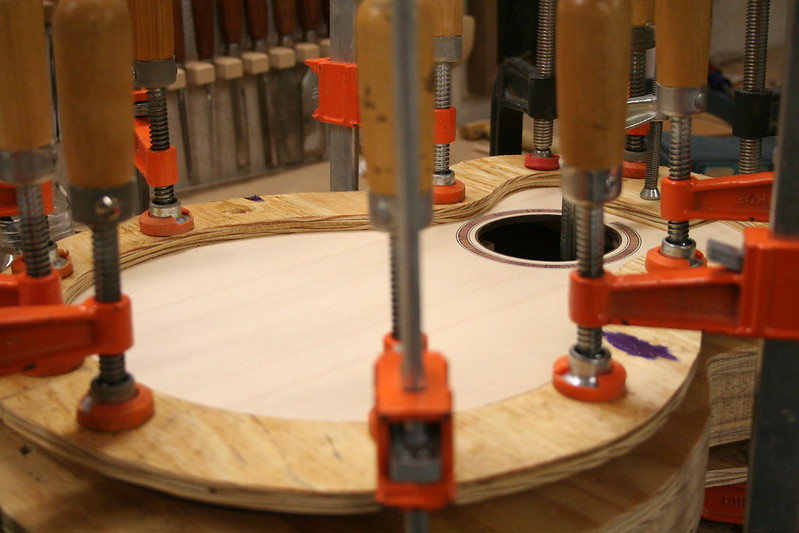  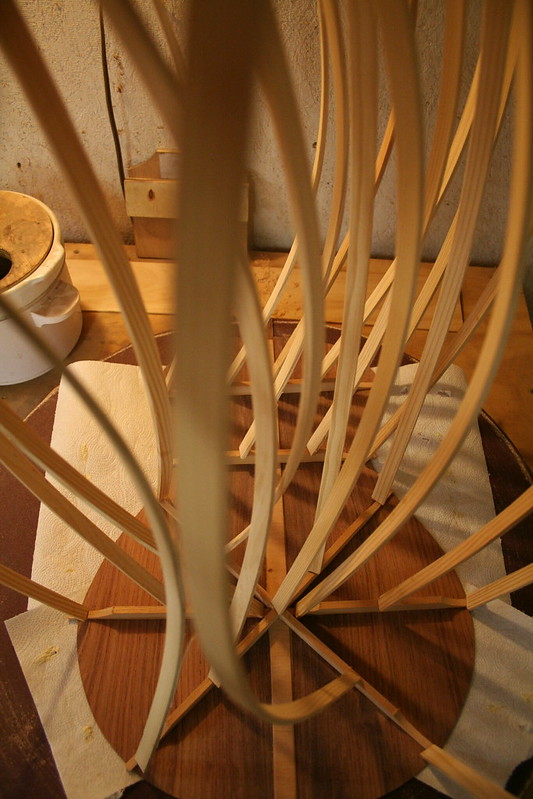 Up next will be carving the back braces and closing the box. Then on to binding.
__________________
Chris Ensor
|
|
#8
08-17-2015, 07:38 AM
|
||||
|
||||
|
this is really great Chris, love the pics and education you're providing. Can I ask you what wood are you using for your go-bar rods? I am thinking of making my own as well. Great thread, I look forward to more.
__________________
Wayne Irvin Johnson www.irvinguitars.com my current guitars; 2014 personal build eir/cedar 25.4 2020 Irvin SJ eir/tunnel 13 redwood top 25.5 guitars I have owned; 1977 Martin D-28 2006 Tom Doerr Legacy Select 1956 Gretsch White Falcon 2011 Taylor GA3e 1967 Silvertone 1969 Stella Harmony
|
|
#9
08-17-2015, 03:23 PM
|
|||
|
|||
|
Quote:
__________________
Chris Ensor
|
|
#10
08-20-2015, 08:11 PM
|
|||
|
|||
|
I have been making lots of curls, dust, and chips!
I carved the braces using one of my favorite paring chisels. I then fit the braces into the liners and glued the back on to the sides. 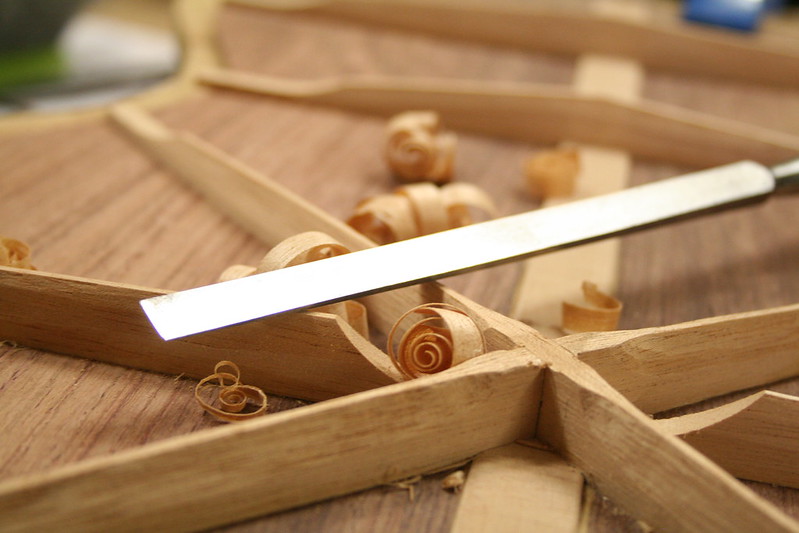 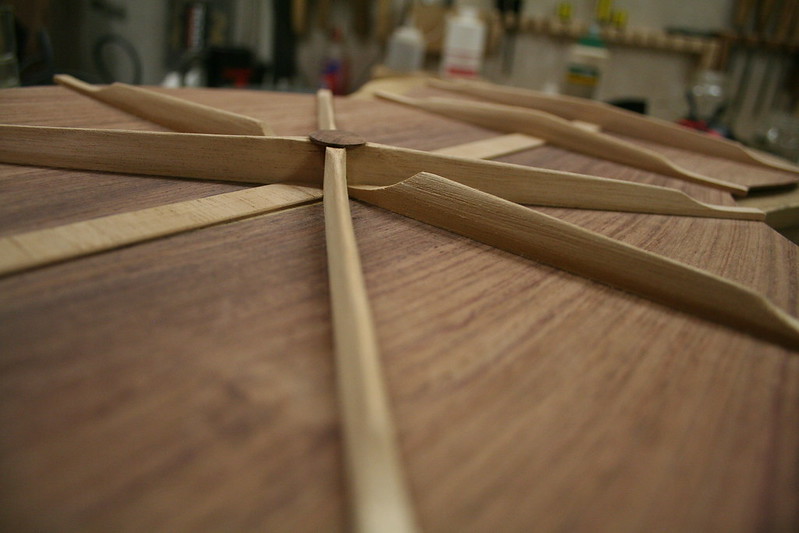 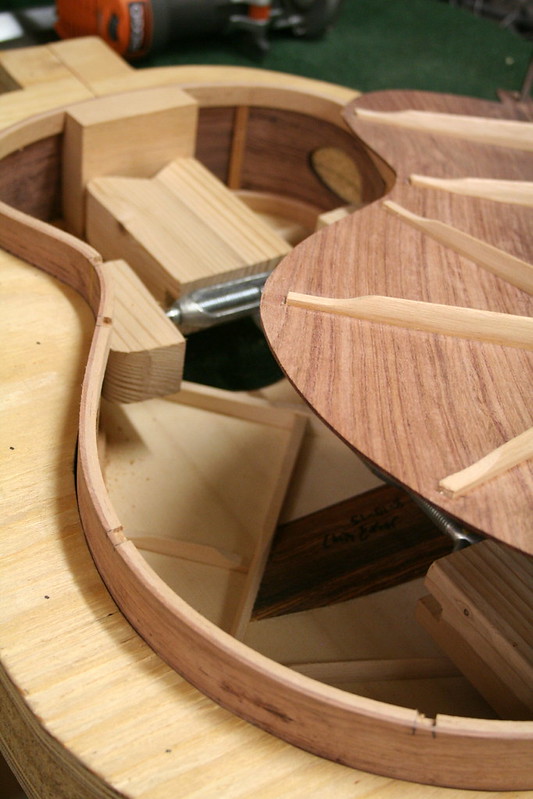 Once the glue was dried, I trimmed the plates to the sides and got a first glimpse at how the box looked as a whole. 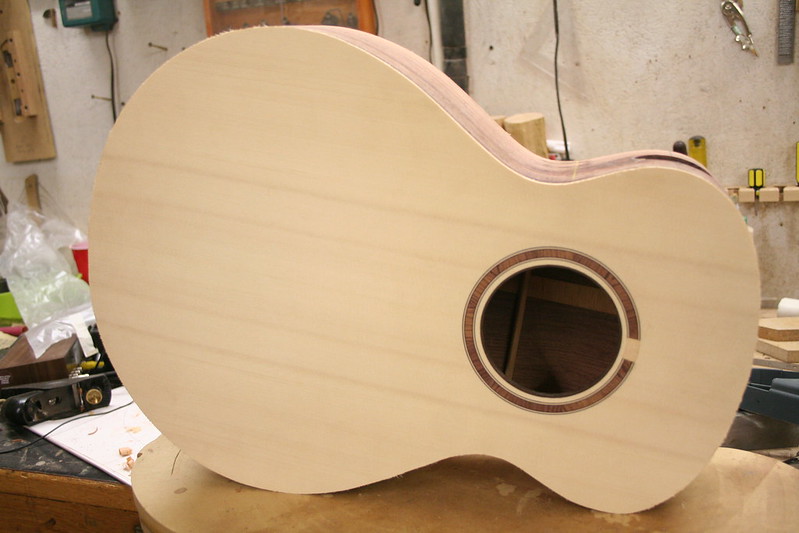 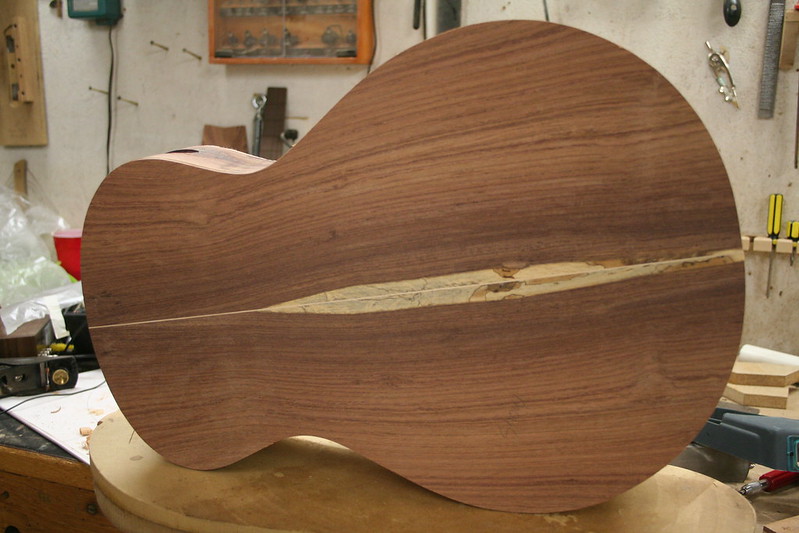 I then used my newest toy to sand the sides in prep for binding- a home made rolling pin sander. This is one of those "see honey, I told you buying a metal lathe was a good idea" sort of moments. It works wonderfully. I then routed my binding and purfling channels with my binding jig (which I recently received a patent on). Lastly, I glued the back binding and purfling into place. The binding on this guitar is wenge. The back & side purfling is a single piece of maple and the top purfling is b/m/b. 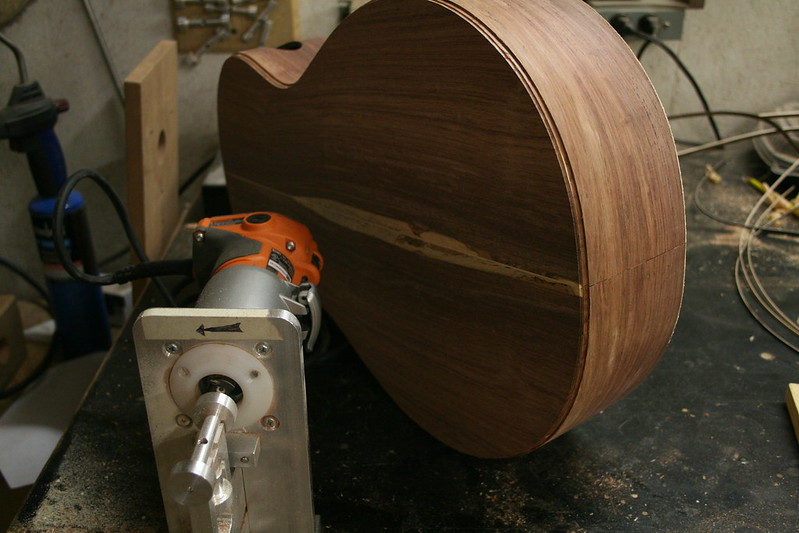 
__________________
Chris Ensor
|
|
#11
08-21-2015, 08:51 AM
|
||||
|
||||
|
love seeing this progress! Nice shot of your binding jig. I can't wait to use the one I bought from you soon...... I will try and post shots of that build once I get going. Can't wait to see more from you on this build, really looking sweet!
__________________
Wayne Irvin Johnson www.irvinguitars.com my current guitars; 2014 personal build eir/cedar 25.4 2020 Irvin SJ eir/tunnel 13 redwood top 25.5 guitars I have owned; 1977 Martin D-28 2006 Tom Doerr Legacy Select 1956 Gretsch White Falcon 2011 Taylor GA3e 1967 Silvertone 1969 Stella Harmony
|
|
#12
08-21-2015, 08:56 AM
|
||||
|
||||
|
love seeing this progress! Nice shot of your binding jig. I can't wait to use the one I bought from you soon...... I will try and post shots of that build once I get going. Can't wait to see more from you on this build, really looking sweet!
__________________
Wayne Irvin Johnson www.irvinguitars.com my current guitars; 2014 personal build eir/cedar 25.4 2020 Irvin SJ eir/tunnel 13 redwood top 25.5 guitars I have owned; 1977 Martin D-28 2006 Tom Doerr Legacy Select 1956 Gretsch White Falcon 2011 Taylor GA3e 1967 Silvertone 1969 Stella Harmony
|
|
#13
08-24-2015, 08:03 PM
|
|||
|
|||
|
The glue that I use for binding is very slow to dry (12 hours). So binding is a minimum 2 day process. But being such an important step, the time doesn't bother me.
Once I had the back binding and purfling glued on, I was able to move onto the top. The only difference between the two is that the top has a black line to separate the maple from the spruce. Lots of tape and rubber bands later... 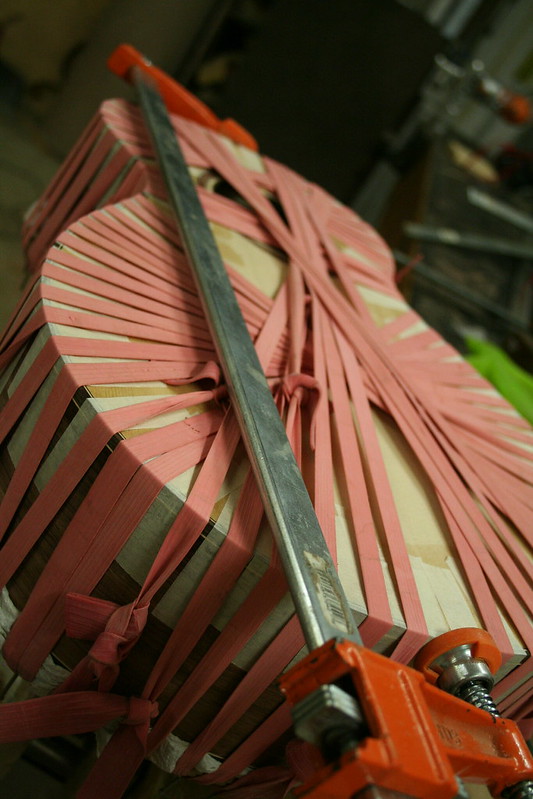 Once everything was nice and dry, I was able to scrape it all down and get my first good look at how the body looks as a whole. I am very pleased with the color and the contrast. 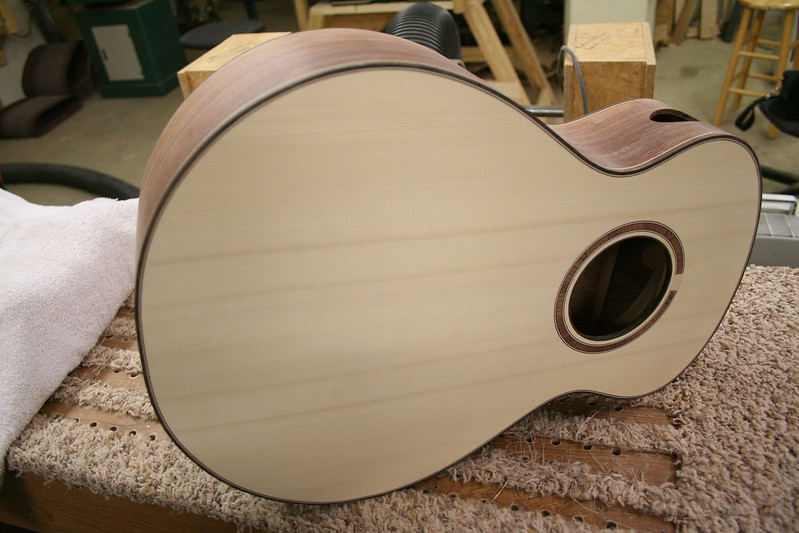 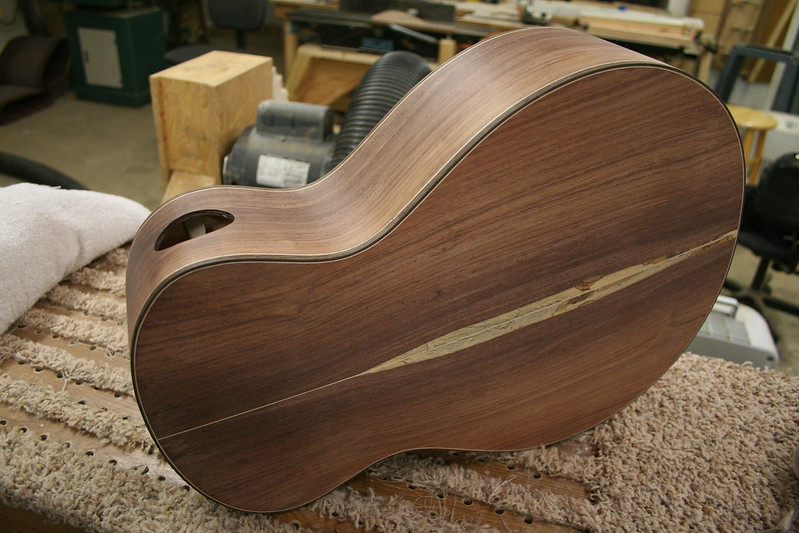 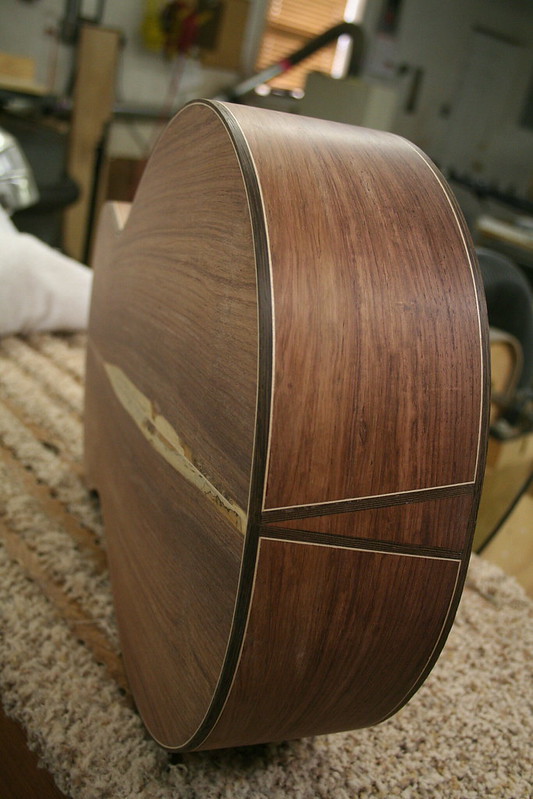 The wenge gives a nice bit of contrast without being jet black and the maple separates everything nicely. Now if you'll excuse me, I am going to go find my tweezers and start working on removing all these wenge splinters....
__________________
Chris Ensor
|
|
#14
08-31-2015, 08:38 PM
|
|||
|
|||
|
I have been making some progress on the neck.
First the neck blank was trued using one of my favorite planes. 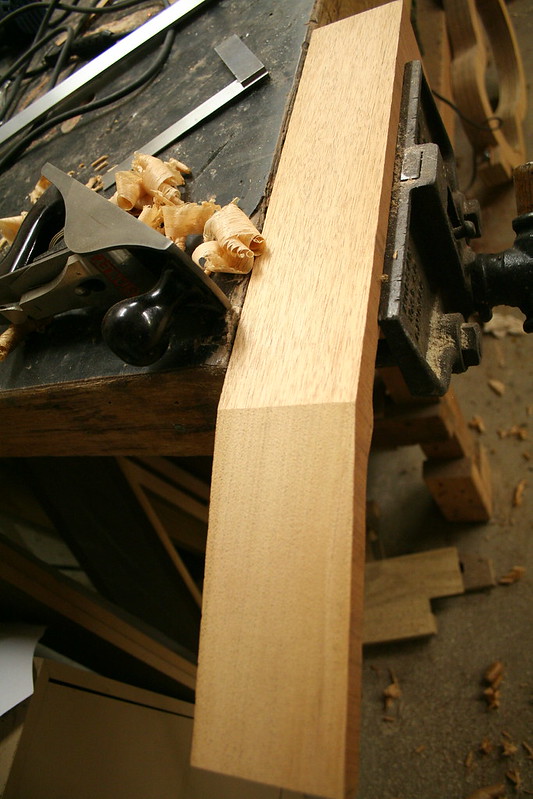 I then slotted the fingerboard and bound it. The fingerboard is wenge with a thin maple veneer under it. This veneer is from the same board that the rest of the purfling on the rest was made from. There will also be a matching veneer under the headstock overlays. 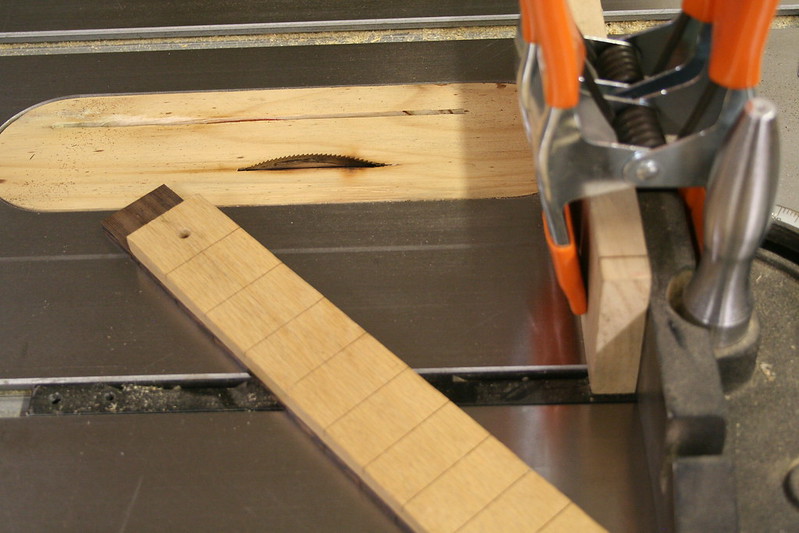 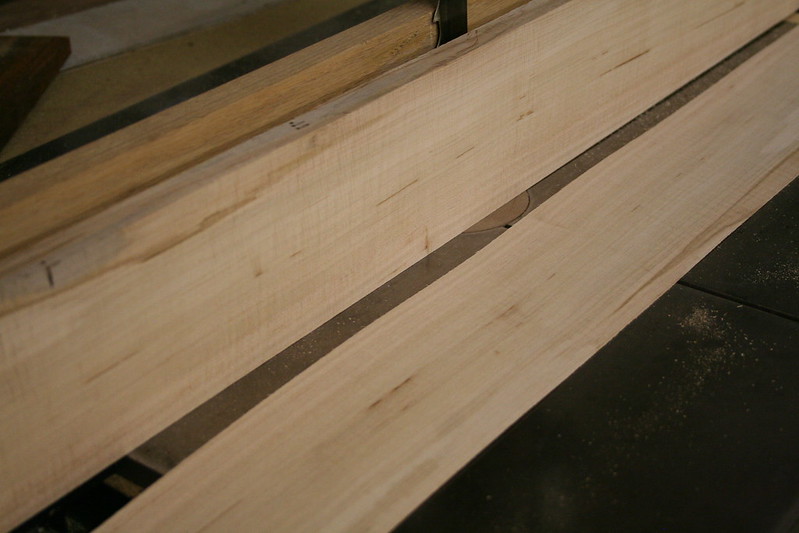 With the neck blank prepped, I routed the truss rod slot, roughed in the heel shape, and thickness the headstock- which also shapes the curve of the volute (not pictured). 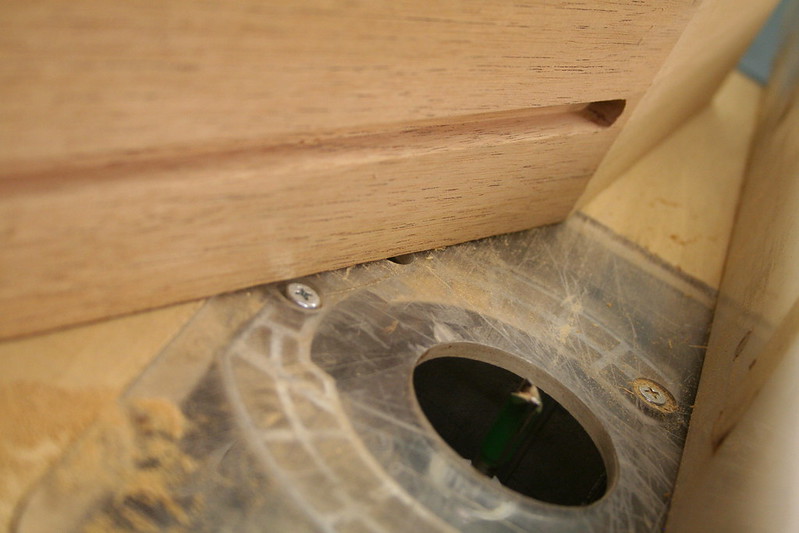 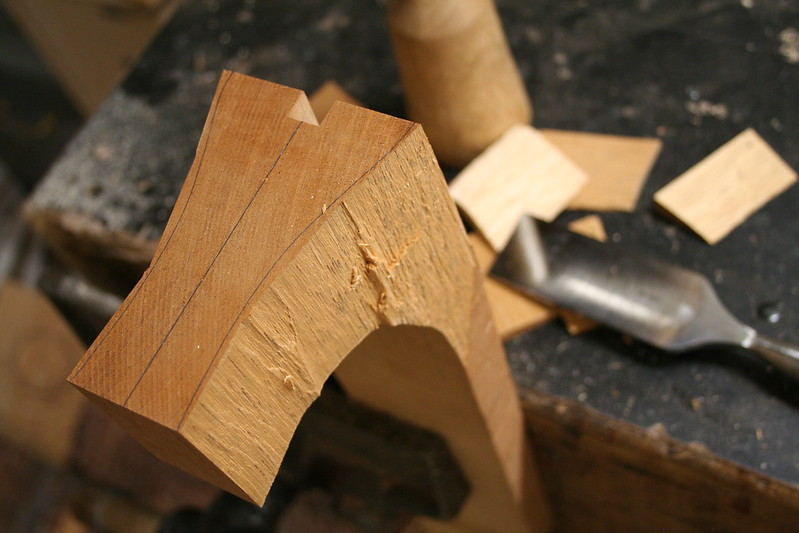 Once the headstock was to the correct thickness, I prepped the headstock overlay material- HRW w/ maple veneers- and glued them all on. 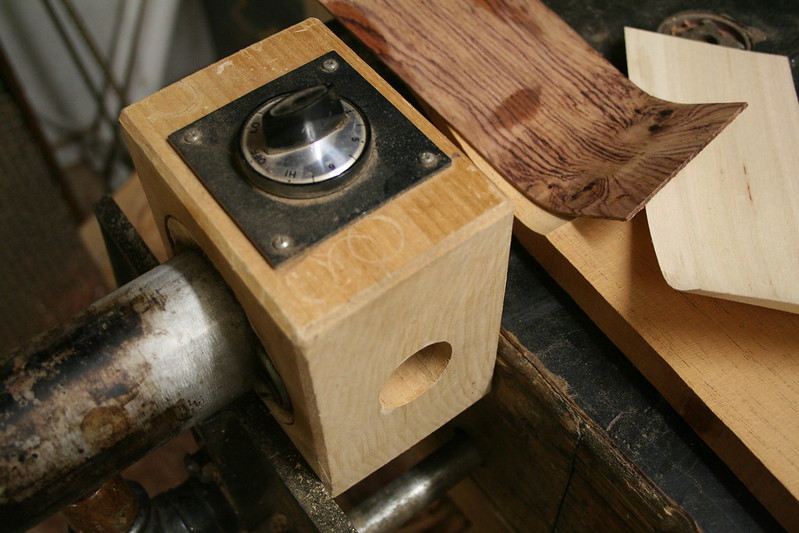 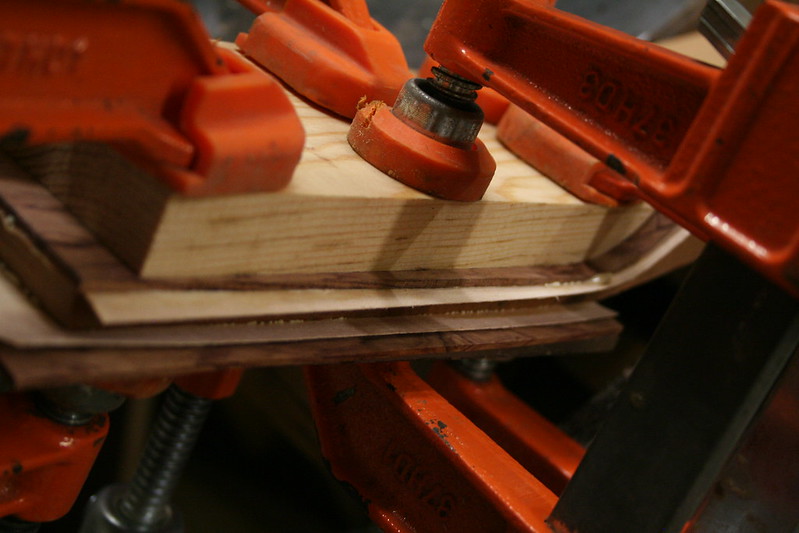 After the glue dried, the headstock was routed to shape. 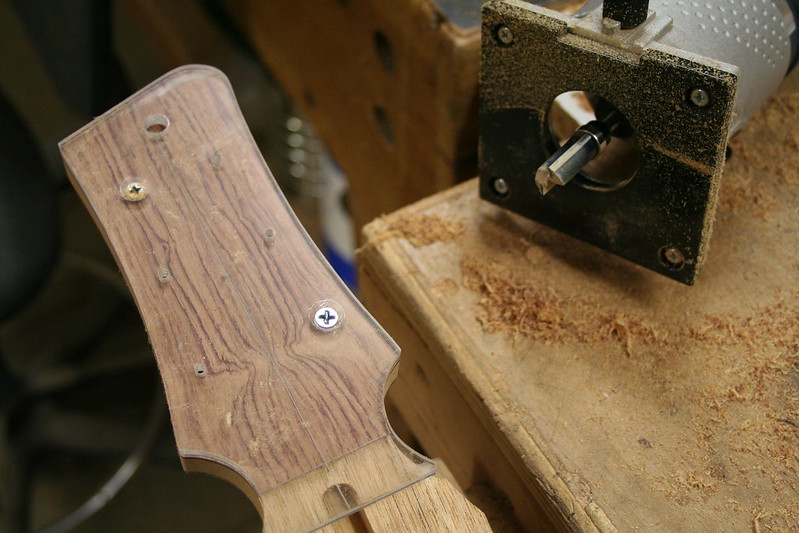 I actually haven't been moving as fast on the neck as I normally may have because I have been working on a new tool. I am attempting to make a drum sander that will sand the radius on to the top of my fretboards. If I can pull it off to the accuracy I need it, my shoulder will thank me.
__________________
Chris Ensor
|
|
#15
09-14-2015, 12:03 PM
|
|||
|
|||
|
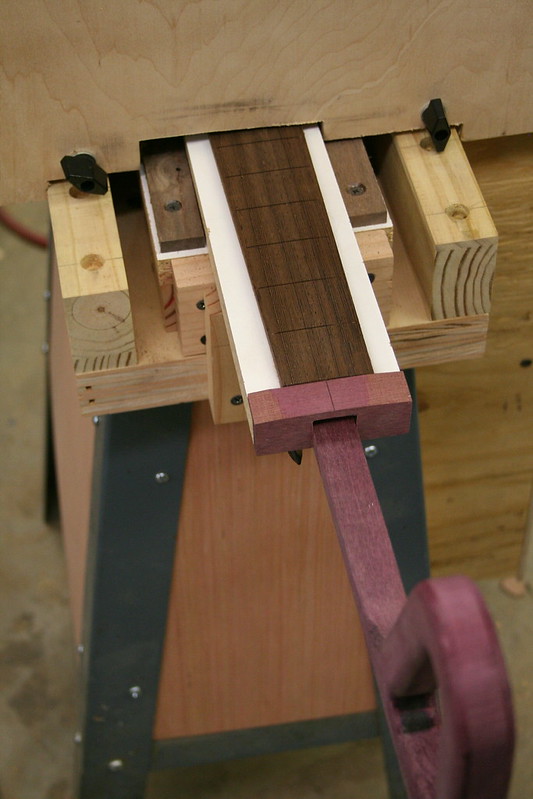
I have been battling a super nasty head cold and working hard on my fingerboard radius drum sander. The sander took a lot of work, but it was worth the effort. After much testing, I was able to use it to sand the initial radius onto my wenge fretboard for this guitar. It worked wonderfully.
 I then inlayed the hollow side dots. Here you can also see the nice fine line purfling on the bottom side of the fingerboard. 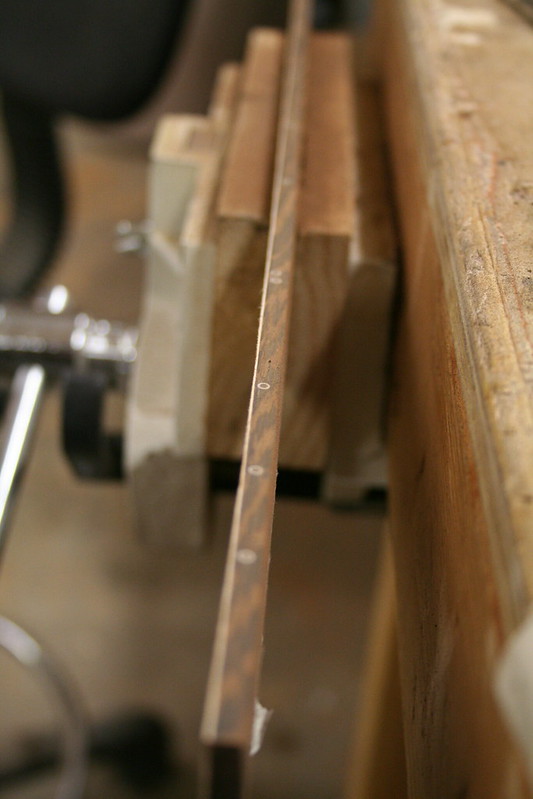 I set the angle of the neck and finessed it to a nice fit to the body. I connected the neck and body so that I could route the fingerboard extension support. 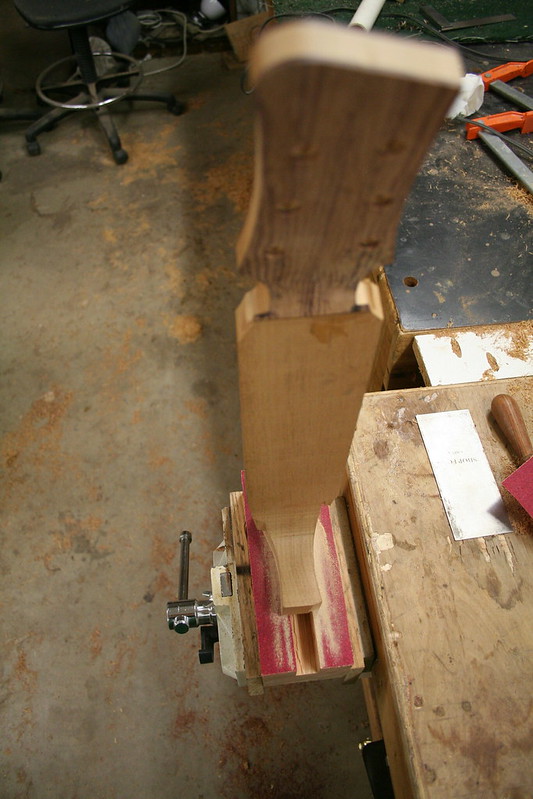 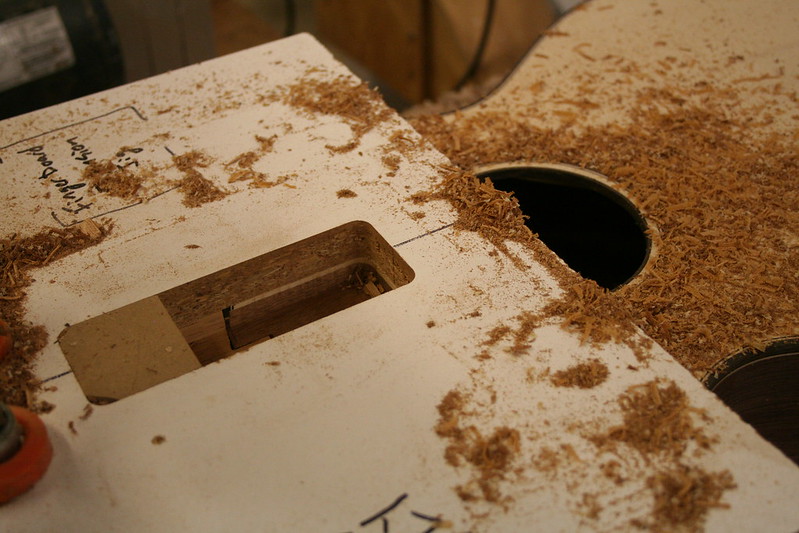 It makes a heck of a mess.... I then installed the truss rod and glued on the fingerboard.  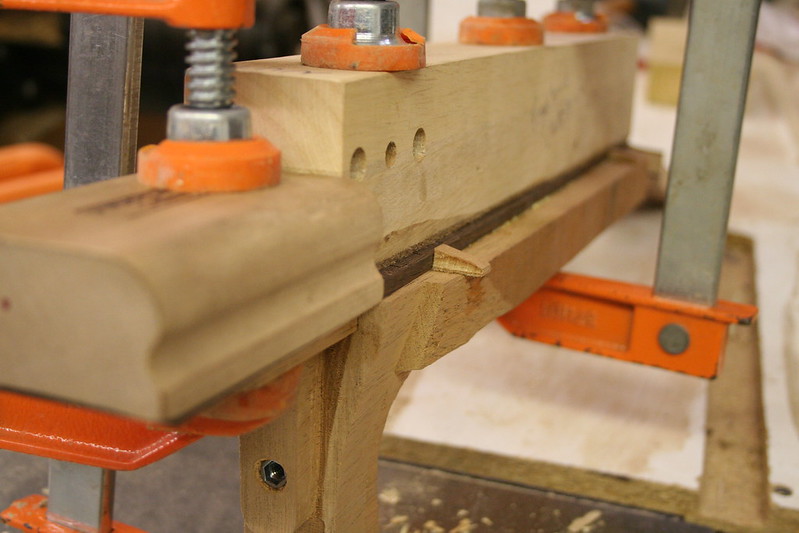 Up next will be carving the neck (one of my favorite steps) and then its time to prep for finish.
__________________
Chris Ensor
|


