
|
|
#1
 05-10-2010, 04:36 PM
|
|||
|
|||
|
Hello all, I started a new build this week so figured I have an excuse to start a new thread and share photos. I unfortunately skipped a lot photos, as I really just wanted to get the boring stuff done so I can start bracing etc.
The first thing I did this time was make a perspex template I can use to mark out bracing & to draw out the shape onto the wood. An easy job, and it has come in really handy so far. It is a copy of Alex Willis' plans from his book. Template (not yet cut out):  I started off by joining the top. After drying completely, I got my jack plane out and got it to the required thickness. Cedar smells amazing and is so soft, it planes wonderfully and took me under 10 minutes to thickness it. Western Red Cedar top: 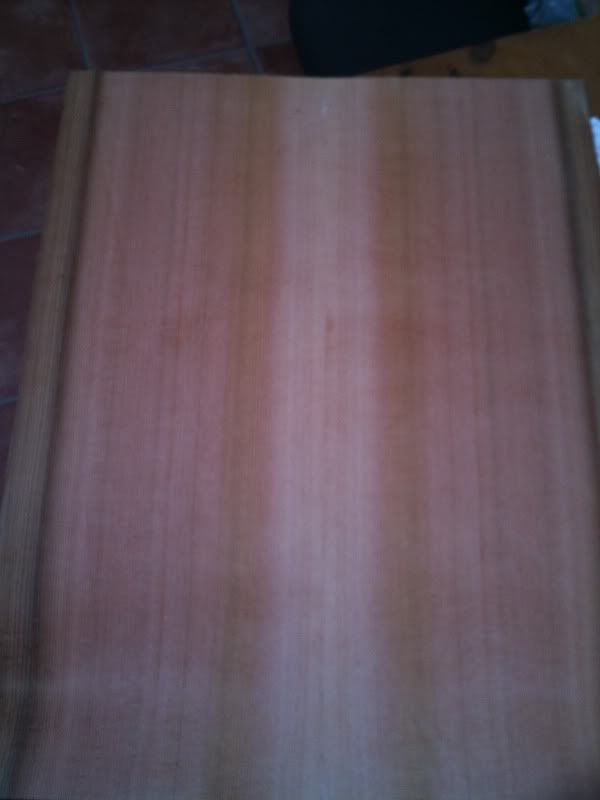 Then cut out the rosette which is Indian Rosewood with ebony/bloodwood purfling. I then cut out the rosette channel. I found the easiest way (for me) is to make the rosette then slowly increase the size of the channel until it is a nice tight fit. After a quick test fit, I glued it all in with regular wood glue. After a rough planing/sanding: 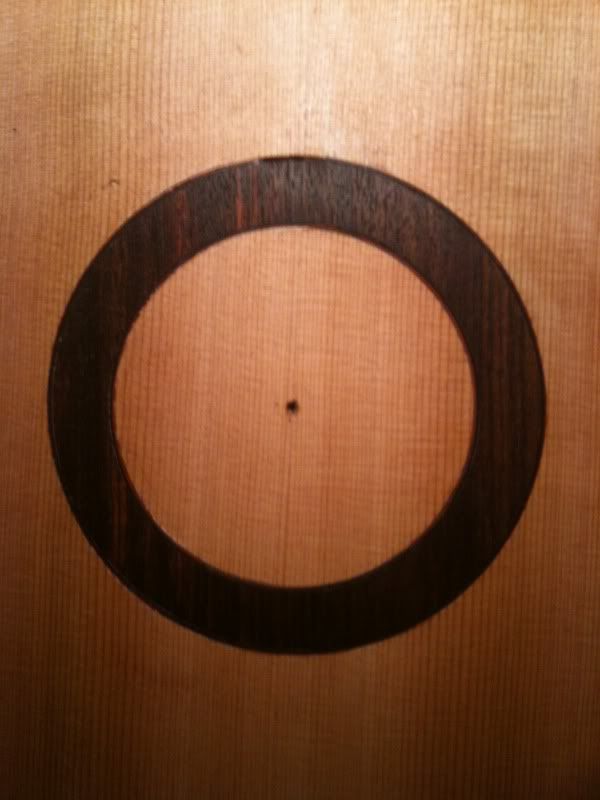 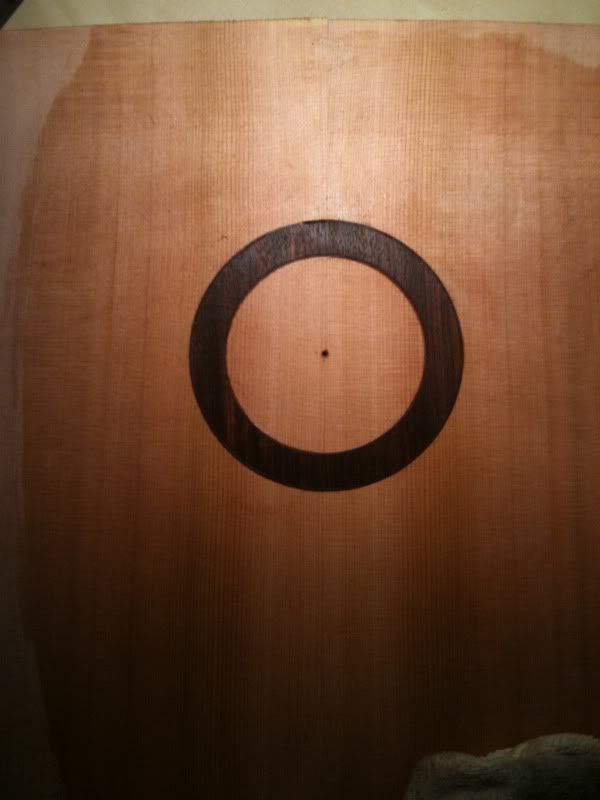 I'm on an early shift tomorrow so that gives me most of the afternoon to get some more work done. I hope to get the soundhole cut out and get the top cut out also. I hope the post brings me some supplies tomorrow which includes some instrument makers glue and a few tools. If they do come then I will get the bracing cut and hopefully glued. I haven't started anything on the back yet. I have bought a Wagner Safe-T-Planer (one of the tools I'm waiting for). I have been interested in these for a while as they are a much cheaper way to thickness wood than buying a thickness planer/sander. I also saw Robbie O'Brien's Youtube tutorial (Luthier Tips Du Jour) on how to set up and use this tool and thought I had to have one. My back & sides are currently at about 5mm and will be a pain to thickness by hand. I can't stress how useful these videos are for almost every aspect in guitar making. His tutorials really help the "hobby" builder who don't always have access to all the power-tools some other builders may have. Even if you are not interested in making guitars, they are a great watch, at least few hours worth of videos. If the tools/glue don't arrive tomorrow I can't find an excuse to not get the waterstone out and sharpen up my chisels & plane blades. I always keep my 1" chisel razor sharp but not the others  . .Off to bed (6 hours until work). I hope to start making some regular updates from now. 
|
|
#2
05-10-2010, 07:27 PM
|
|||
|
|||
|
Looking good, I'm glad you mentioned how you install the rosette (i.e. gradually widening the channel), I'm going to go for that too. A quick question, how thick is the wood you inlayed for your rosette? The reason I ask is that I'm looking to use a slightly wider ring of African Blackwood (AB), with a strip of Abalam running around the middle of it. The Alabam is .05" thick (1.27 mm), and I'm wondering if I'm going to need to make two concentric wood circles, or if I'll have enough thickness to be able to inlay the Abalam into the AB (please oh please be the latter)
__________________
My First Build!!! Curly Redwood/"Cloudy" Cocobolo Rosewood -- http://acousticbuilder.blogspot.com 1960s Gibson Hummingbird Regal Black Lightning Resonator etc.
|
|
#3
05-11-2010, 04:59 AM
|
|||
|
|||
|
Quote:
|
|
#4
05-11-2010, 05:54 AM
|
|||
|
|||
|
I don't really have the experience but isn't the rosette usually inlayed about half the thickness of the soundboard? Maybe it's just early but I'm not understanding why you would split it a second time.
I'd get the soundboard to the right thickness, rout channel .05-.06 deep, inlay ABW, thickness sand, and then rout .04 or .05 deep for the abalam before thickness sanding. Or don't even adjust the router depth at all. Even though it'd be cutting through the ABW's thickness, it's not like you don't still have the .05-.06 of soundboard material that you had before the abalam rout and inlay. Back to topic. OP- good start. I don't know if you've used Willis's plans before but that OM is braced heavily. I voiced mine a bit but after hearing what a great guitar (Joel Stehr's) sounds like I wish I'd have kept shaving braces!
|
|
#5
05-11-2010, 04:18 PM
|
|||
|
|||
|
My rosette is about 1.5mm maybe a little more. It was a left over of a sides set before bending, so it must be between 1.4-2mm.
I'm sure there are easier ways to cut the channel, however I found that by cutting it the way I did I could get a perfect fit before the purfling, then I would cut it slightly bigger for the black lines (inside & out). I then just cut the outside of the ring a tiny amount and I managed to get the both bloodwood purfling pieces in. I have been cutting up loads of brace wood today. I have just glued on the "X" brace and I am waiting for it to dry. I am testing out Titebond Liquid Hide Glue. It is very sticky (compared to usual wood glue) and I feel it will have a great bond once dry. The only issue is, unlike regular wood glue, this stuff seems to take a lot longer to cure (in fact, an age). I have had it clamped for double the recommended time so far. I think it is dry but as I have never used it I will rather be safe than sorry. EDIT: Seems to have glued very well. I may get the rest of the top braced before bed, if not tomorrow. Last edited by Coke_zero; 05-11-2010 at 04:42 PM.
|
|
#6
05-12-2010, 05:03 AM
|
|||
|
|||
|
Some nice looking wood there, CZ, I'll look forward to seeing how your new build progresses
 What's happening with your first build? I think the last you posted on that thread you were taking a break from it because of work? Did you get to finish it? Fliss
|
|
#7
05-12-2010, 08:21 AM
|
|||
|
|||
|
Quote:
The first build was more of a practice I guess. There are some pretty major issues with it. I will use it to test out new tools and biding jigs. It will also come in handy when I try to learn to French Polish. This build will take a long time, but I have managed to get a lot done in a fraction of the time that I did before. I know how to go about cutting and gluing braces this time around. I will have to thickness my back and sides which I never did last time, however I hope bending will be slightly easier this time, even though the wood is a lot more dense.
|
|
#8
05-12-2010, 11:10 AM
|
|||
|
|||
|
Quote:
 If your second build gets completed ahead of your first build, does that mean that your second one becomes your first? Fliss
|
|
#9
05-12-2010, 12:47 PM
|
|||
|
|||
|
I'm not a politician so don't worry.
I have been thinking and to keep things in order, #2 will become #1  . .Top bracing is almost done so some new pictures may go on tonight. Then I just have to wait for some tools for the back to start.
|
|
#11
05-13-2010, 09:03 AM
|
|||
|
|||
|
During gluing up the box while it was in spool clamps it fell off the work bench (assisted by my dog) and it got pretty badly damaged.
Edit: The top should be pretty much finished tonight. I have 2 braces to glue on and carve and then a bit of work getting rid of some mass, sanding and cleaning up and it will be done. Pictures will be up later. Last edited by Coke_zero; 05-13-2010 at 09:10 AM.
|
|
#12
05-23-2010, 10:41 AM
|
|||
|
|||
|
Okay, it's been a while.
I have braced the top and carved it. It went pretty well and I'm happy with the results. I still need to clean up the top and cut it out more accurately. I hope to get a new band-saw soon so I will wait for that. The marks you see are pencil lines which I can simply rub out. 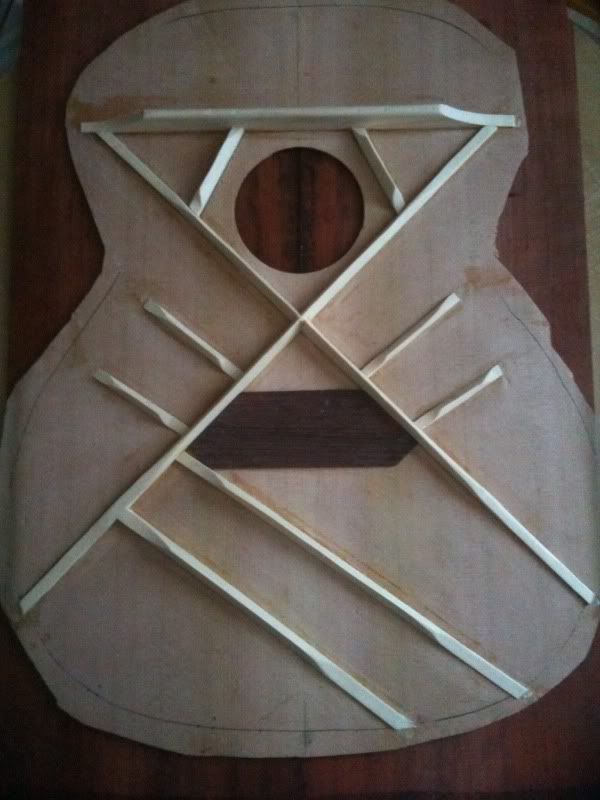 I haven't yet showed the the Padauk I am using. It is fairly cool looking and has some nice figured areas. 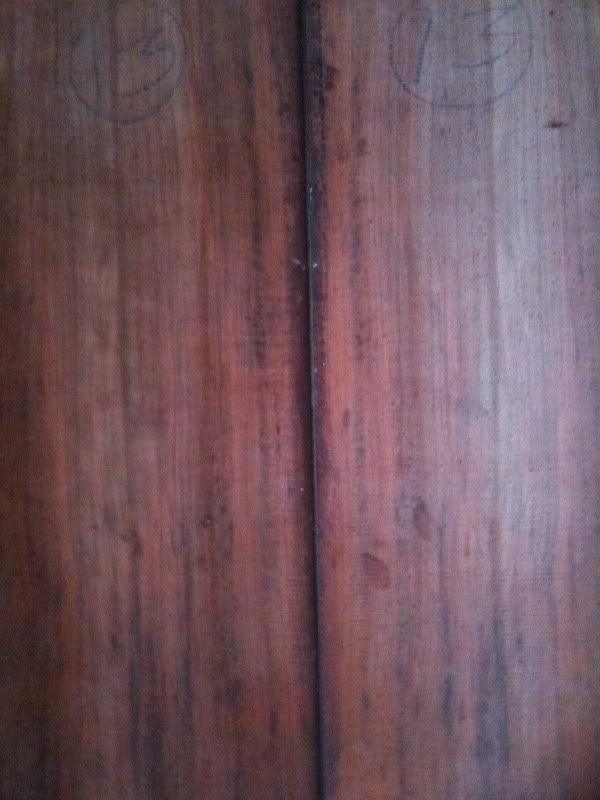 I was originally going to use maple for the details on this guitar (binding etc) but it has taken on a black and red theme so I am trying to source some ebony bindings. I did try to glue the back but the glue I used was awful stuff so have given up on that. I will need to clean up the joint again before using hide glue next instead. It was actually a good thing that it didn't work as I have now decided to put in a back strip which is black/red/black. I am just waiting for my hide glue and equipment to use to turn up. A lot of it is basic stuff. I found a few cheap 125ml bottles on eBay and got the glue from my wood supplier. My biggest issue was how I can heat it and control the heat, however a fellow Brit on another forum said he uses a baby bottle warmer and it does the job perfectly, he sent me a link and that's what I got. Last edited by Coke_zero; 05-23-2010 at 10:49 AM.
|
|
#15
05-29-2010, 06:26 PM
|
|||
|
|||
|
Did a few more things today as I'm off over the bank holiday. I glued the backstrip, cut out the back and have started bracing in a 15' radius dish. Hopefully I will get some pictures on here tomorrow with the completed bracing.
|


