|
|
#31
 07-07-2015, 06:30 AM
|
|||
|
|||
|
Quote:
Have a great day. Kevin. |
|
#32
07-07-2015, 09:30 AM
|
||||
|
||||
|
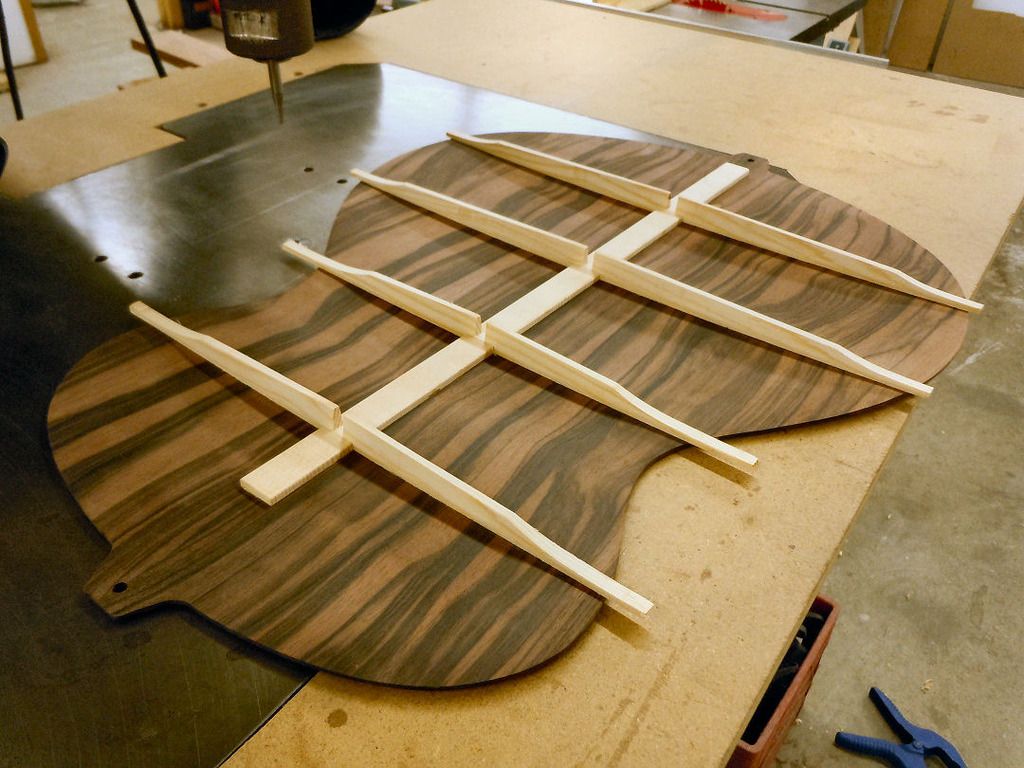
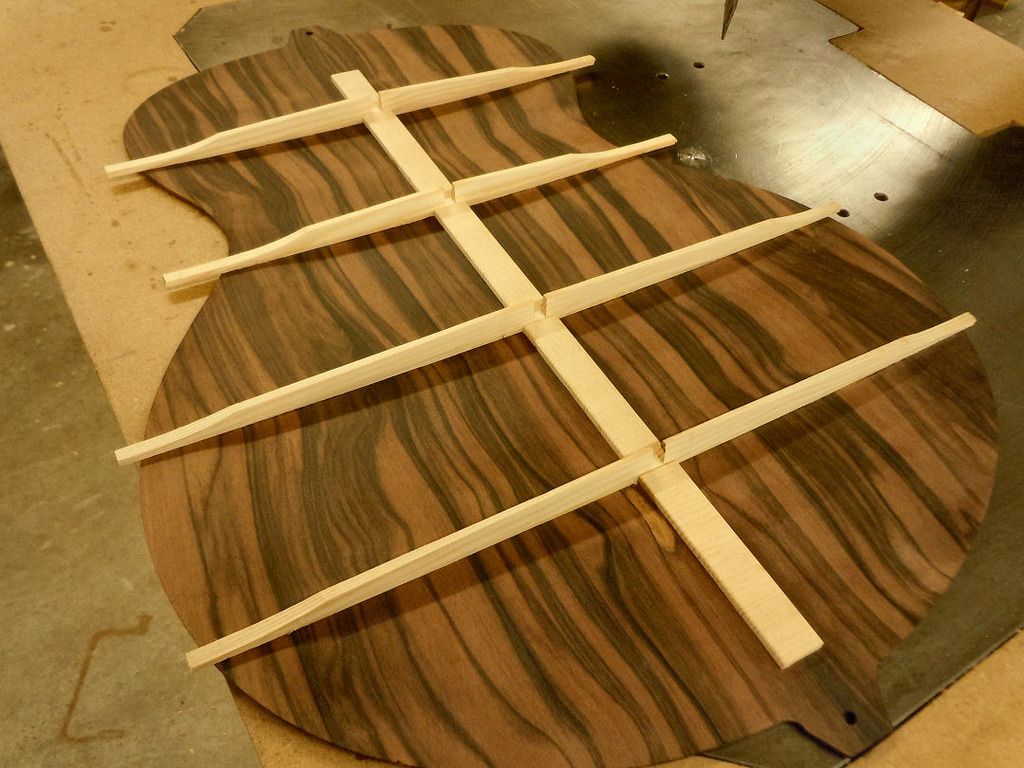
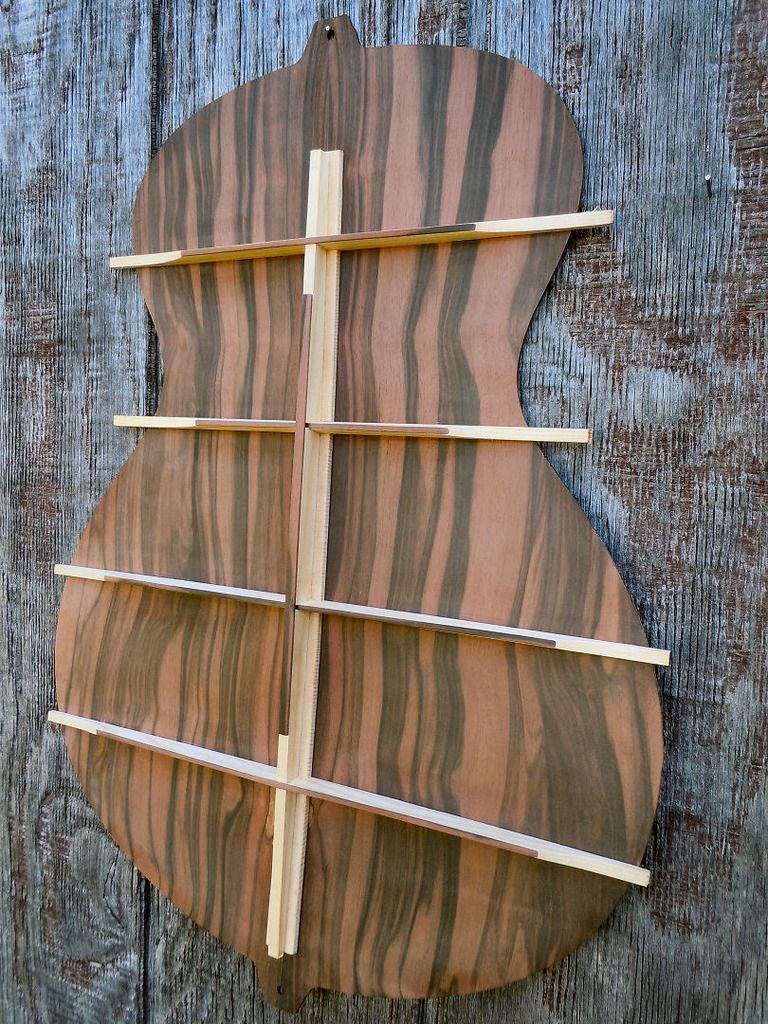
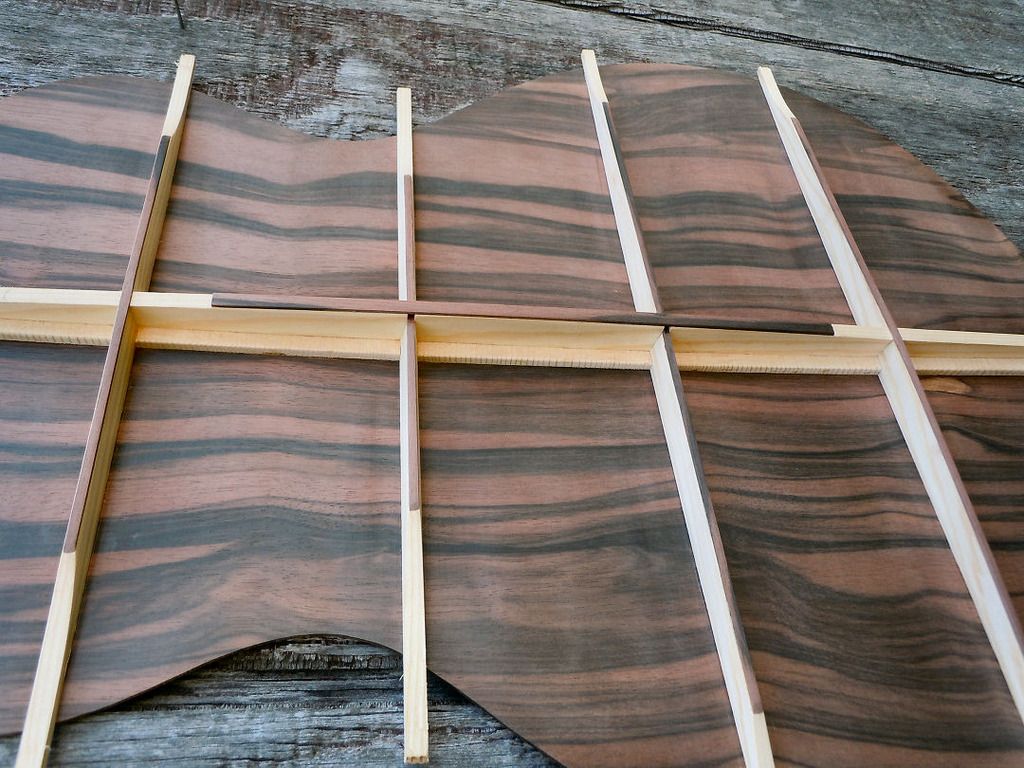
Beautiful piece of Macassar, and such clean, pleasing work. In the two pics below, the bracings look like quadruple sculls in a river's swirling brown hues. Pretty cool!
Quote:
__________________
Some tunes can be found here |
|
#33
07-07-2015, 08:14 PM
|
|||
|
|||
|
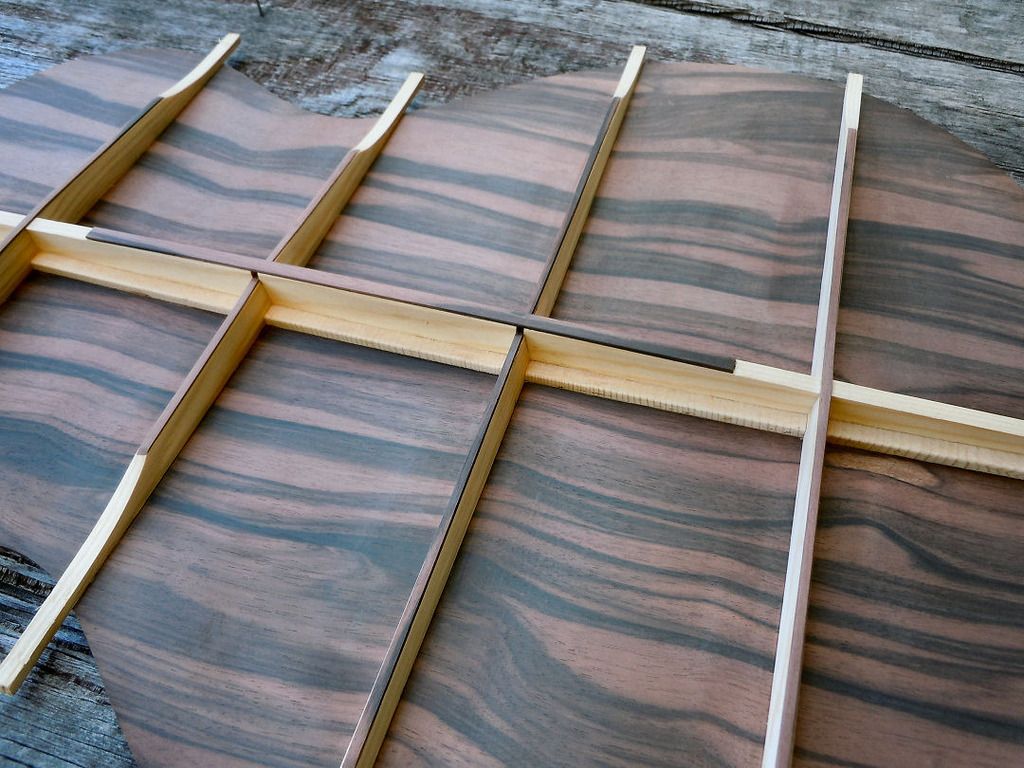
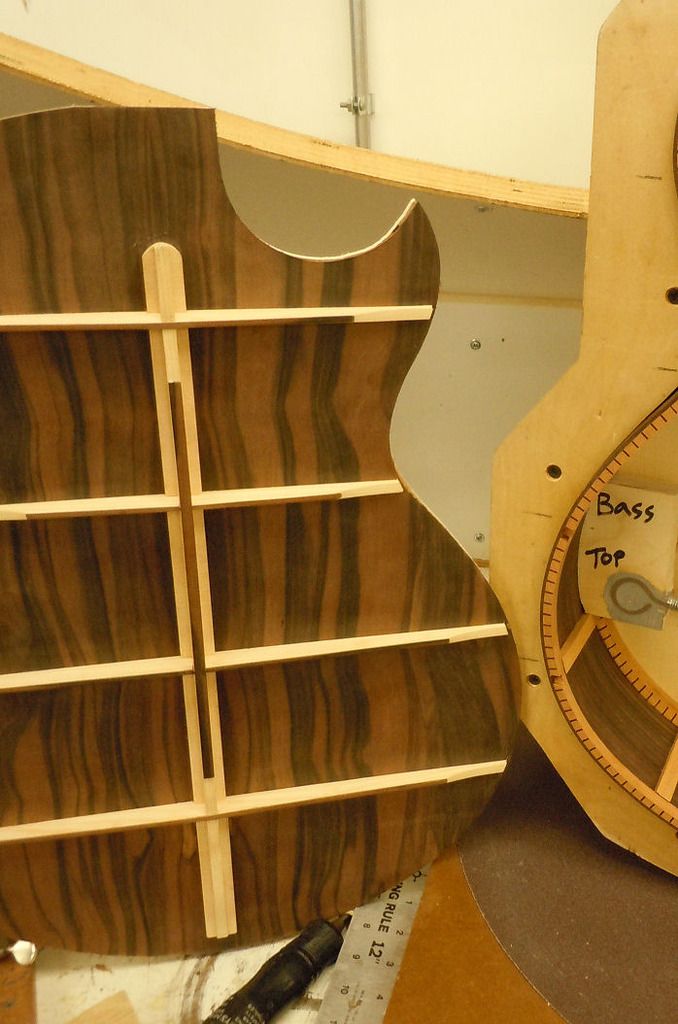
I capped the bracing with some Macassar ebony strap. This ties the bracing together. Stiff back.
 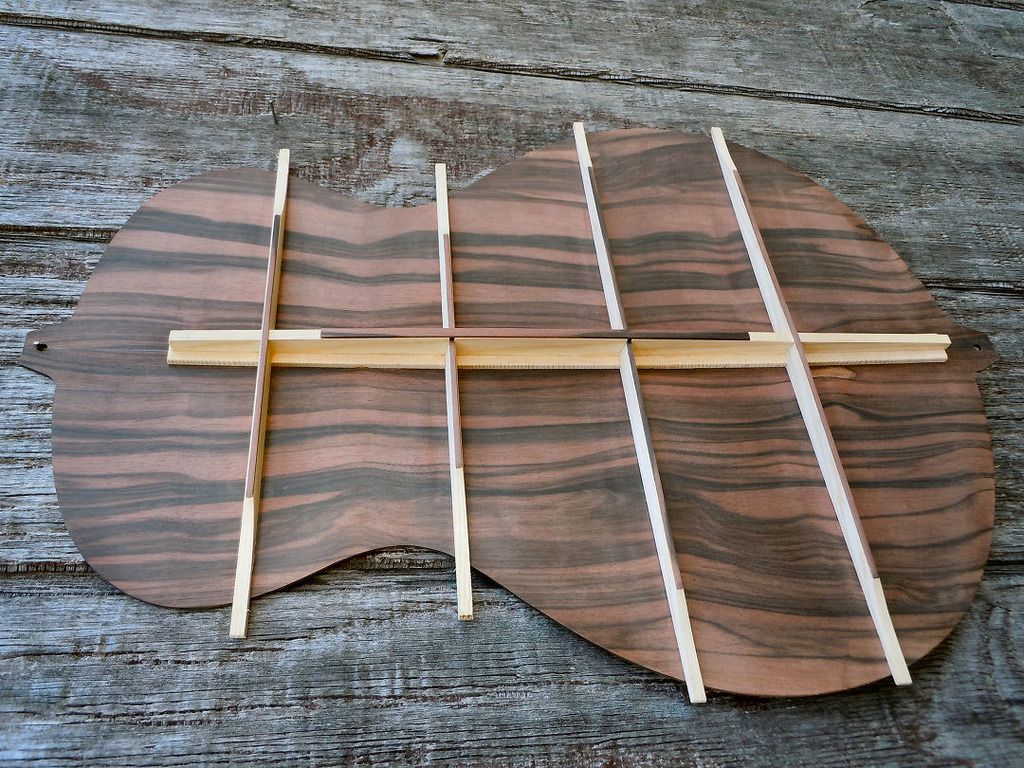 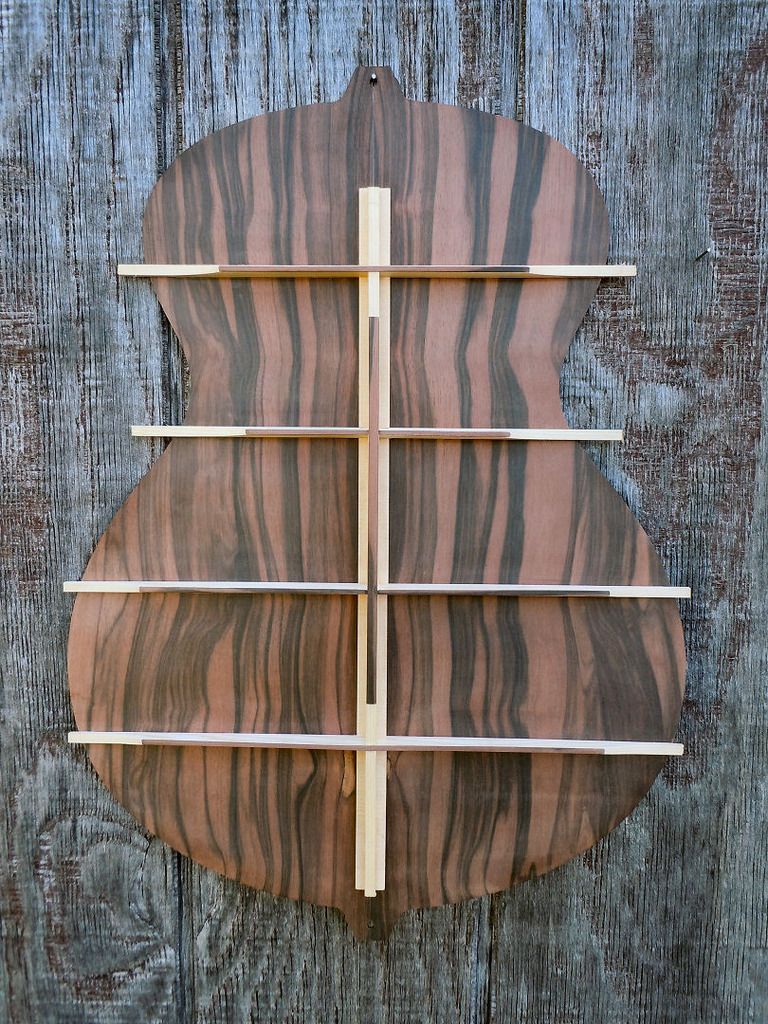   Other than a coat of shellac, this back is done. I'll end up trimming the middle spline back to meet the head block and tailblock, but I can't do that until I get the sides done. More later. Kevin. |
|
#34
07-18-2015, 08:42 AM
|
|||
|
|||
|
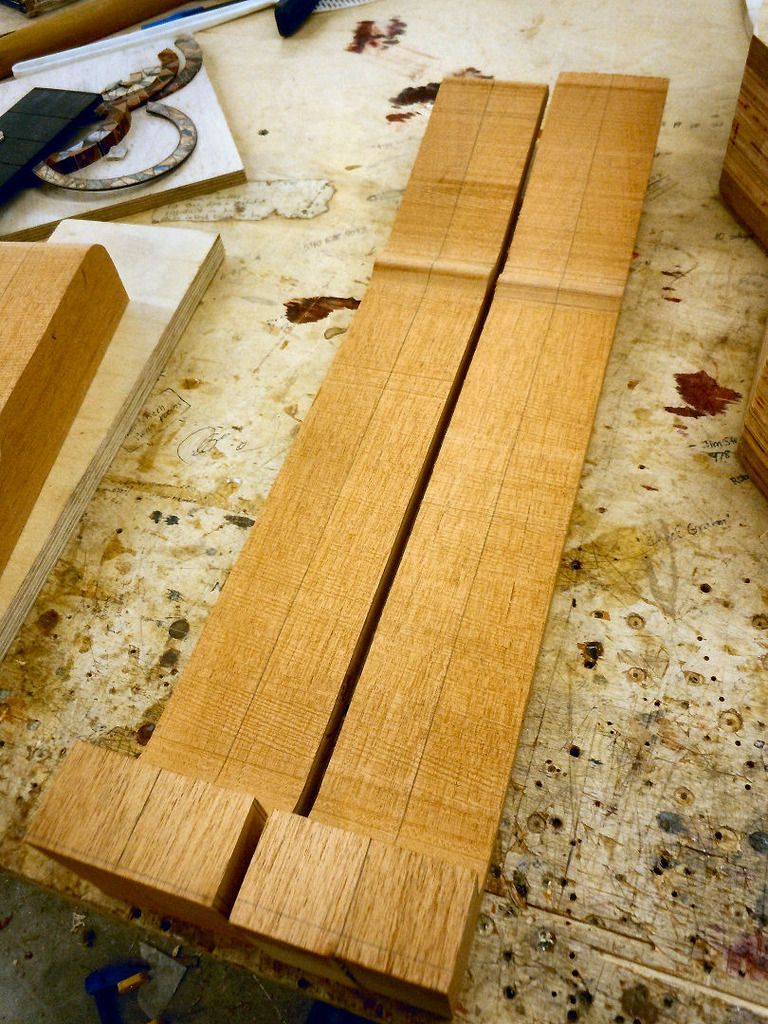
Couple neck blanks. One for this guitar.
 Got the sides bent, the blocks in and the kerf on. 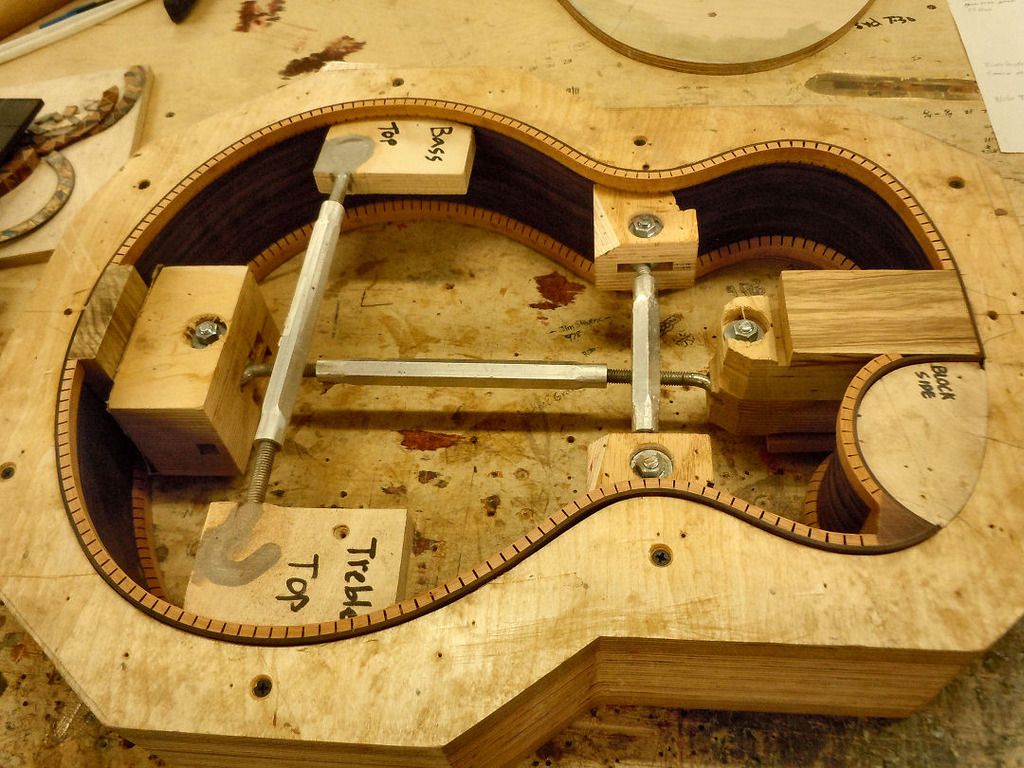 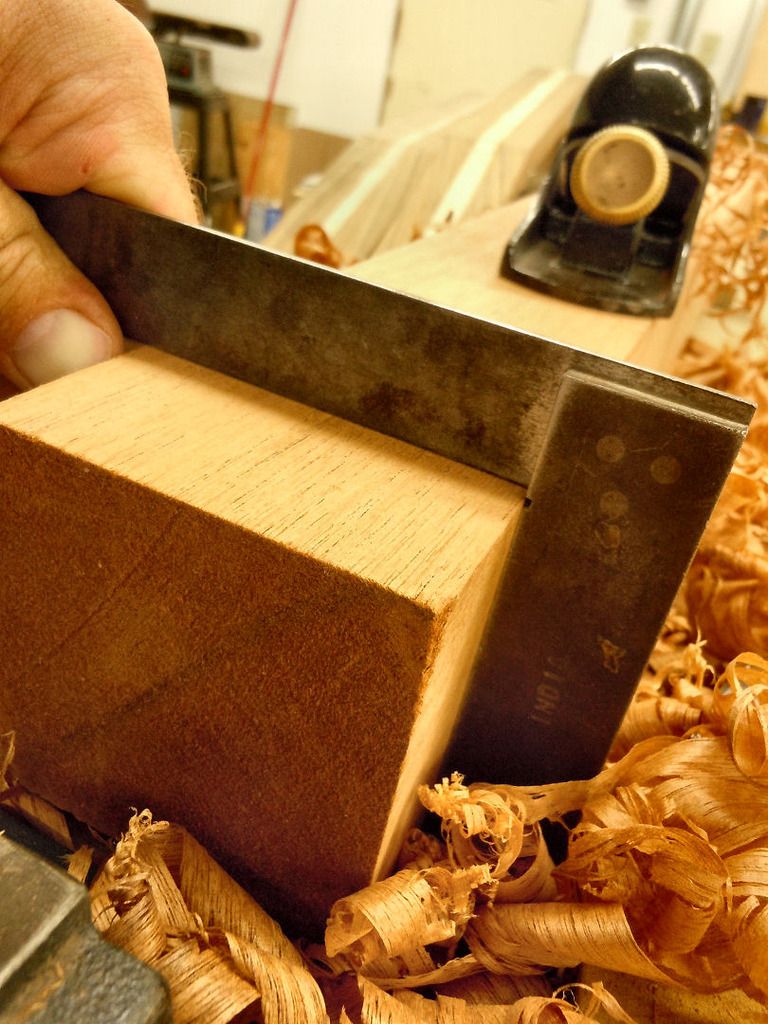 Kevin. |
|
#35
07-25-2015, 04:08 PM
|
|||
|
|||
|
Got the ufb put in this one.
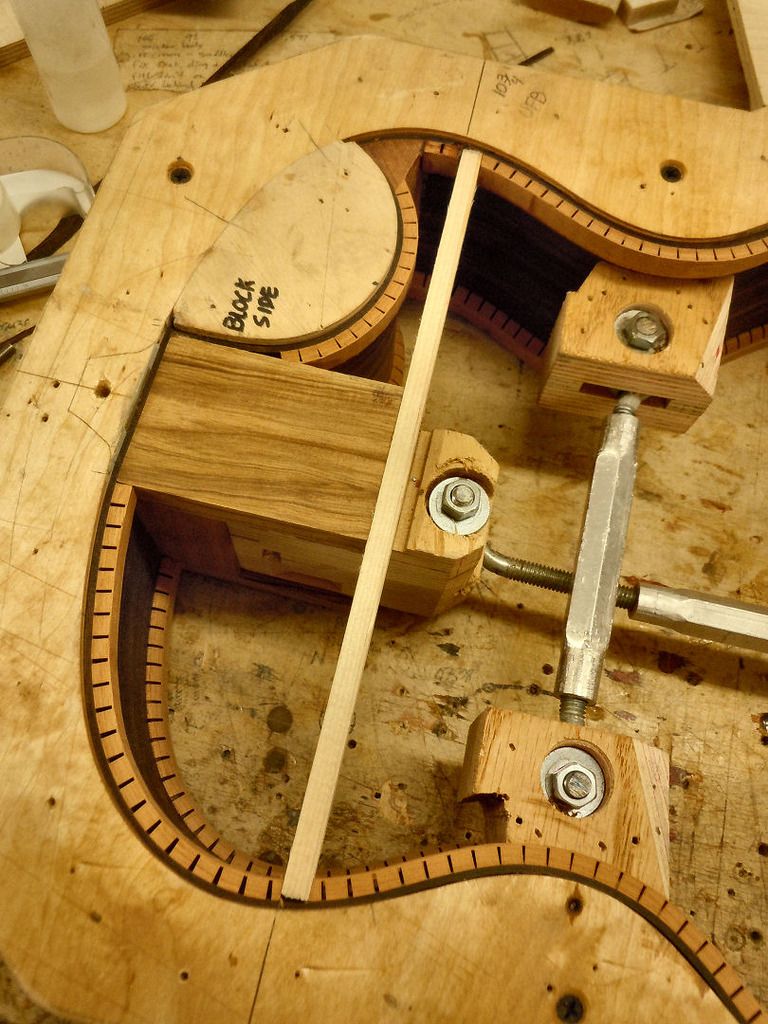 Made a jig to rout this. 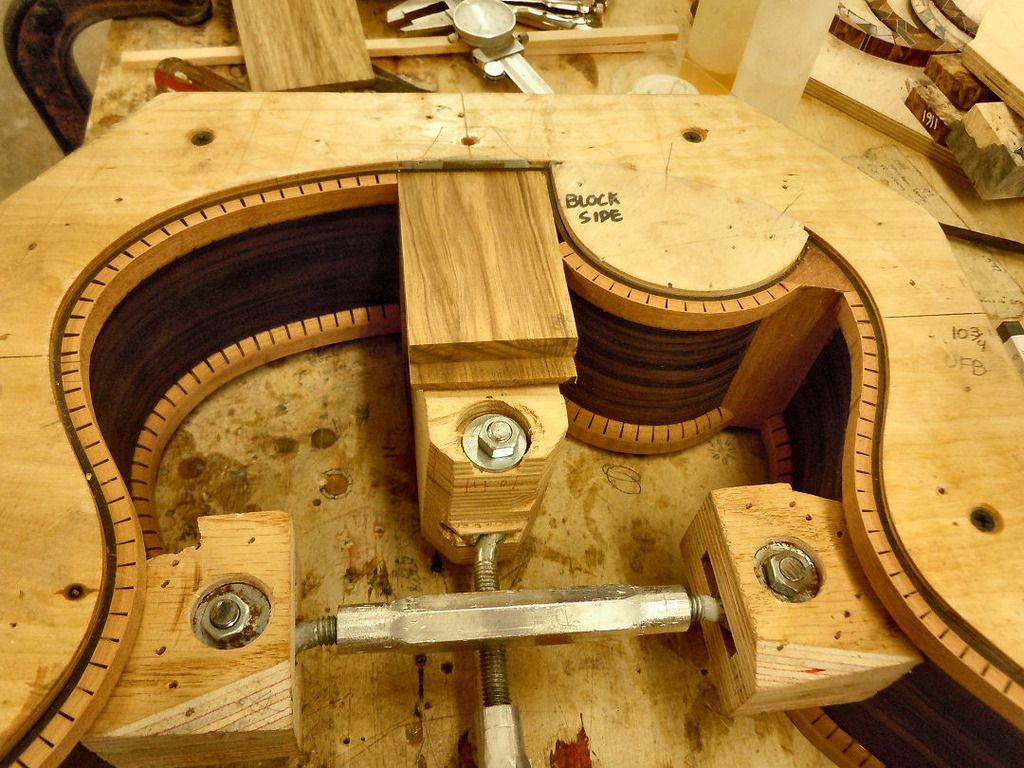 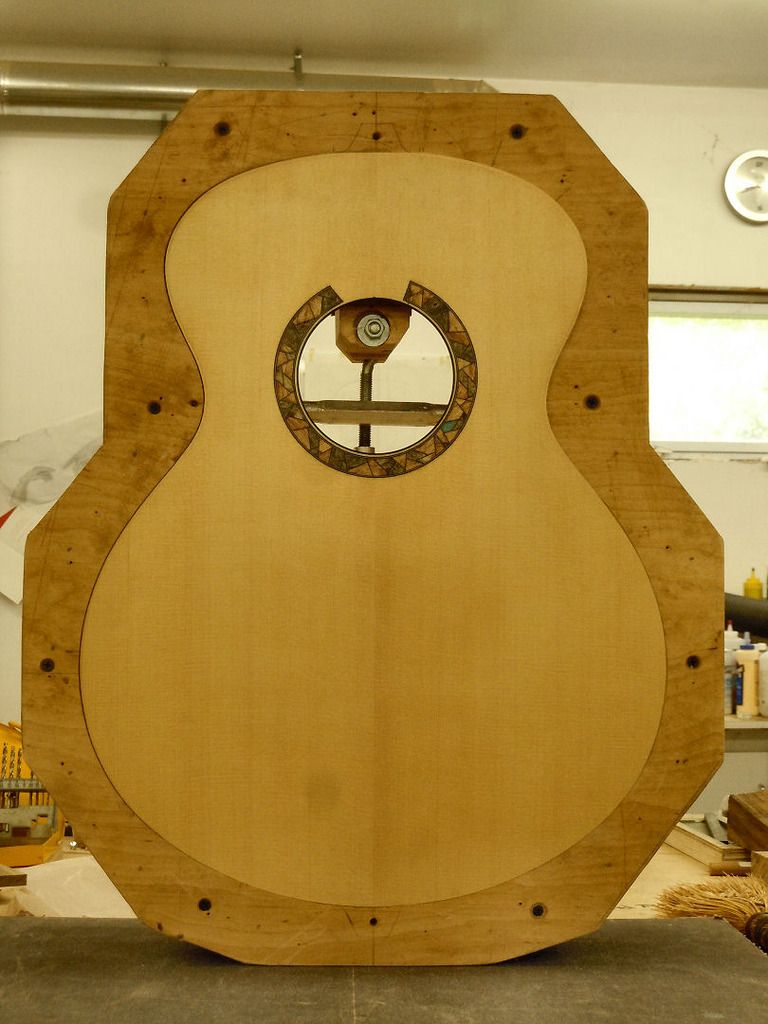 I'll set the neck angle on this next week and glue the top on and move it forward. Thanks for looking. Kevin. |
|
#36
07-25-2015, 04:56 PM
|
|||
|
|||
|
Looks great, Kevin! I love that macassar!
Joel |
|
#37
07-26-2015, 05:01 PM
|
|||
|
|||
|
Quote:
Kevin. |
|
#38
07-28-2015, 05:25 PM
|
|||
|
|||
|
Got the side braces on and eventually got the top glued on.
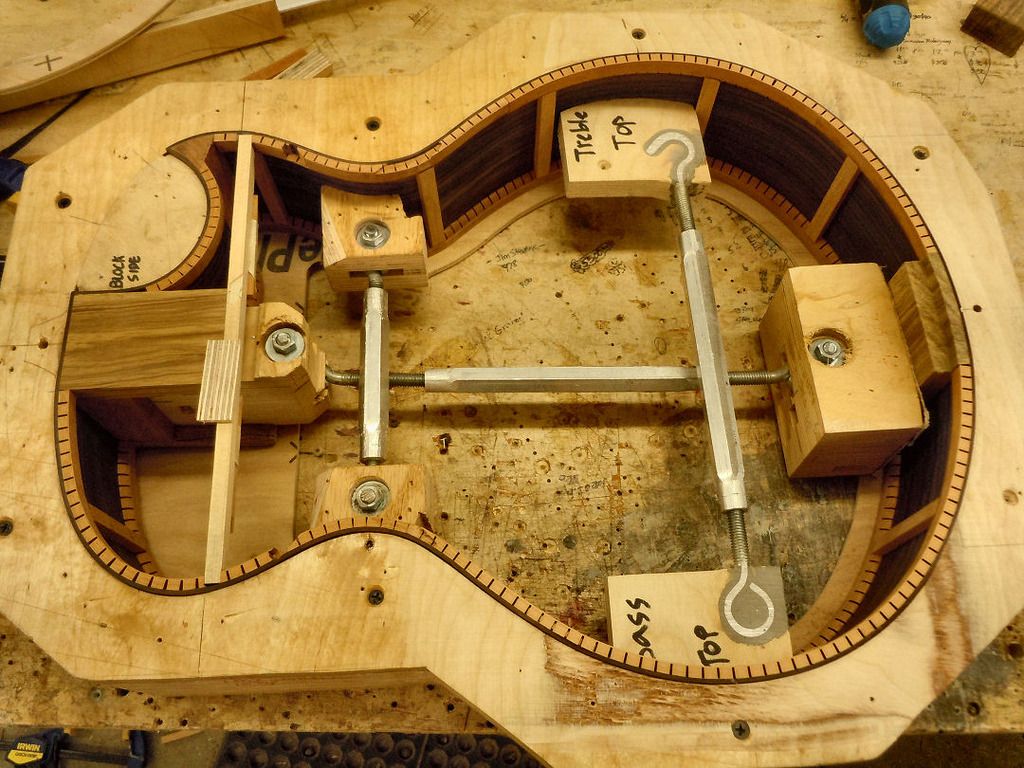 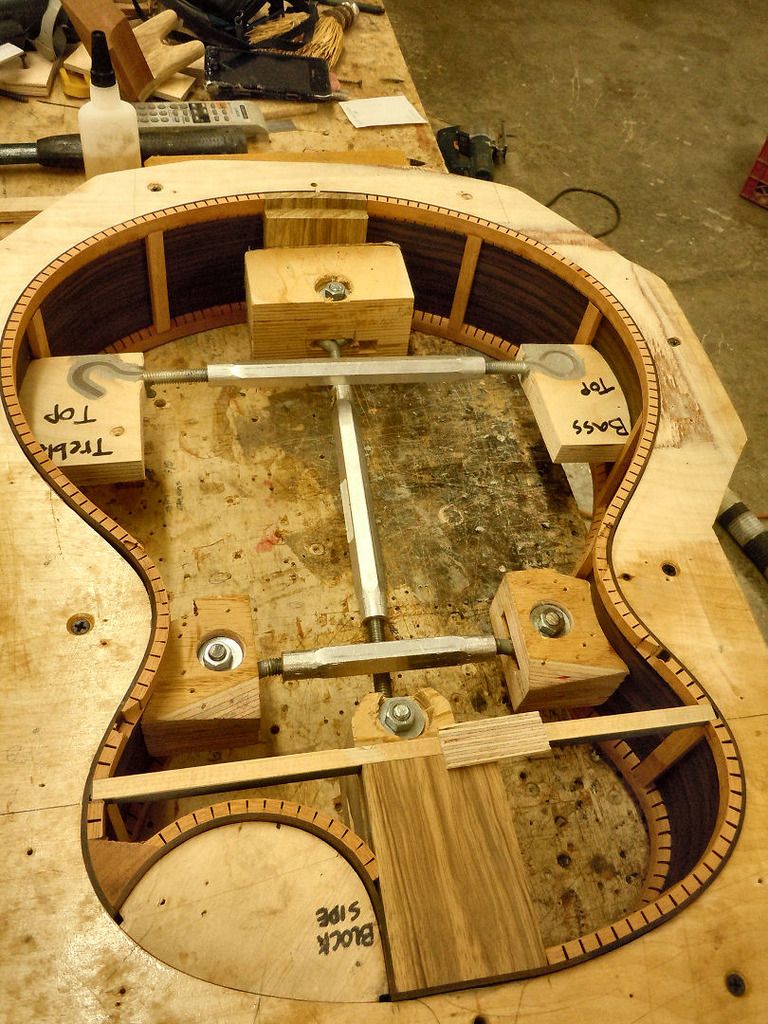 Used my handy neck set straight edge also. I used it here to get the correct angle put on the headblock. I can use it with sand paper on the bottom of it to further flatten the fingerboard overhang area - while keeping the straight edge lined up with the neck/bridge ht set up. 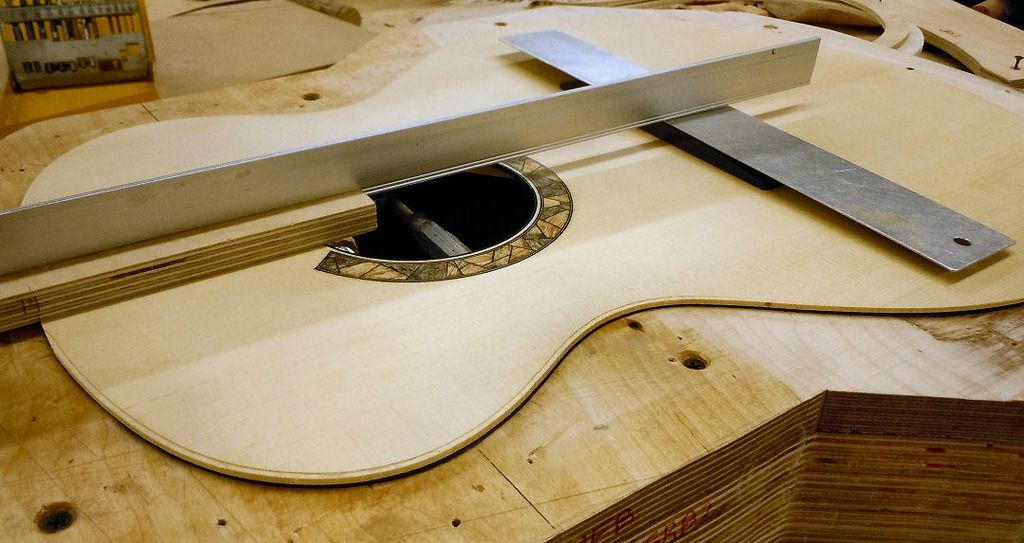 Also - in this picture above, on the straight edge there are three marks of significance. One Is the bottom of the straight edge, that is the ht. of the fingerboard and frets combined. The others are the two parallel lines directly above the bottom of the straight edge. I set the straight edge up so that I could use these as two lines to simulate the actual string height at the bridge/saddle. So I can really dial in this neck set up. Its a good thing. Kevin. |
|
#39
07-31-2015, 11:20 AM
|
|||
|
|||
|
top on/neck set/back going on today. master grade engelmann top.
 Kevin. |
|
#40
08-01-2015, 02:44 PM
|
|||
|
|||
|
got the back glued on...here is a look at how I shaped that front side of that back reinforcement spruce.
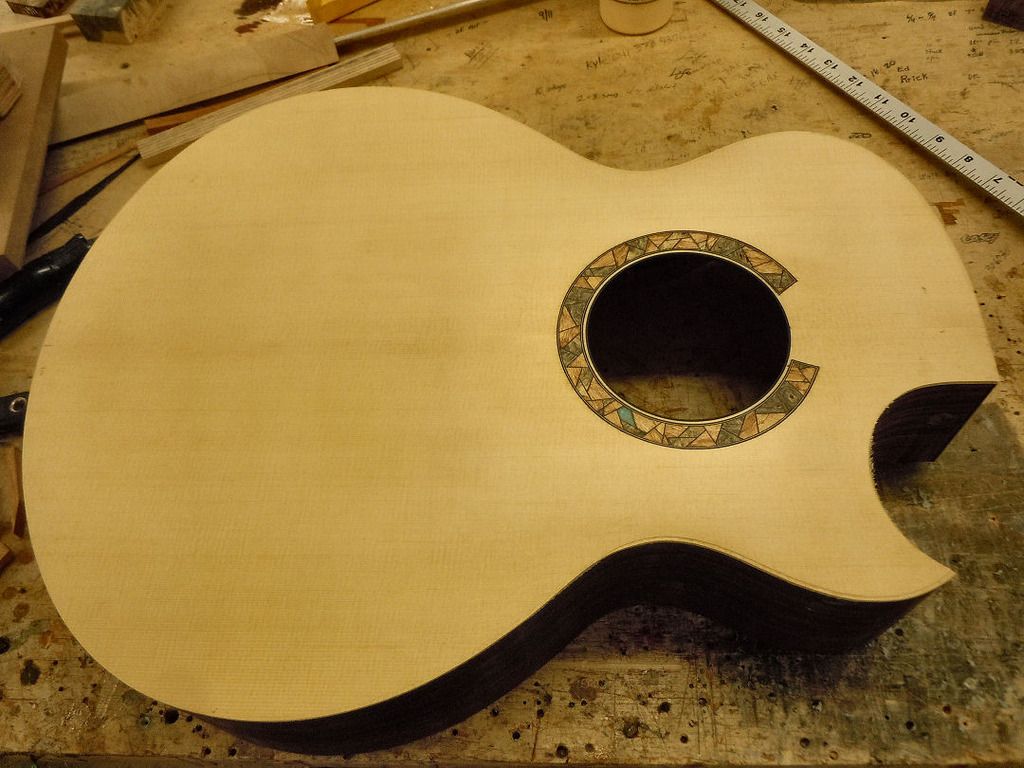
 here is how that front end "locks" into the foot on my spanish style heel. More stability for the neck set. I can elaborate more on this privately if someone is interested.  I decided to use this for the center purfling. 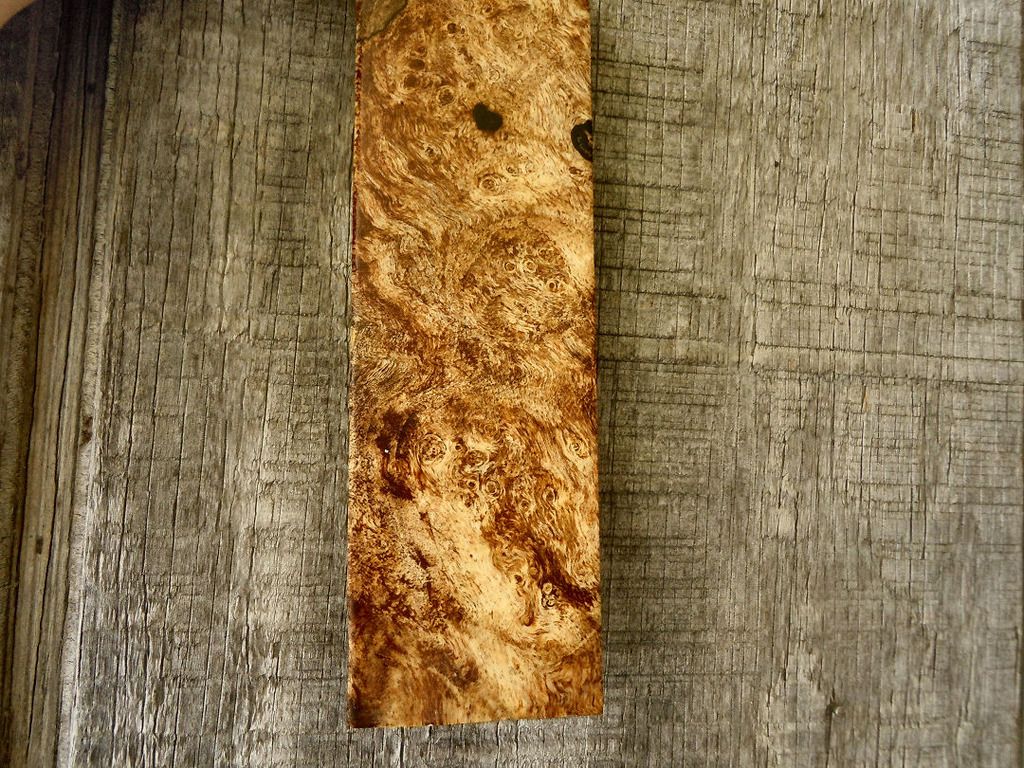 I put it on the top and it looks great. Matches the rosette motif a little and this will become part of the end graft. 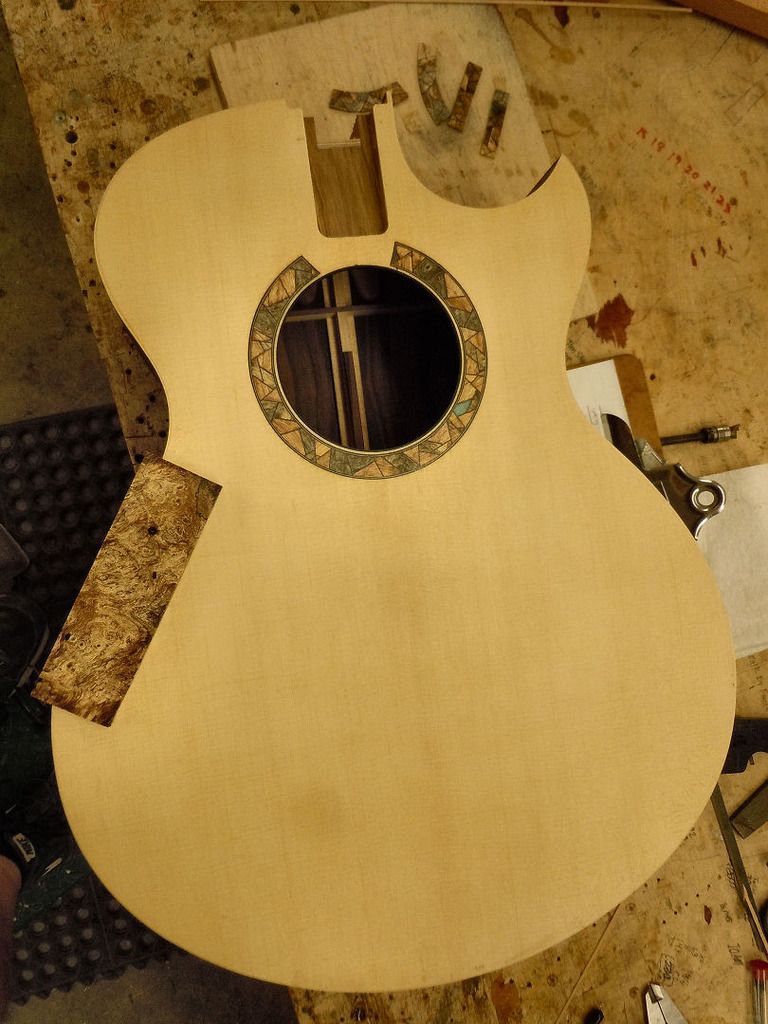 Here is what it will look like against the other purflings. 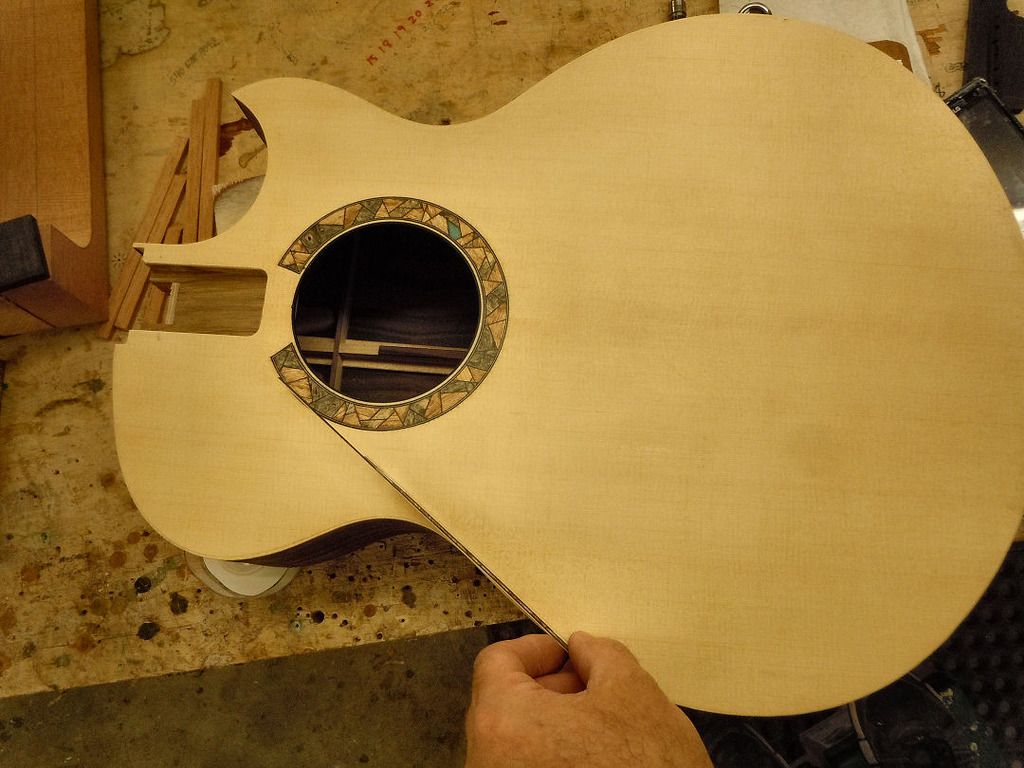 So...as I've mentioned before, I make most all of my purflings and bindings. This is part of the reason hand made costs more...everything has to be made. For me, by hand. Anyway, I stripped these out. 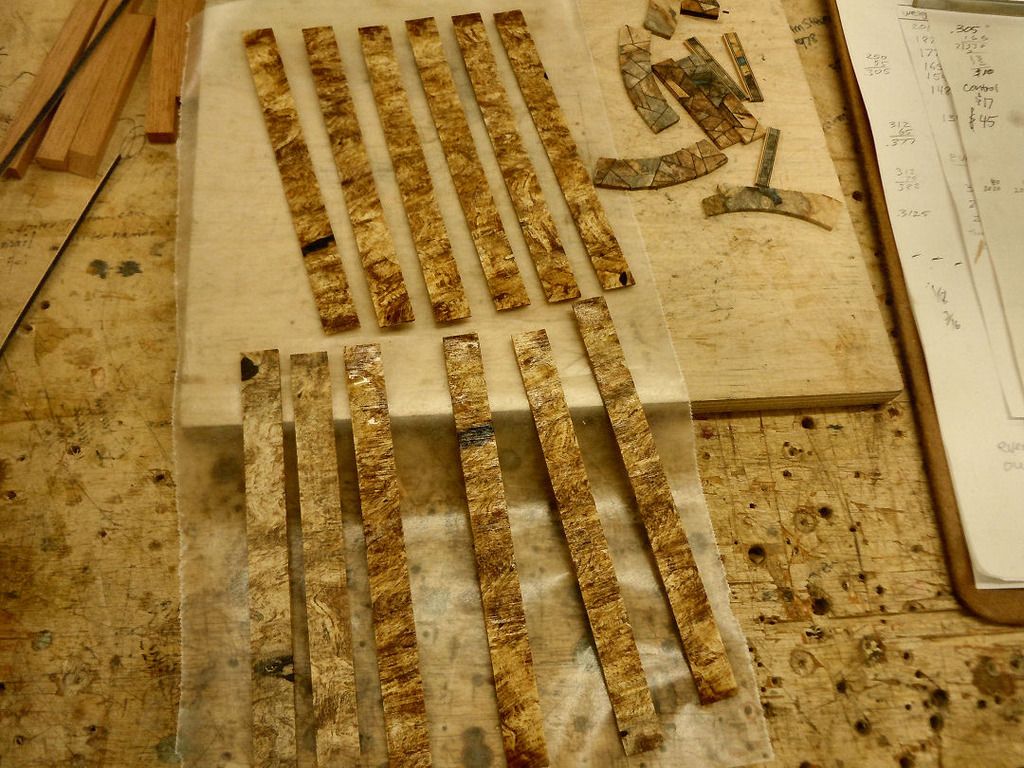 Then I had to get a little creative to keep this stabilized burl wood from disintegrating while I striped it height-wise. 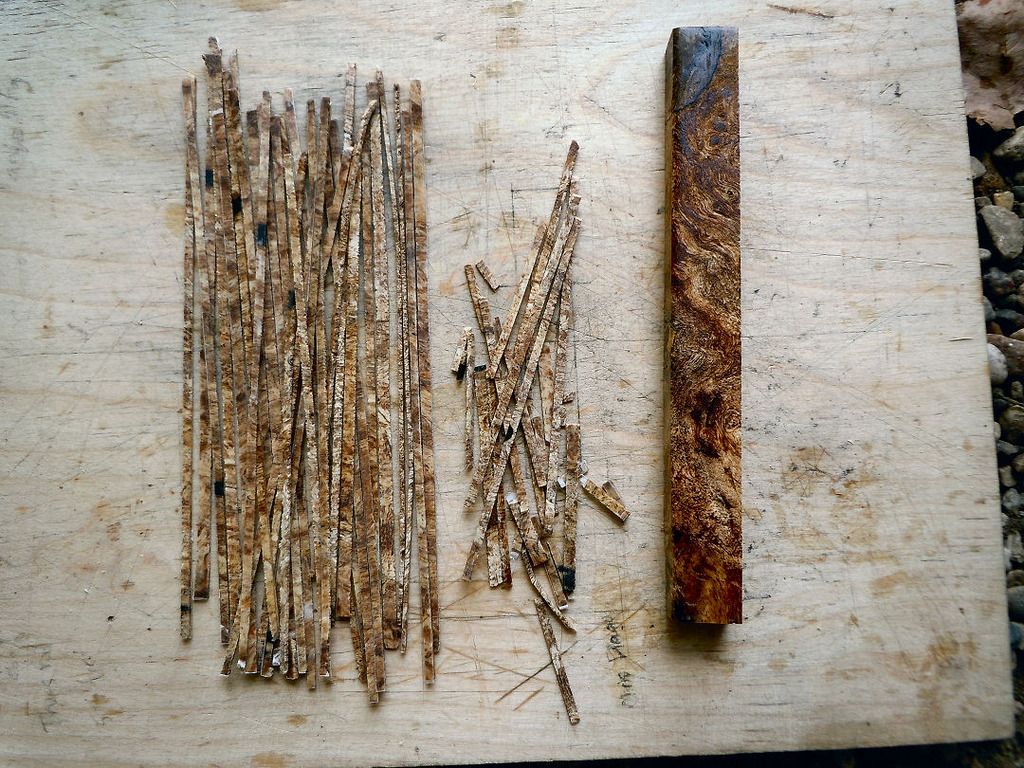 This guitar is turning out really nice. The tap tones are crisp and lengthy. They also have a depth to the bass side of the frequency. So this guitar should have a nice warmth to it. Kevin. |
|
#41
08-01-2015, 06:21 PM
|
||||
|
||||
|
Looking great, Kevin. Love that rosette--the one blue "pane" does it for me.
Fantastic! Steve |
|
#42
08-01-2015, 07:13 PM
|
|||
|
|||
|
Very nice! Love your work and very much enjoyed playing your guitars in Memphis.
__________________
https://www.facebook.com/pages/The-T...56266954411686 http://www.reverbnation.com/jayhowlett http://www.jayhowlett.com Guitars: I'm really happy to have a few nice ones. |
|
#43
08-02-2015, 12:04 PM
|
|||
|
|||
|
Quote:
Thanks again!!! Kevin. Quote:
Kevin Last edited by KevinLPederson; 08-02-2015 at 12:11 PM. |
|
#44
08-02-2015, 12:09 PM
|
|||
|
|||
|
Meant to post this picture with the rest from yesterday. It's turning out really lovely.
I almost have the draft for the High Definition Leopard going on this guitar finished. Its going to be really awesome! This week! 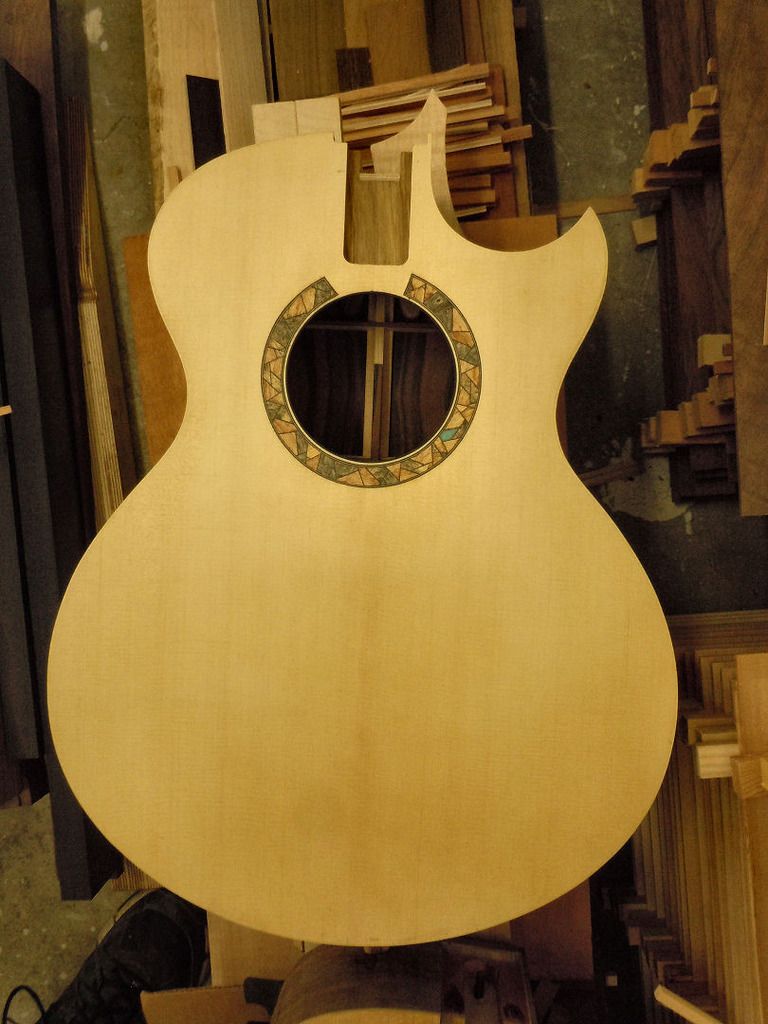 Kevin. |
|
#45
08-07-2015, 07:07 AM
|
|||
|
|||
|
This will be the Leopard on the headstock. The detail will be in the pieces.
 Kevin. |